


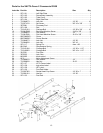

10
as shown in Figure 10. Finger tighten only.
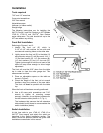
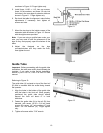
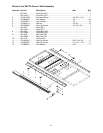
5. Install three 1/4-20 x 1-1/2 hex cap screws,
three 1/4 flat washers, and three 1/4 nuts into
the holes in the rear edge of extension table as
shown in Figure 11. Finger-tighten only.
6. Re-check the table for alignment, make further
adjustments if necessary, then tighten all
screws and nuts.
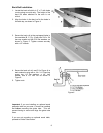
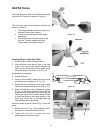
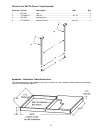
7. Mount the two legs to the inside corners of the
extension table as shown in Figure 12. Secure
with the eight screws provided.
Note: If you are using a mobile base under your
saw, you may need to shift the placement of the
legs so they rest properly upon the shelves of the
base.
8. Adjust the footpads on the legs
counterclockwise until they reach the floor,
then tighten the nut.
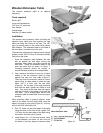
Guide Tube
Important: Before proceeding with the guide tube
installation, the table saw switch should already be
installed. If not, refer to the Switch Installation
section in your JTAS-10, JTAS-12 or XACTA
®
Saw
manual.
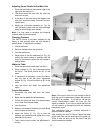
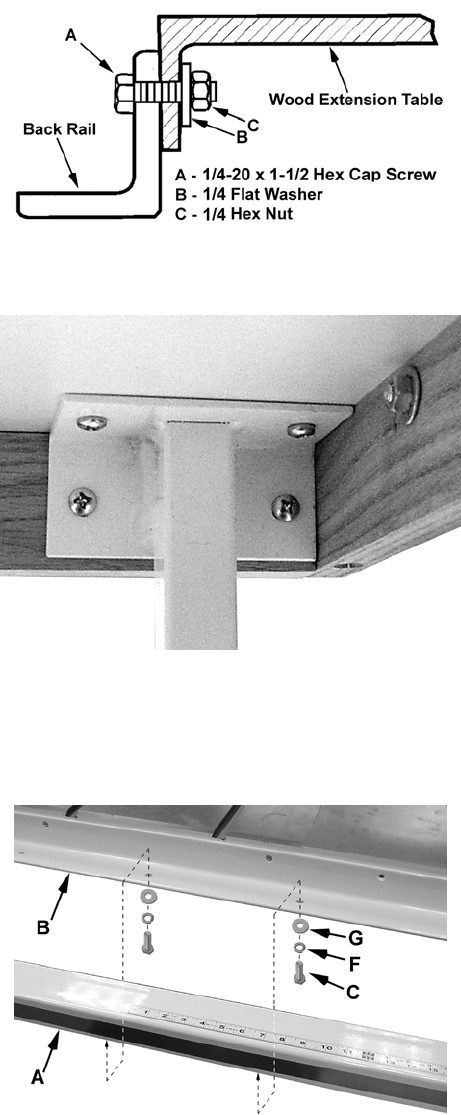
Referring to Figure 13:
The guide tube (A) is placed on top of the front rail
(B) and is mounted with the scale facing toward
the operator.
1. Align the holes in the bottom of the guide tube
with the holes in the front rail. When properly
positioned the guide tube should extend
beyond the front rail about 6" in both
directions.
2. Fasten the guide tube (A) to the rail (B) from
beneath, with seven 1/4-20 x 3/4 hex head
screws (B), seven 1/4" lock washers (F) and
seven 1/4" flat washers (G). Finger tighten
only.
3. Tighten all screws with a 7/16" wrench.
Figure 11
Figure 12
Figure 13