


10
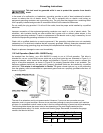
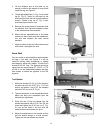
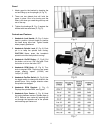
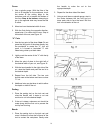
3. Lift the tailstock end of the lathe up far
enough to slide a few pieces of scrap wood
under the leg, see Figure 2.
4. Thread adjustable feet (A, Fig. 2) into stand
leg (B, Fig. 2). There is a flat spot on the
shaft near the foot that will accommodate a
wrench. Thread a hex nut (C, Fig. 2) onto
shaft and leave loose for now.
5. Remove the scrap pieces of wood and slide
the tailstock, tool rest and headstock down
to the tailstock end of the late bed.
6. Mount the two adjustable feet in the same
manner as above and move the headstock,
tool rest and tailstock into their normal
positions.
7. Adjust the feet so that the lathe rests evenly
on the floor, and tighten the nuts.
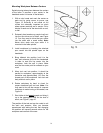
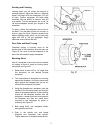
Stand Shelf
You can make an extra shelf that rests between
the legs if you wish, see Figure 3. It will be
useful for storing lathe accessories, or adding
sand bags for some extra weight. The two 2x4’s
should be 55-3/4” long. The plywood should be
ripped into two equal pieces 27-13/16”L x 17”W
so that it can be assembled between the legs.
Use screws to attach the plywood to the 2x4
supports.
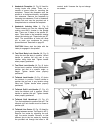
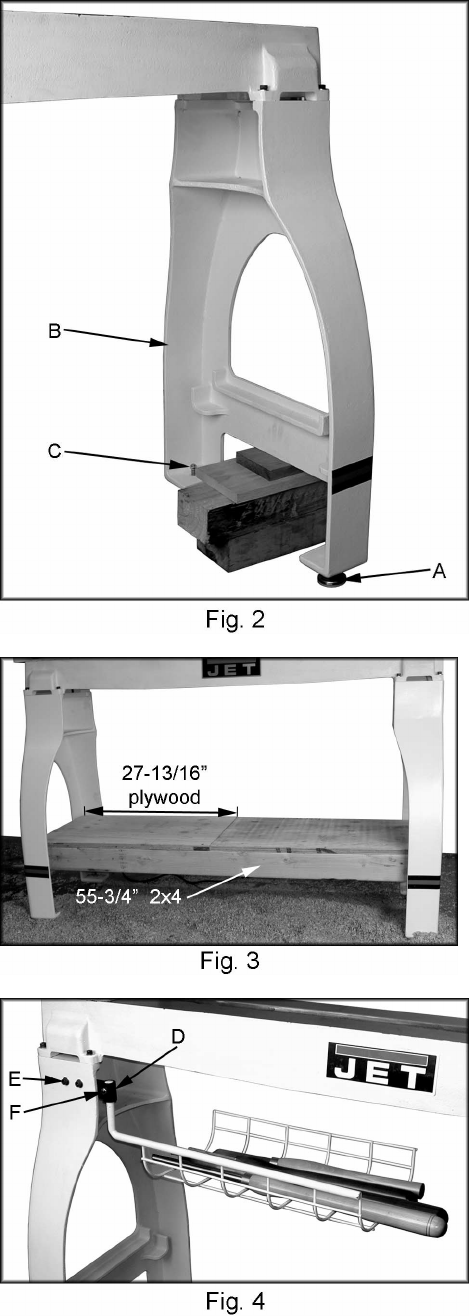
Tool Basket
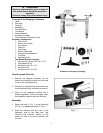
1. Mount the bracket (D, Fig. 4) to the inside of
the lathe leg with two 5/16”-18 x 1-1/2” hex
socket cap screws, four 5/16” flat washers
and two 5/16” hex nuts (E, Fig. 4).
2. The two setscrews, on the bracket should be
below the bolts and accessible from the
backside for adjustment.
3. Place the arm of the tool basket into the
bracket and secure with a 5/16”-18 x 5/8” set
screw and tighten the 5/16” hex nut (F, Fig.
4). Line up the notch in the arm with the
setscrew so the tool basket can pivot.
4. Adjust the setscrews on the bracket so that
the tool basket swings in a level manner.
Tighten the two hex socket cap screws.