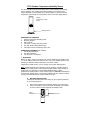
5. Snap the outdoor temperature/humidity sensor into
place on the mounting bracket.
B. MOUNTING WITH ADHESIVE TAPE
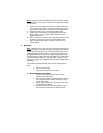
1. With a nonabrasive solution, clean and dry the back of
the mounting bracket and the mounting surface to
ensure a secure hold. The mounting surface should be
smooth and flat.
2. Remove the protective strip from one side of the tape.
Press firmly into the designated area on the back of the
mounting bracket.
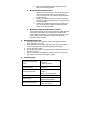
3. Remove the protective strip from the other side of the
tape, and position the outdoor temperature/humidity
sensor in the desired location.
C. MOUNTING USING THE BRACKET AS A STAND
The mounting bracket can be used as a stand by simply attaching
the bracket to the bottom of the temperature/humidity sensor.
Once snapped in place the sensor can then be placed on a shelf,
table or other surface where the temperature and humidity
measurements are desired.
III. MAINTENANCE AND CARE
1. Extreme temperatures, vibrations, and shock should be avoided to
prevent damage to the units
2. Clean displays and units with a soft, damp cloth. Do not use solvents
or scouring agents, they may mark the displays and casings
3. Do not submerge in water.
4. Do not subject the units to unnecessary heat or cold by placing them in
the oven or freezer.
5. Opening the casings invalidates the warranty. Do not try to repair the
unit. Contact La Crosse Technology for repairs.
IV. SPECIFICATIONS
Temperature measuring
range
-21.8ºF to 157.8ºF with 0.2ºF
resolution
(-29.9°C to 69.9°C)
Relative Humidity
measuring range
1% to 99% with 1%
resolution)
Transmission interval
Every 10 seconds in first 3
minutes
Every 1 minute thereafter
Transmission frequency 433.92 MHz
Power source
2 x 1.5V AA Battery
Alkaline recommended
Dimensions (H x W x D)
6.3” x 2.95” x 2.2”
(160 x 75 x 55mm)


