


1) Install fixture in ceiling. Adjust fixture for proper alignment with
the ceiling (Step A) and then wire fixture. White fixture lead to
neutral supply lead. Bare fixture wire to supply ground. Use wire-
nuts (local hardware items). Place all electrical connections in
the J-BOX. Attach J-BOX COVER onto J-BOX.
IS:7784
READ AND UNDERSTAND THESE INSTRUCTIONS BEFORE INSTALLING FIXTURE
This fixture is intended for installation in accordance with the National Electrical Code and local regulations. To
assure full compliance with local codes and regulations, check with your local electrical inspector before
installation. To prevent electric shock, turn off electricity at fuse box before proceeding.
Retain these instructions for maintenance reference.
INSTRUCTION SHEET NO.
A0302
Page 2 of 3
A COMPANY
631 Airport Road, Fall River, MA 02720
NOTE: To insure proper installation it is important that MOUNTING FRAME always be
securely mounted to structural ceiling members.
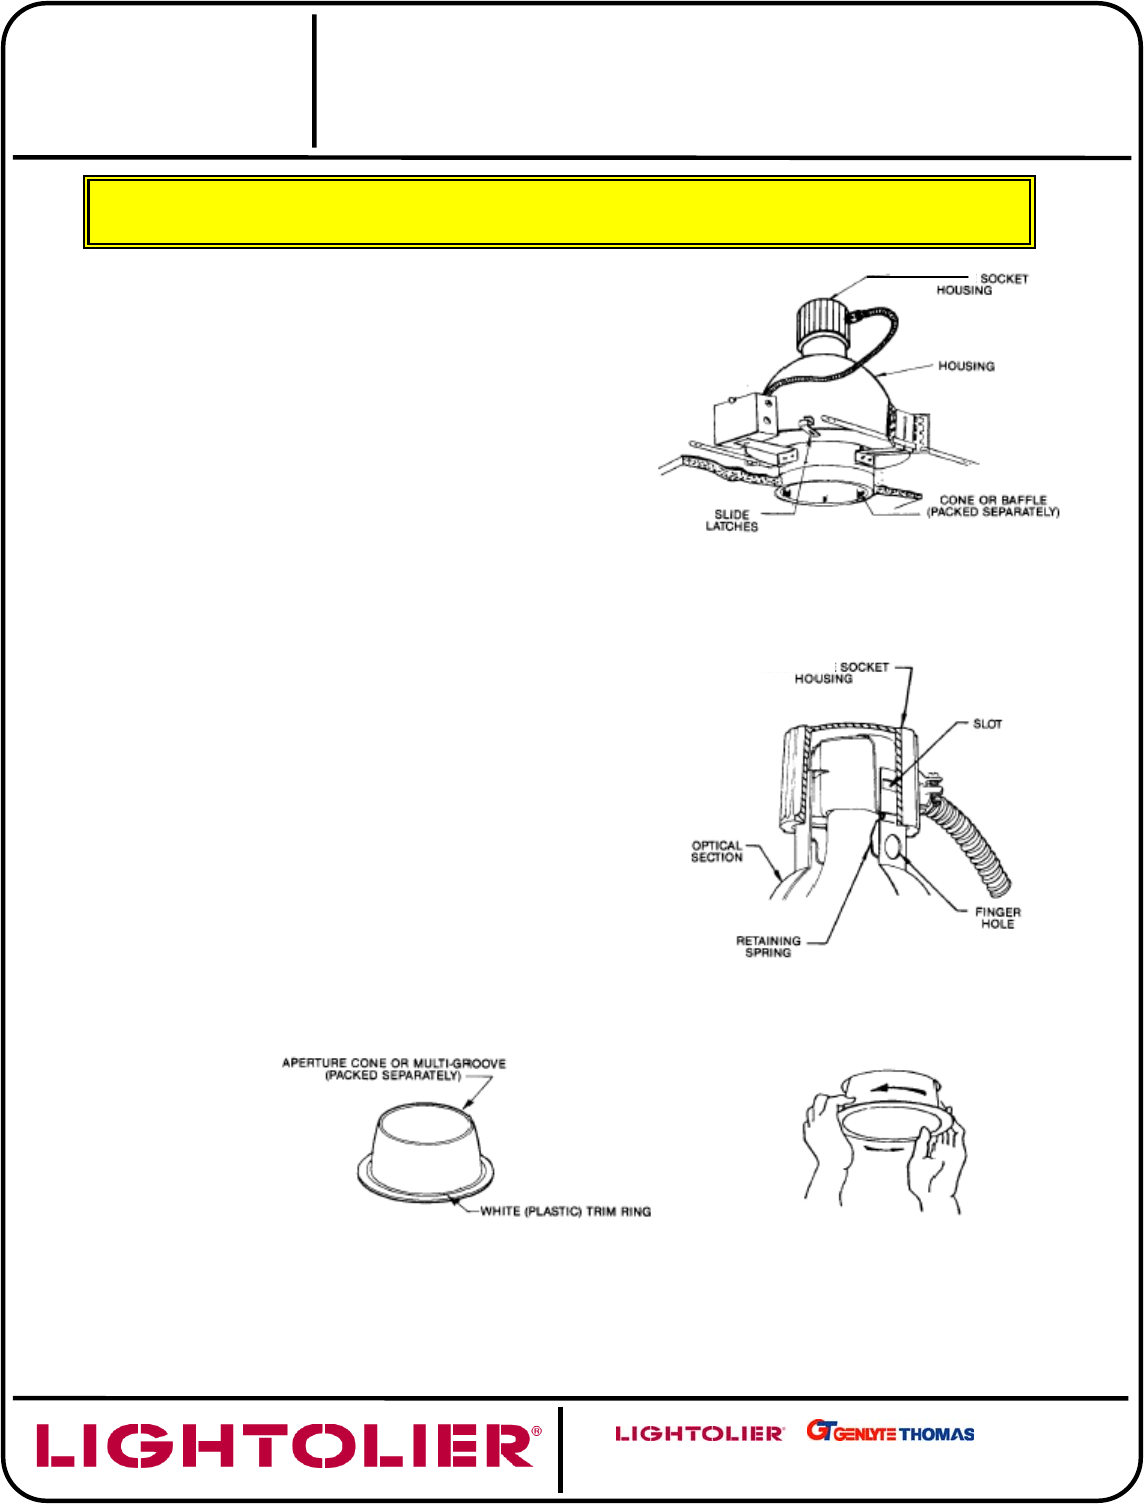
B. INSTALL AND WIRE
FIXTURE
NOTE: SLIDE LATCHES permit removal of reflector from
within fixture for access to splices or for relamping from
above ceiling (Fig. 8) These latches must be snapped
back into position to prevent reflector from disengaging
during relamping.
C. PUSH-IN
(
FIG.8
)
1) Push APERTURE CONE or MULTI-GROOVE BAFFLE
straight up into MOUNTING FRAME until tight against
finished ceiling. RETAINING SPRINGS on MOUNTING
FRAME (Fig.1) will secure APERTUR CONE or MULTI-
GROOVE BAFFLE in place.
NOTE: To remove CONE or BAFFLE, turn CONE or
BAFFLE counterclockwise while pulling downward.
After starting, use both hands to remove, if desired.
See (Fig. 11)
FIG. 8
FIG. 9
FIG. 10
FIG. 11
TO REMOVE