


6
FUNCTIONAL
DESCRIPTION
CAUTION:
• Always be sure that the tool is switched off and
unplugged before adjusting or checking function on the
tool.
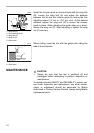
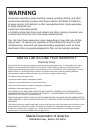
Adjusting the depth of cut
Place the tool on a flat surface. Turn the scale ring until it
makes contact with the base. Loosen the clamp screw. Turn
the scale ring until the bit just touches the flat surface.
Tighten the clamp screw.
Place the tool on its side and turn the scale ring counter-
clockwise (when viewing the tool from the top) until the
desired depth of cut is obtained. One full turn of the scale
ring is equal to 1/4” change in depth setting. Loosen the
clamp screw and move the tool base until it makes contact
with the scale ring. Then tighten the clamp screw securely.
CAUTION:
• Since excessive cutting may cause overload of the motor
or difficulty in controlling the tool, the depth of cut should
not be more than 15 mm (9/16”) at a pass when cutting
grooves with a 6 mm (1/4”) diameter bit.
NOTE:
• When cutting grooves with a 20 mm (13/16”) diameter
bit, the depth of cut should not be more than 5 mm
(3/16”) at a pass.
When you wish to cut grooves more than 15 mm (9/16”)
deep with a 6 mm (1/4”) diameter bit or more than 5 mm
(3/16”) deep with a 20 mm (13/16”) diameter bit, make
several passes with progressively deeper bit settings.
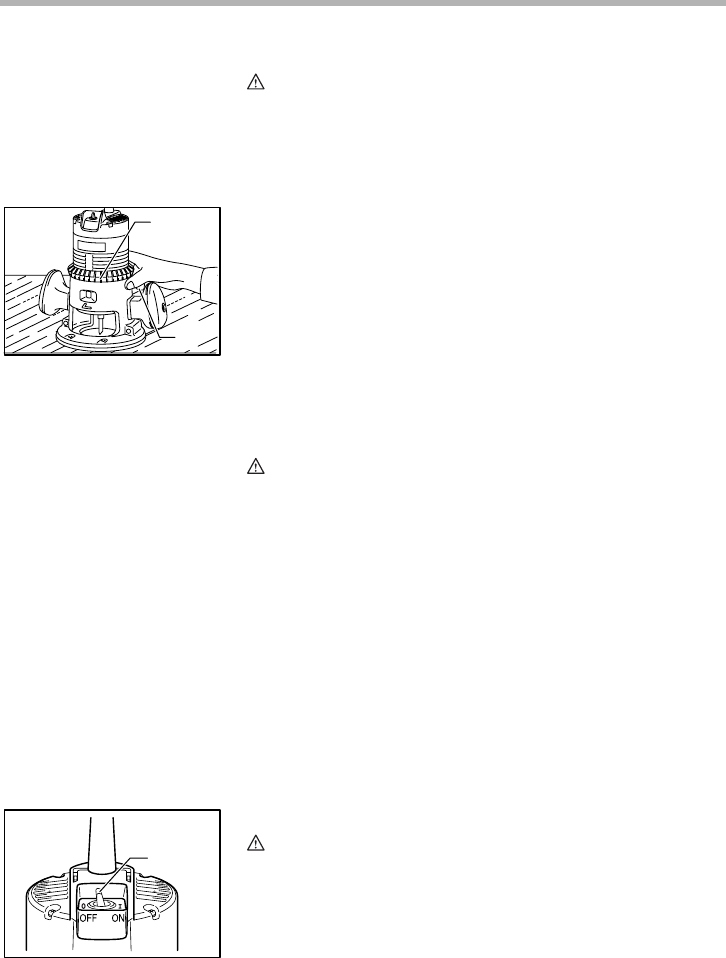
Switch action
CAUTION:
• Before plugging in the tool, always check to see that the
tool is switched off.
• Switch can be locked in “ON” position for ease of
operator comfort during extended use. Apply caution
when locking tool in “ON” position and maintain firm
grasp on tool.
• Make sure that the shaft lock is released before the
switch is turned on.
1. Scale ring
2. Clamp screw
1
2
003651
1. Switch lever
1
003659