


5
from tool, then cleaning it with gum and pitch
remover, hot water or kerosene. Never use gasoline.
Blade depth and bevel adjusting locking levers
must be tight and secure before making cut. If
blade adjustment shifts while cutting, it may cause
binding and KICKBACK.
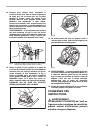
ALWAYS hold the tool firmly with both hands.
NEVER place your hand or fingers behind the
tool. If kickback occurs, the tool could easily jump
backwards over your hand, leading to serious per-
sonal injury.
Never force the tool. Forcing the tool can cause
uneven cuts, loss of accuracy, and possible
kickback. Push the tool forward at a speed so that
the blade cuts without slowing.
11. Adjustments. Before cutting be sure depth and
bevel adjustments are tight.
12. When operating the tool, keep the cord away
from the cutting area and position it so that it will
not be caught on the workpiece during the cut-
ting operation. The tool is provided with a front
grip and rear handle for two hand operation.
Operate with proper hand support, proper work-
piece support, and supply cord routing away
from the work area.
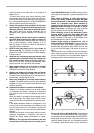
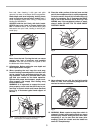
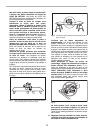
WARNING: It is important to support the work-
piece properly and to hold the tool firmly to pre-
vent loss of control which could cause personal
injury. Fig. 4 illustrates typical hand support of
the tool.
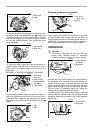
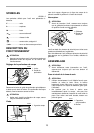
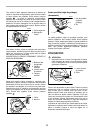
13. Place the wider portion of the tool base on that
part of the workpiece which is solidly supported,
not on the section that will fall off when the cut is
made. As examples, Fig. 5 illustrates the RIGHT
way to cut off the end of a board, and Fig. 6 the
WRONG way. If the workpiece is short or small,
clamp it down. DO NOT TRY TO HOLD SHORT
PIECES BY HAND!
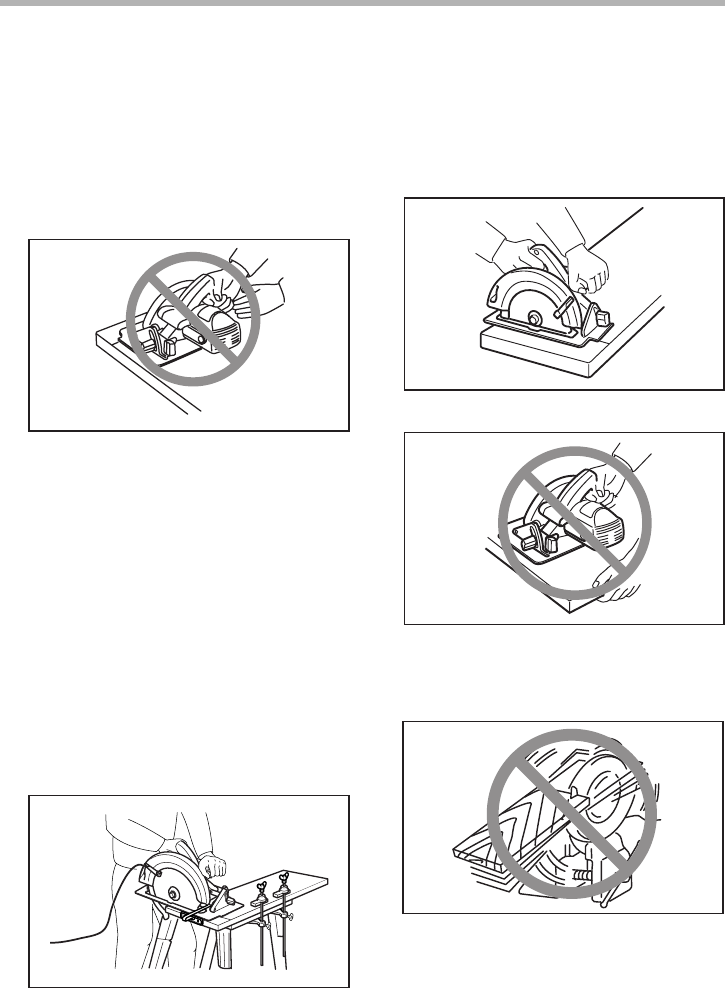
14. Never attempt to saw with the tool held upside
down in a vise. This is extremely dangerous and
can lead to serious accidents.
15. WARNING: Blade coasts to stop after switch is
released. Contact with coasting blade can cause
serious injury. Before setting the tool down after
completing a cut, be sure that the lower (tele-
scoping) guard has closed and the blade has
come to a complete stop.
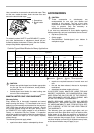
Fig. 3
Fig. 4 A typical illustration of proper hand support, work-
piece support, and supply cord routing.
Fig. 5
Fig. 6
Fig. 7