


8
FUNCTIONAL
DESCRIPTION
CAUTION:
• Always be sure that the tool is switched off and the
battery cartridge is removed before adjusting or
checking function on the tool.
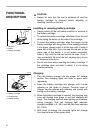
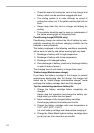
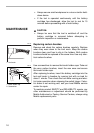
Installing or removing battery cartridge
• Always switch off the tool before insertion or removal of
the battery cartridge.
• To remove the battery cartridge, withdraw it from the tool
while sliding the button on the side of the cartridge.
• To insert the battery cartridge, align the tongue on the
battery cartridge with the groove in the housing and slip
it into place. Always insert it all the way until it locks in
place with a little click. If you can see the red part on the
upper side of the button, it is not locked completely.
Insert it fully until the red part cannot be seen. If not, it
may accidentally fall out of the tool, causing injury to you
or someone around you.
• Do not use force when inserting the battery cartridge. If
the cartridge does not slide in easily, it is not being
inserted correctly.
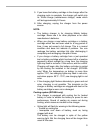
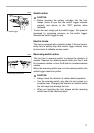
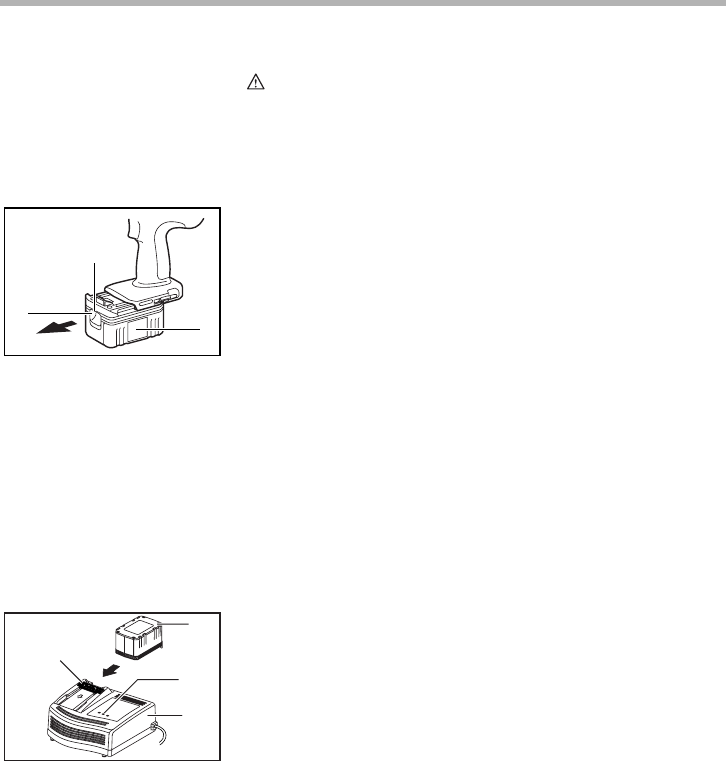
Charging
1. Plug the battery charger into the proper AC voltage
source. Two charging lights will flash in green color
repeatedly.
2. Insert the battery cartridge into charger until it stops
adjusting to the guide of charger. Terminal cover of
charger can be opened with inserting and closed with
pulling out the battery cartridge.
3. When the battery cartridge is inserted, the charging light
color will change from green to red and charging will
begin. The charging light will keep lighting up lit steadily
during charging. One red charging light indicates
charged condition in 0 - 80% and two red ones indicates
80 - 100%.
4. With finish of charge, the charging lights will change
from two red ones to two green ones.
1. Red part
2. Button
3. Battery cartridge
1
2
3
002054
1. Terminal cover
2. Battery cartridge
3. Charging light
4. Battery charger
1
2
3
4
001336