


8
ASSEMBLY
CAUTION:
• Always be sure that the tool is switched off and
unplugged before carrying out any work on the tool.
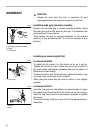
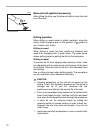
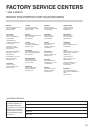
Installing side grip (auxiliary handle)
Always use the side grip to ensure operating safety. Install
the side grip so that the teeth on the grip fit in between the
protrusions on the tool barrel.
Then tighten the grip by turning clockwise at the desired
position. It may be swung 360° so as to be secured at any
position.
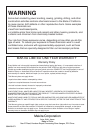
Installing or removing drill bit
For Model HP2050F
To install the bit, place it in the chuck as far as it will go.
Tighten the chuck by hand. Place the chuck key in each of
the three holes and tighten clockwise. Be sure to tighten all
three chuck holes evenly.
To remove the bit, turn the chuck key counterclockwise in just
one hole, then loosen the chuck by hand.
After using the chuck key, be sure to return to the original
position.
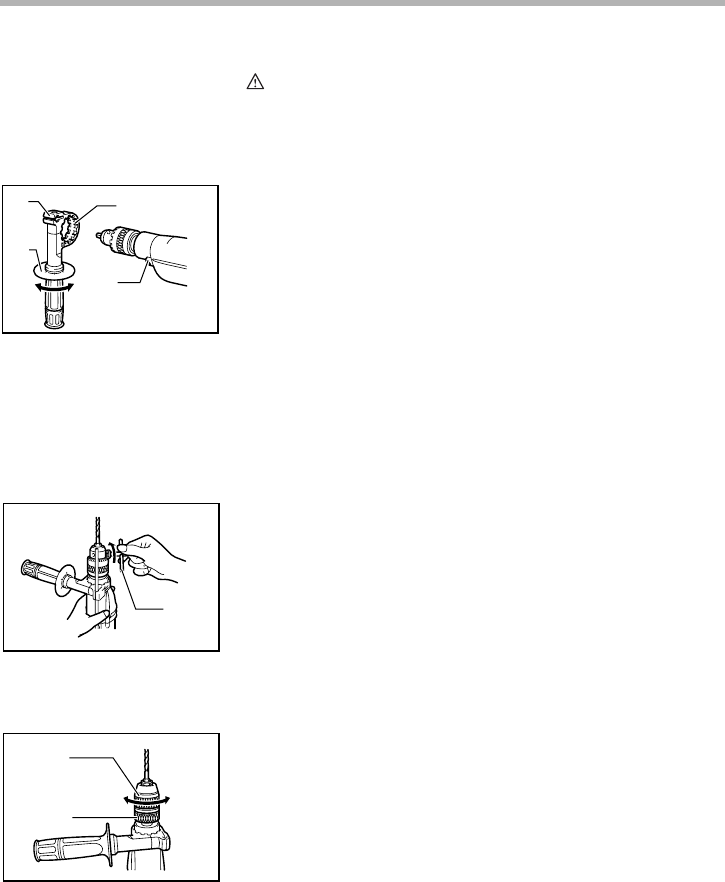
For Model HP2051F
Hold the ring and turn the sleeve counterclockwise to open
the chuck jaws. Place the bit in the chuck as far as it will go.
Hold the ring firmly and turn the sleeve clockwise to tighten
the chuck.
To remove the bit, hold the ring and turn the sleeve counter-
clockwise.
1. Grip base
2. Side grip (auxiliary handle)
3. Teeth
4. Protrusions
1
2
3
4
002693
1. Chuck key
1
002694
1. Sleeve
2. Ring
1
2
002695