


7
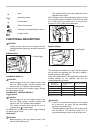
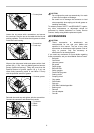
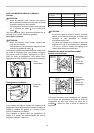
After installing, always make sure that the bit is securely
held in place by trying to pull it out.
To remove the bit, pull the chuck cover down all the way
and pull the bit out.
1
2
007845
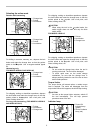
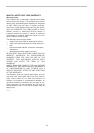
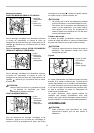
Bit angle (when chipping, scaling or
demolishing)
HR5201C
HR5210C
1
2
3
007846
HR5211C
1
2
3
007847
The bit can be secured at 16 different angles. To change
the bit angle, depress the lock button and rotate the
change lever so that the pointer points to the
symbol.
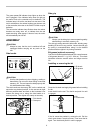
Turn the bit to the desired angle.
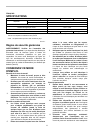
Depress the lock button and rotate the change lever so
that the pointer points to the
symbol. Then make sure
that the bit is securely held in place by turning it slightly.
HR5201C
HR5210C
1
2
3
007864
1
2
3
HR5211C
007904
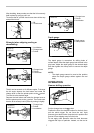
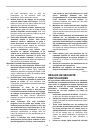
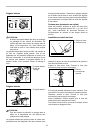
Depth gauge
1
2
007848
The depth gauge is convenient for drilling holes of
uniform depth. Insert the depth gauge into the hole in the
grip base. Adjust the depth gauge to the desired depth
and then tighten the clamp screw to secure the depth
gauge.
NOTE:
• The depth gauge cannot be used at the position
where the depth gauge strikes against the tool
body.
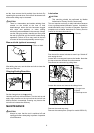
OPERATION
Hammer drilling operation
007849
Set the change lever to the
symbol.
Position the bit at the desired location for the hole, then
pull the switch trigger. Do not force the tool. Light
pressure gives best results. Keep the tool in position and
prevent it from slipping away from the hole.
Do not apply more pressure when the hole becomes
clogged with chips or particles. Instead, run the tool at
1. Depth gauge
2. Clamp screw
1. Change lever
2. Pointer
3. Lock button
1. Change lever
2. Pointer
3. Lock button
1. Change lever
2. Pointer
3. Lock button
1. Lock button
2. Change lever
3. Pointer
1. Bit
2. Chuck cover