


18
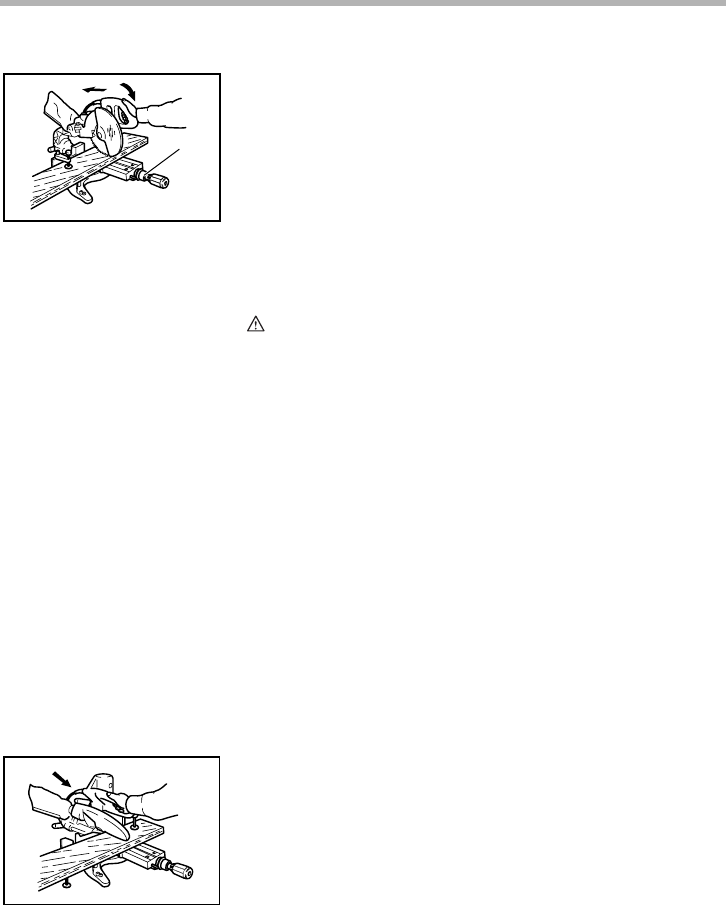
2. Slide (push) cutting (cutting wide workpieces)
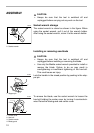
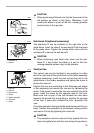
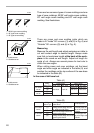
Loosen the knob counterclockwise so that the carriage
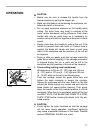
can slide freely. Secure the workpiece with the vise. Pull
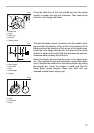
the carriage toward you fully. Switch on the tool without
the blade making any contact and wait until the blade
attains full speed. Press down the handle and PUSH
THE CARRIAGE TOWARD THE GUIDE FENCE AND
THROUGH THE WORKPIECE. When the cut is com-
pleted, switch off the tool and WAIT UNTIL THE BLADE
HAS COME TO A COMPLETE STOP before returning
the blade to its fully elevated position.
CAUTION:
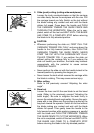
• Whenever performing the slide cut, FIRST PULL THE
CARRIAGE TOWARD YOU FULLY and press down the
handle to the fully lowered position, then PUSH THE
CARRIAGE TOWARD THE GUIDE FENCE. NEVER
START THE CUT WITH THE CARRIAGE NOT FULLY
PULLED TOWARD YOU. If you perform the slide cut
without pulling the carriage fully or if you perform the
slide cut toward your direction, the blade may kickback
unexpectedly with the potential to cause serious
PERSONAL INJURY.
• Never perform the slide cut with the handle locked in the
lowered position by pressing the stopper pin.
• Never loosen the knob which secures the carriage while
the blade is rotating. This may cause serious injury.
3. Miter cutting
Refer to the previously covered “Adjusting the miter
angle”.
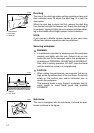
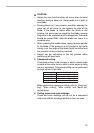
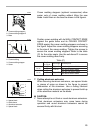
4. Bevel cut
Loosen the lever and tilt the saw blade to set the bevel
angle (Refer to the previously covered “Adjusting the
bevel angle”). Be sure to retighten the lever firmly to
secure the selected bevel angle safely. Secure the work-
piece with a vise. Make sure the carriage is pulled all the
way back toward the operator. Switch on the tool without
the blade making any contact and wait until the blade
attains full speed. Then gently lower the handle to the
fully lowered position while applying pressure in parallel
with the blade and PUSH THE CARRIAGE TOWARD
THE GUIDE FENCE TO CUT THE WORKPIECE. When
the cut is completed, switch off the tool and WAIT UNTIL
THE BLADE HAS COME TO A COMPLETE STOP
before returning the blade to its fully elevated position.
1. Knob
1
002232
002233