


6
UT-100 Ignition Instructions for use as a Butane Torch
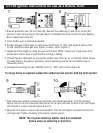
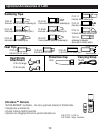
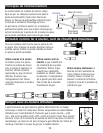
1.Remove protective cap. (Do not twist off). Remove the soldering or heat tip by turning the
knurled nut and tip housing to the right (figure 1) Retighten knurled nut (Do not over tighten)
Never change tips while hot.
2. Push shutter lever to backward position.
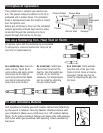
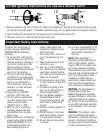
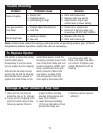
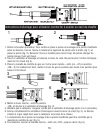
3.Position the gas control lever to 3 and move on/off lever to “ON”. And ignite at flame orifice
In cold conditions move gas lever higher, in warm, lower. (figure 7)
4. Adjust the flame length by using the gas control lever. NOTE: “Flame out” could occur if the
temperature control lever is positioned at too high a setting.
5. Preheat flame is obtainable by moving the shutter lever half-way up, so that the shutter covers
the small holes in the ejector. (However, normal operating position for the shutter lever is
completely down.)
6. Extinguish by turning the gas “ON/OFF” lever to “OFF” until it clicks (figure 8).
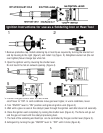
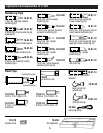
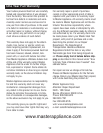
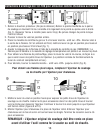
1. Push shutter lever upward to expose the small holes on the solder/heat ejector. Insert the accessory
spanner wrench into one of the small holes and turn to the right until loose. Continue to turn with fingers
until the ejector is easily removed (Figures 9 and 10)
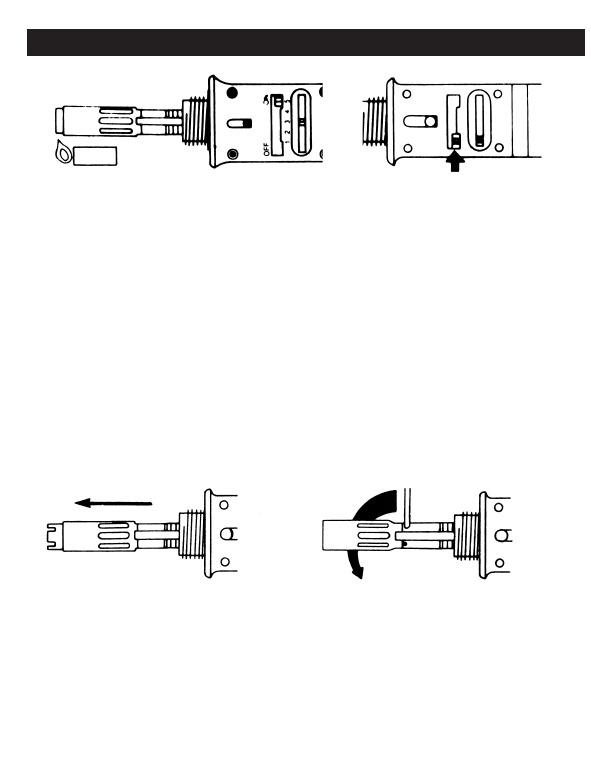
2. Mount the torch ejector in place of the removed ejector. Push the torch ejector downward and then turn
until finger tight. Tighten completely with accessory spanner wrench.
7 8
9
10
NOTE: The original soldering ejector must be reinstalled
before using as soldering or heat tool.
If a large flame is required replace the soldering heat ejector with the torch ejector.