


- 7-
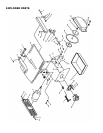
BLADE AND BLADE GUARD INSTALLATION:
Use with 7 in. Continuous Rim Diamond Blade.
1. Unplug the machine from the power source.
2. Remove the water tank from underneath the machine.
3
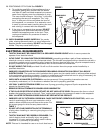
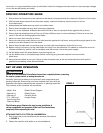
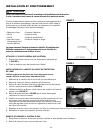
. Remove the lower blade guard by removing the screws on each side of
the lower blade guard FIGURE 4.
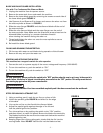
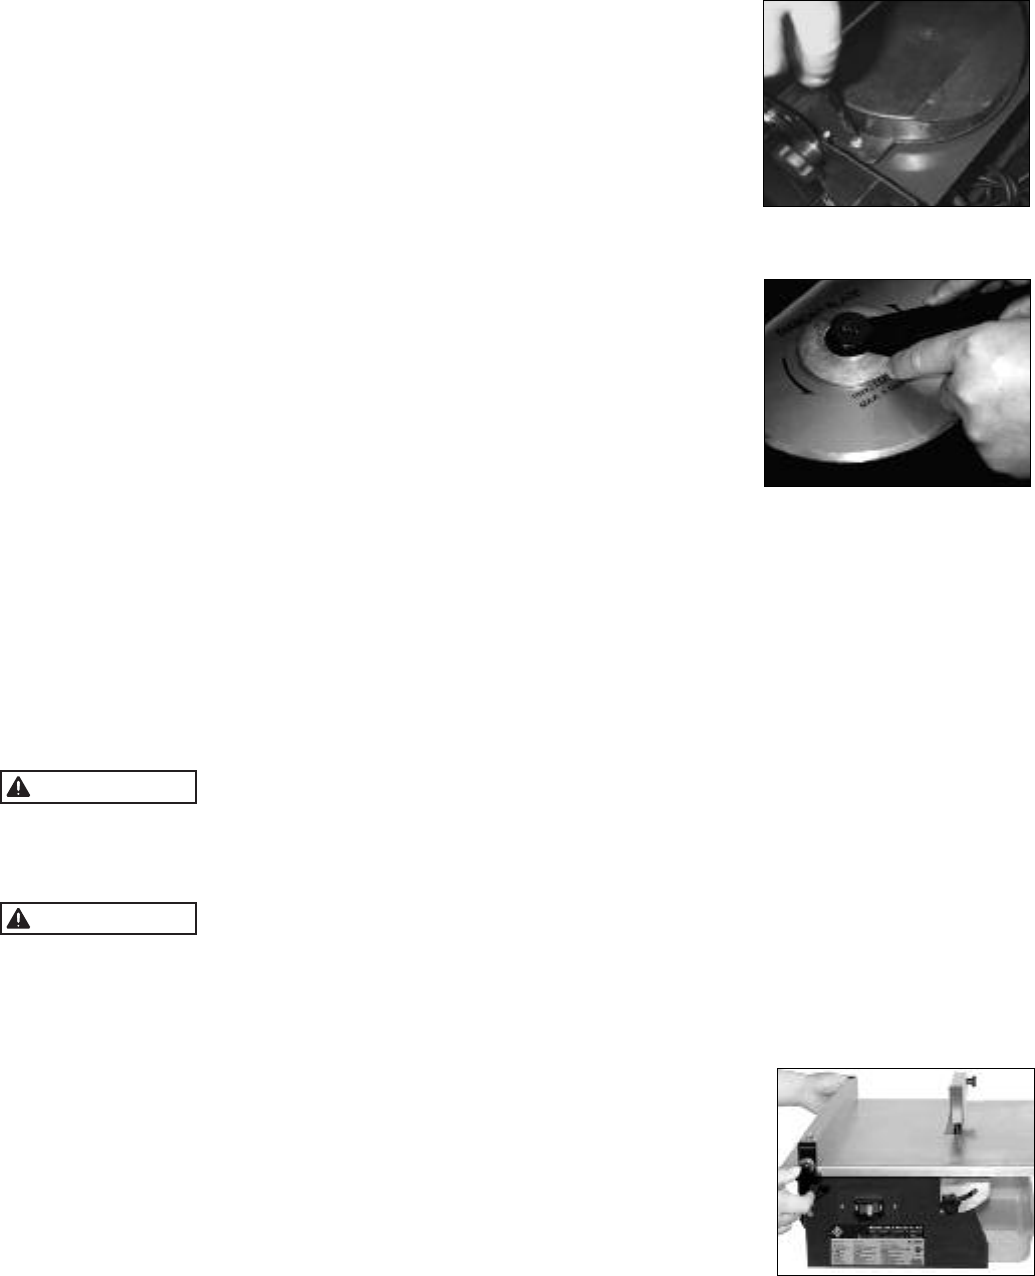
4. Use Spanner A and Spanner B to loosen and remove the arbor nut from
the motor spindle as shown in FIGURE 5.
5. Slide the outer flange FIGURE 5 and the diamond blade off the end of
the motor spindle.
6. Slide the new diamond blade and the outer flange over the end of
the motor spindle. Note: Make sure the directional arrow printed on the
diamond blade is pointing in a counter-clockwise direction
when viewing the machine facing the arbor nut.
7. Thread and tighten the arbor nut onto the motor spindle to secure
the diamond blade.
8. Re-install the lower blade guard.
FILLING AND DRAININGTHE WATERTRAY:
1. Fill the tray with water to cool blade during operation of the tile saw.
2. Remove the tray and pour the water out.
STARTING AND STOPPINGTHE MOTOR:
This machine has a magnetic switch for safer operation.
1. Connect the unit to a power supply of the correct voltage and frequency (120V–60HZ).
2. To turn the machine on, push the switch to “ON.”
3. To turn the machine off, push the switch to “OFF.”
For your own safety, always position the switch to the “OFF” position when the saw is not in use. In the event of a
power failure, blown fuse or tripped circuit breaker, press switch to the “OFF” position. This will prevent the tool
from starting up again when the power comes back on.
Only use this machine after it has been assembled completely and it has been screwed onto the workbench.
STEPS FOR MAKING A STRAIGHT CUT:
1. Using a marking pencil, mark the cut line on a piece of tile.
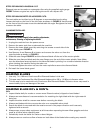
2. Unlock the parallel guide FIGURE 6 and slide it to the edge
of the table.
3. Line up the cut line on the tile with the diamond blade.
4. Adjust the parallel guide against the edge of the tile and
lock the parallel guide into position.
5. Turn the machine on by pushing the switch to the “ON” position,
and then allow it to reach full speed. Be sure the blade runs smoothly.
The blade should also be wet from the water tank below the machine
before beginning use.
6. Keeping fingers out of the cutting path, slowly slide the tile into the
moving blade. Note: DO NOT feed the tile into the blade too fast.
WARNING
WARNING
FIGURE 4
FIGURE 5
FIGURE 6