


OM-220 390 Page 20
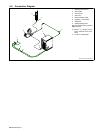
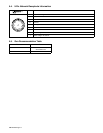
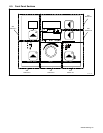
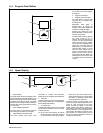
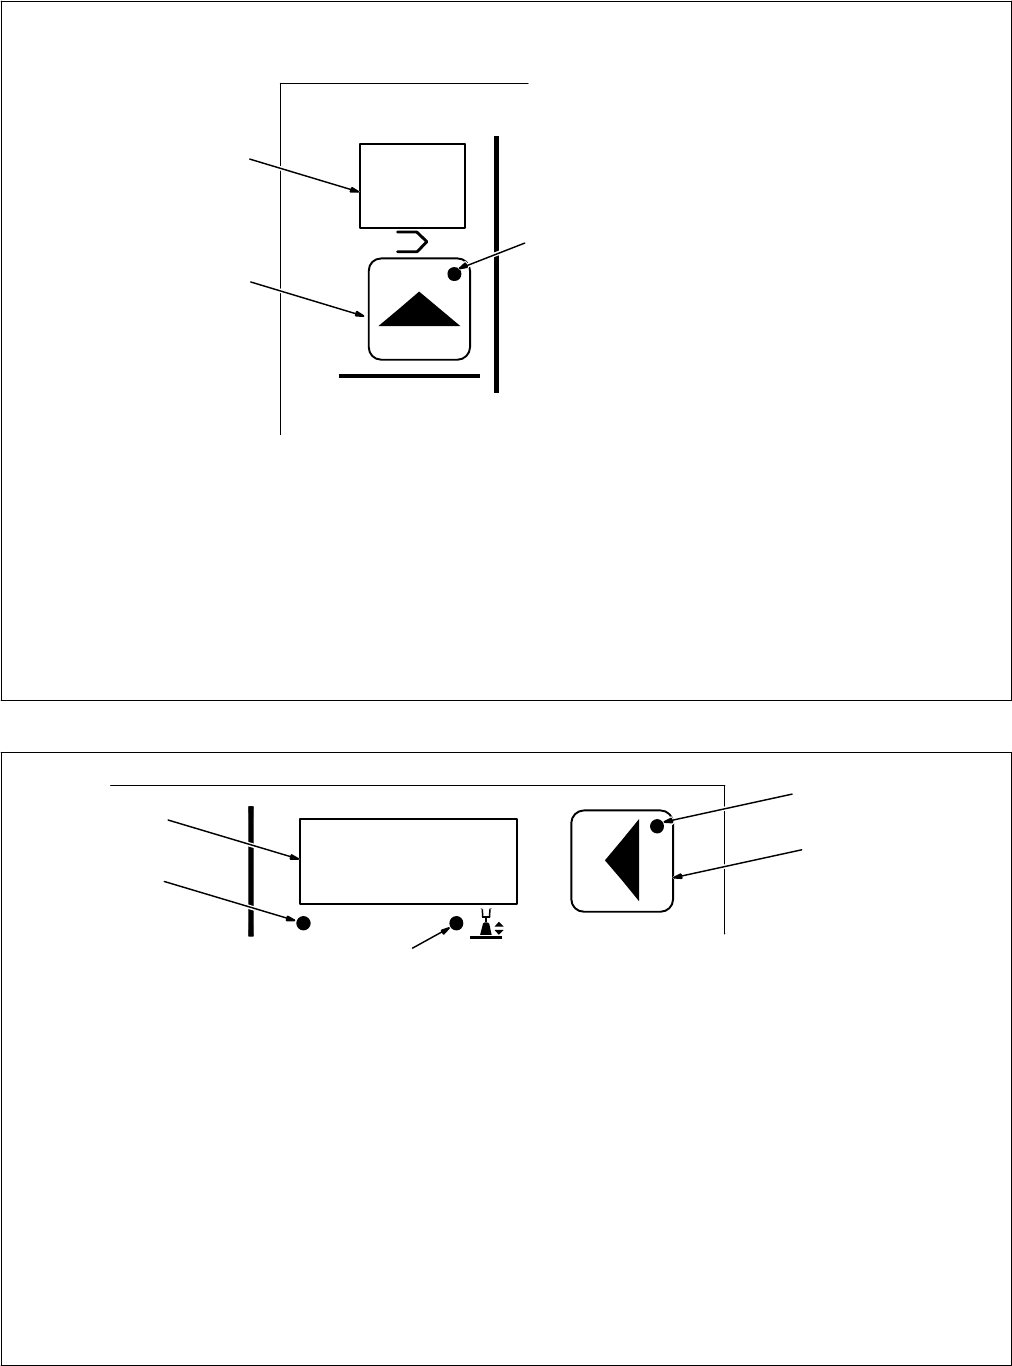
6-4. Program Push Button
1
3
2
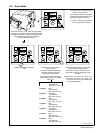
1 Program Display
The number of the active program
is displayed.
2 Program Push Button
3 Program Push Button LED
The LED lights to indicate that
programs can be changed using
the Adjust knob.
Momentarily press button to
illuminate LED. To change the
program number, rotate Adjust knob
to select one of eight programs.
Pressing and holding the push
button will display current wire size,
wire type and process.
To reset feeder to factory settings,
turn power source off for 10
seconds. Press and hold button in
on power up, wait until top display
shows RST and bottom display
shows NO before releasing button.
Feeder Set Up button LED will
begin flashing. Turn Adjust knob to
change bottom display to show
YES, then press Feeder Set Up
button to confirm selection. The top
display will show CYCL and the
lower display will show PWR. Turn
welding power source power off for
10 seconds, then turn power back
on again.
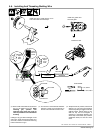
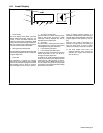
6-5. Upper Display
2
1
4
3
1 Upper Display
The upper display at idle (not welding) shows
preset volts with process selection MIG or Arc
Adjust for all other processes. When welding,
the display shows actual voltage. The display
will show actual voltage for approximately 3
seconds after welding stops before returning
to preset value.
2 Upper Display Push Button
Press the button to illuminate the LED and
allow changing information in the display.
3 Upper Display Push Button LED
The upper display push button LED
illuminates to indicate that information
displayed can be changed by the Adjust knob.
4 Volts LED
Indicates a voltage value is being displayed,
preset voltage in MIG when not welding and
actual voltage while welding.
5 Arc Adjust LED
Indicates that displayed value is an arc length
value when the process is Pulse, Accu-pulse,
or RMD (optional).
. At any time while welding, the display
allows adjustment of the weld voltage or
arc adjust preset values by turning the
Adjust knob. The preset values will be
displayed while the knob is being rotated
and return to displaying actual values
when adjustment is completed.
To activate Carbon Arc Cutting (CAC), press
and hold the upper display push button in on
power up. CAC will appear on the upper
display and NO will appear on the lower
display. Rotate adjust knob to YES on the
lower display, and press the flashing Feeder
Set up push button . CYCL will appear on the
upper display and PWR will appear on the
lower display. Turn welding power source off
and back on again to enable the Carbon Arc
Cutting process selection.
V
5