page 4
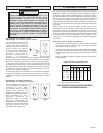
WARNING!
TOOL ASSEMBLY
To reduce the risk of injury, always unplug tool before
attaching or removing accessories or making adjustments.
Use only specifically recommended accessories. Others may
be hazardous.
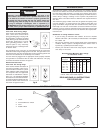
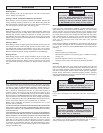
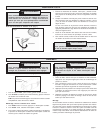
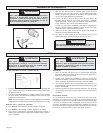
Installing Bits into Keyed Chucks (Fig. 1)
1. Open the chuck jaws wide enough to insert the bit. Be sure the bit
shank and chuck jaws are clean. Dirt particles may prevent the bit
from lining up properly.
2. When using drill bits, insert the bit into the chuck. Center the bit in the
chuck jaws and lift it about 1/16" off of the bottom. Tighten the chuck
jaws by hand to align the bit.
When using screwdriver bits, insert the bit far enough for the chuck
jaws to grip the bit shank. Tighten the chuck jaws by hand to align
the bit.
3. Place the chuck key in each of the three holes in the chuck, turning
it clockwise as shown. Tighten securely.
4. To remove the bit, insert the chuck key into one of the holes in the
chuck and turn it counterclockwise.
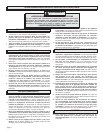
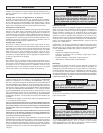
Using Forward/Reverse Switch (Fig. 2)
1. For forward (clockwise) rotation, slide the forward/reverse
switch towards the front of the tool.
2. For reverse (counterclockwise) rotation, slide the forward/reverse
switch towards the back of the tool.
NOTE: To prevent damage to the motor, allow the tool to come to a
complete stop before reversing.
Starting, Stopping and Controlling Speed
1. To start the tool, pull the paddle switch.
2. To stop the tool, release the paddle switch.
3. To vary the driving speed, simply increase or decrease pressure on
the paddle switch. The further the paddle switch is pulled, the greater
the speed.
Drilling
1. Before drilling, be sure the workpiece is clamped securely. Use
backing material to prevent damage to the workpiece during break-
through.
2. When starting a hole, place the drill bit on the work surface and
apply firm pressure. Begin drilling at a slow speed, gradually in-
creasing the speed as you drill.
3. Use enough pressure on the tool to keep the bit drilling or driving
constantly, but do not push hard enough to stall the bit.
4. Reduce pressure and ease the bit through the last part of the hole.
While the tool is still running, pull the bit out of the hole to prevent
jamming.
Stalling
If the tool seems as if it is about to stall, maintain a firm grip and reduce
pressure slightly to allow the bit to regain speed. If the tool does stall,
release the paddle switch immediately. Reverse the motor, remove the bit
from the work and start again. Do not press the paddle switch on and off
in an attempt to start a stalled drill. This can damage the drill.
OPERATION
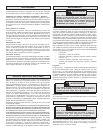
To prevent personal injury, always remove the chuck key
from the chuck after each use.
To reduce the risk of injury, wear safety goggles or glasses
with side shields. Unplug the tool before changing
accessories or making adjustments.
WARNING!
WARNING!
To reduce the risk of explosion, electric shock and property
damage, always check the work area for hidden electrical
wires or pipes when drilling.
WARNING!
Fig. 1
Loosen
Tighten
Fig. 2
Forward/
Reverse
switch
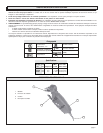
No Load
RPM
0 - 1300
0 - 1300
0 - 750
Volts
AC
120
120
120
Catalog
Number
0375-1
0375-6
0379-1
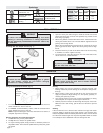
Specifications
Amps
3.5
3.5
3.5
Twist Drill
Capacity
in Steel
3/8"
3/8"
1/2"
Amperes
Double Insulated
Canadian Standards
Association
Underwriters
Laboratories, Inc.
Volts Alternating Current
No Load Revolutions
per Minute (RPM)
Symbology
Mexican Approvals
Marking


