


page 5
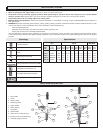
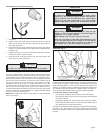
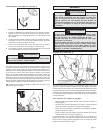
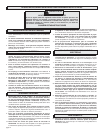
Installing Bits into Keyed Chucks (Fig. 2)
1. Unplug tool.
2. Open the chuck jaws wide enough to insert the bit. Be sure the bit
shank and chuck jaws are clean. Dirt particles may prevent the bit
from lining up properly.
3. Insert the bit into the chuck. Center the bit in the chuck jaws and lift
it about 1/16" off of the bottom. Then, tighten the chuck jaws by hand
to align the bit.
4. Place the chuck key in each of the three holes in the chuck, turning it
clockwise as shown. Tighten securely.
5. To remove the bit, insert the chuck key into one of the holes in the
chuck and turn it counterclockwise.
Fig. 2
OPERATION
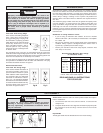
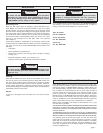
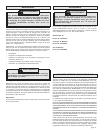
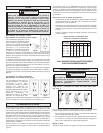
Bit Binding (Fig. 4)
If the bit binds, the drill will suddenly react in the opposite direction of the
rotation of the bit. Figure 4 shows the path of reaction, (B) if the drill bit
binds while being driven in forward (A).The operator should reduce the
chances of a sudden reaction by following the instructions listed below.
The operator should also prepare for a sudden reaction by holding se-
curely using the pipe handle or bracing against a solid fixed object.
To reduce the chance of bit binding:
• Use sharp bits. Sharp bits are less likely to bind when drilling.
• Use the proper bit for the job. There are many types of bits designed
for specific purposes.
• Avoid drilling warped, wet, knotty, and or pitchy material if possible.
• Avoid drilling in material that you suspect contains hidden nails or
other things that may cause the bit to bind.
The direction of reaction is always opposite of the direction of bit binding.
Reaction is even more likely to occur when enlarging already existing
holes and at the point when the bit breaks through the other side of the
material.
When drilling, always hold the drill securely using the pipe
handle, or brace the drill against a solid fixed object in
preparation for a sudden reaction.
When drilling, never use your body to brace drill.
Never put your hands (or other body parts) between the part
of the drill being braced and the object it is being braced
against. Hands (or other body parts) that are in the path of
the reaction can be pinched, crushed, and broken.
WARNING!
WARNING!
To reduce the risk of personal injury when drilling, always
hold tool by the insulated gripping surfaces when perform-
ing an operation where the cutting tool may contact hidden
wiring or its own cord. Contact with a "live" wire will make
exposed metal parts of the tool "live" and shock the operator.
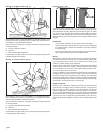
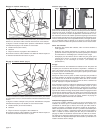
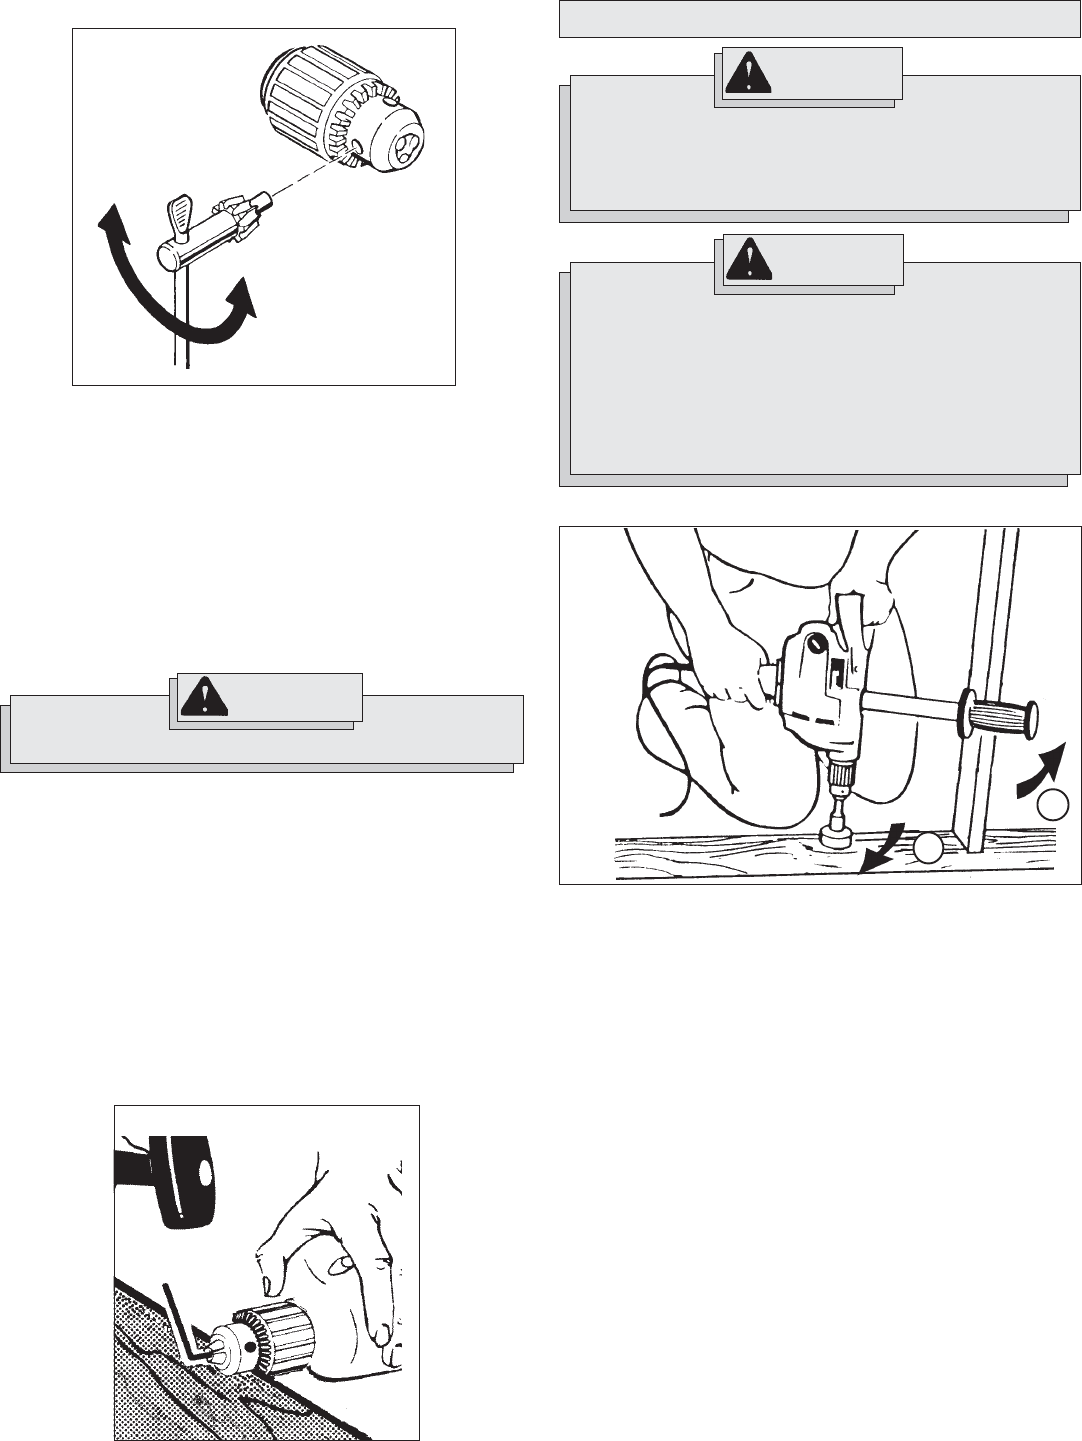
Chuck Removal (Fig. 3)
This tool is equipped with a threaded spindle to hold the chuck. Before
removing the chuck, unplug the tool and open the chuck jaws. A left-
handed thread screw is located inside the chuck to prevent the chuck
from loosening when the tool is operated in reverse direction. Remove
the screw by turning it clockwise. To remove the chuck, hold the tool so
that only the side of the chuck rests firmly and squarely on a solid
workbench. Insert the chuck key or a chuck remover bar in one of the
keyholes. Turn the chuck so the key is at about a 30° angle to the bench
top and strike the key sharply with a hammer so the chuck turns in a
counterclockwise direction (looking from the front of the tool). This should
loosen the chuck from the spindle which has a right hand thread making
it easy to remove the chuck by hand.
NOTE: When replacing the chuck, always replace the left hand thread
screw in the chuck.
WARNING!
To reduce the risk of injury, always wear eye protection.
Fig. 3
Fig. 4
B
A