page 6
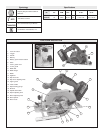
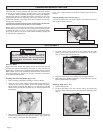
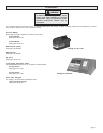
Fig. 1
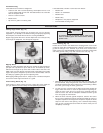
Adjusting Depth (Fig. 4 & 5)
1. Remove battery pack.
2. To adjust the depth of the cut, hold the saw by the handle and
loosen the depth adjusting lever by pushing it down toward the shoe
(Fig. 4).
TOOL ASSEMBLY
Selecting Blade
Always use sharp blades. Dull blades tend to overload the tool and
increase the chance of KICKBACK (see page 8). Only use thin kerf
blades with a maximum safe operating speed greater than the no load
RPM marked on the tool's nameplate. Read the blade manufacturer's
instructions before use. Do not use any type of abrasive cut-off wheel
or dry diamond cutting blades.
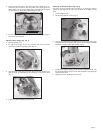
Installing and Removing Blades (Fig. 2 & 3)
1. Remove battery pack before installing or removing blades.
2. Place the saw on a flat surface with the blade facing upwards. To
remove the bolt from the spindle, push in the spindle lock button.
While holding the spindle lock button in, use the wrench provided
with the tool to turn the bolt clockwise (Fig. 2). Remove the bolt and
blade flange.
5. Place the blade flange on the spindle and hand tighten the bolt.
6. While holding the spindle lock button in, use the wrench to turn the
bolt counterclockwise and tighten.
Removing Battery Pack from Tool (Fig. 1)
Push in the release buttons and slide the battery pack away from
the tool.
Inserting Battery Pack into Tool (Fig. 1)
To insert the battery pack into the tool, push in the release buttons and
slide it into the body of the tool.
CHARGING AND USING BATTERY PACK
3. Slide the lower guard lever up to raise the lower guard. Remove the
blade from the spindle. Always clean the spindle, upper guard and
lower guard to remove any dirt and sawdust.
Charge your battery pack before using your tool for the first time and
when your tool no longer performs with the power and torque needed
for the job. Full loading capacity of battery pack is only reached after
4 - 5 chargings. Never completely discharge the battery pack. Standard
charging time will vary according to the type of charger you use. The
charging time will also vary depending on the supply voltage and charge
needed. For example, if your battery pack does not require a full charge,
charging time will be less.
FOR SPECIFIC CHARGING INSTRUCTIONS, PLEASE READ THE CHARGER
OPERATOR'S MANUAL SUPPLIED WITH YOUR CHARGER.
Battery packs are affected by temperature. Your battery pack will
perform best and have longest life if it is charged when the temperature
is between 60°-80°F (15°-27°C). Do not charge in temperatures below
40°F (5°C) or above 113°F (45°C). Under these conditions, capacity will
be reduced. See “Maintenance”.
To reduce the risk of injury, always
remove battery pack before attaching or
removing accessories. Use only specifically
recommended accessories. Others may be
hazardous.
WARNING!
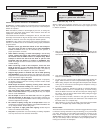
4. To install a blade, place the blade on the spindle with the teeth
pointing in the same direction as the arrow on the lower guard
(Fig. 3). Release the lower guard lever.
Inserting a battery pack
Removing a battery pack
Fig. 2
Fig. 4
Fig. 3


