


26
27
Aluminum Oxide
For fast cutting, general purpose discs for most
metal jobs. Best for cold-rolled steel, stainless
steel or metals requiring tough, fast cutting, long
lasting abrasives.
Aluminum Zirconia Bi-Cut
Unique grit pattern is arranged in clusters for fast-
er stock removal and cleaning. Ideal for removing
paint from cars, boats, etc. without clogging.
Ceramic
Lasts up to 3 times longer than Aluminum Ox-
ide Discs. For general metal working. Ideal for
tough jobs.
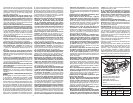
Sanding Disc Selection
Use sanding discs and accessories that are:
• correct size as written on tool’s nameplate.
• rated at or above the RPM listed on the tool’s
nameplate.
• correct accessory, wheel type and grit for the job.
Refer to the table below to select the correct type
of sanding disc for your job. Generally, use 24 or
36 grit for heavy stock removal; 50, 60, or 80 grit
for medium stock removal and 120 grit for fi nishing.
Always begin with a coarse grit, using successively
fi ner grits to obtain the desired fi nish. See your
MILWAUKEE Electric Tool Catalog for a complete
list of sanding discs.
USING SANDING DISCS
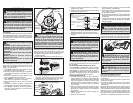
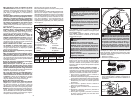
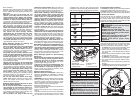
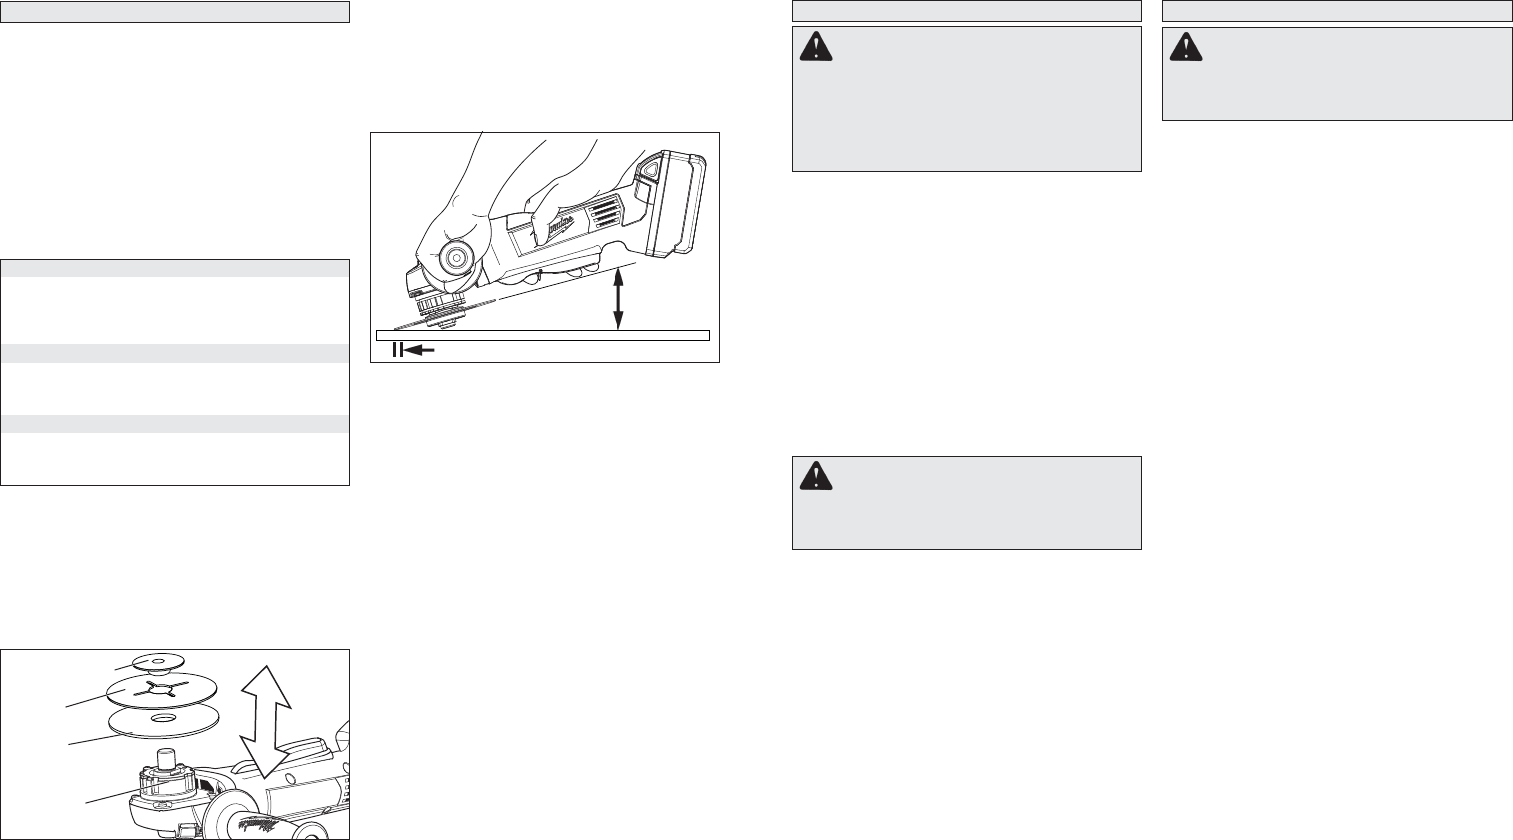
Installing Backing Pad and Sanding Discs
1. Remove the battery pack.
2. Wipe the accessories, disc nut and spindle to
remove dust and debris. Inspect the parts for
damage. Replace if needed.
3. Slip backing pad onto spindle with fl at side away
from gear case.
4. Place sanding disc on backing pad and secure
assembly to spindle with disc nut.
Fig. 9
Spindle
Backing
pad
Disc nut
Sanding
disc
5. To tighten, press the spindle lock button while
turning disc nut clockwise with the spanner
wrench provided.
6. To remove backing pad and sanding disc,
remove the battery pack and reverse the pro-
cedure.
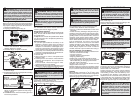
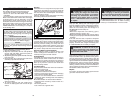
Sanding
Hold tool at 5° to 15° angle to ensure proper sand-
ing pressure and control. Too great an angle will
result in too much pressure and could cause exces-
sive wear to the disc and workpiece. Too small an
angle will reduce control.
Use long, sweeping, side to side strokes, advancing
forward to produce the desired fi nish.
Cross Sanding
When fi nishing a surface that has been prepared by
a coarse disc or wheel, sand at right angles to the
strokes made by the coarser disc. Finishing marks
left from previous sanding are easily seen and
removed for a uniform fi nish. Failure to cross sand
when changing from a coarse disc to a fi nishing disc
may result in deep scratches and circular marks.
Removing Welds or Hammer Marks
When removing welds or hammer marks, limit
coarse sanding to the immediate area. Use suc-
cessively fi ner grits to smooth surface.
Finishing Metal
Constantly move across the surface. Work faster on
curved surfaces where contact areas are smaller
and pressure is greater. Flat areas may appear at
the end of the stroke when pressure is too heavy.
Ease up on pressure at end of each stroke and
when reversing strokes.
Troubleshooting
Deep scratches and circular marks can result from:
• Using too coarse a grit
• Using a partially glazed disc
• Dirt or loose metal on the workpiece
• Failure to sand across the grain when changing
from coarse to fi nishing discs
• Failure to use closed coated discs to reduce the
problem of grains working loose and scratching
the workpiece
Bluish discoloration of metal surface indicates:
• Excessive heat caused by circular motion in a
small area
• Excessive pressure
• Use of worn out or glazed discs
For best result use only this portion of disc
Fig. 10
Hold at a
Hold at a
5° to 15°
5° to 15°
angle
angle
ACCESSORIES
For a complete listing of accessories refer to your
MILWAUKEE Electric Tool catalog or go online
to www.milwaukeetool.com. To obtain a catalog,
contact your local distributor or service center.
WARNING Always remove battery pack
before changing or removing accessories.
Only use accessories specifi cally recommend-
ed for this tool. Others may be hazardous.
Maintaining Tool
Keep your tool, battery pack and charger in good
repair by adopting a regular maintenance program.
After six months to one year, depending on use,
return the tool, battery pack and charger to a
MILWAUKEE service facility for:
• Lubrication
• Mechanical inspection and cleaning (gears,
spindles, bearings, housing, etc.)
• Electrical inspection (battery pack, charger, motor)
• Testing to assure proper mechanical and electrical
operation
If the tool does not start or operate at full power
with a fully charged battery pack, clean the contacts
on the battery pack. If the tool still does not work
properly, return the tool, charger and battery pack,
to a MILWAUKEE service facility for repairs.
MAINTENANCE
Cleaning
Clean dust and debris from charger and tool vents.
Keep tool handles clean, dry and free of oil or grease.
Use only mild soap and a damp cloth to clean the
tool, battery pack and charger since certain cleaning
agents and solvents are harmful to plastics and other
insulated parts. Some of these include gasoline,
turpentine, lacquer thinner, paint thinner, chlorinated
cleaning solvents, ammonia and household deter-
gents containing ammonia. Never use fl ammable or
combustible solvents around tools.
Repairs
For repairs, return the tool, battery pack and char-
ger to the nearest service center.
WARNING To reduce the risk of per-
sonal injury and damage, never immerse your
tool, battery pack or charger in liquid or allow
a liquid to fl ow inside them.
WARNING To reduce the risk of injury,
always unplug the charger and remove the
battery pack from the charger or tool before
performing any maintenance. Never disas-
semble the tool, battery pack or charger.
Contact a MILWAUKEE service facility for
ALL repairs.