


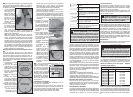
6
7
OPERATION
1. Hammering only. For use with "hammering
only" accessories. Use this setting for chiseling.
2. Chisel adjustment. Use this setting to adjust
the angle of the chisel blade in relation to the tool.
With a chisel mounted in the tool, twist the chisel
to the desired angle. Then, rotate the action
selector to the "hammering only" setting for use.
Electronic Feedback Control Circuit
These hammers have an Electronic Feedback
Control Circuit (EFCC) which helps improve the
operation and life of the tool.
Feedback Control
The electronic speed control circuit allows the tool
to maintain constant speed and torque between
no-load and load conditions.
Soft Start
The Soft-Start feature reduces the amount of torque
reaction to the tool and the user. This feature gradu-
ally increases the motor speed up from zero to the
speed set by the speed control dial.
Selecting Speed
The speed control dial on these hammers allows
the user to adjust the rotating speed (RPM) and the
impact rate (BPM) of the tool.
To change the speed, set the speed control dial to
the desired setting.
• Lower speeds provide more control when starting
holes and reduce 'spalling' on breakthrough. Spall-
ing occurs when pieces of material chip off around
the drilled hole on breakthrough. When chiseling in
soft or brittle materials, use lower speeds to reduce
damage to surrounding areas of the material.
• Higher speeds provide faster penetration when
drilling and chiseling in demolition work.
Selecting Action
Cat. No. 5337-20
The cat. no. 5337-20 demolition hammer is for
"hammering-only". No rotation is available. Only
chisels and other "hammering-only" accessories
should be used.
Cat. No. 5339-20
The cat. no. 5339-20 demolition hammer is for
"hammering-only". No rotation is available. The
action selector is used to select the action:
WARNING To reduce the risk of injury,
wear safety goggles or glasses with side
shields. Unplug the tool before changing
accessories or making adjustments.
NOTE: To engage the hammering mechanism,
maintain pressure on the bit/chisel. When pressure
is released, hammering stops.
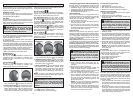
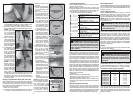
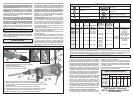
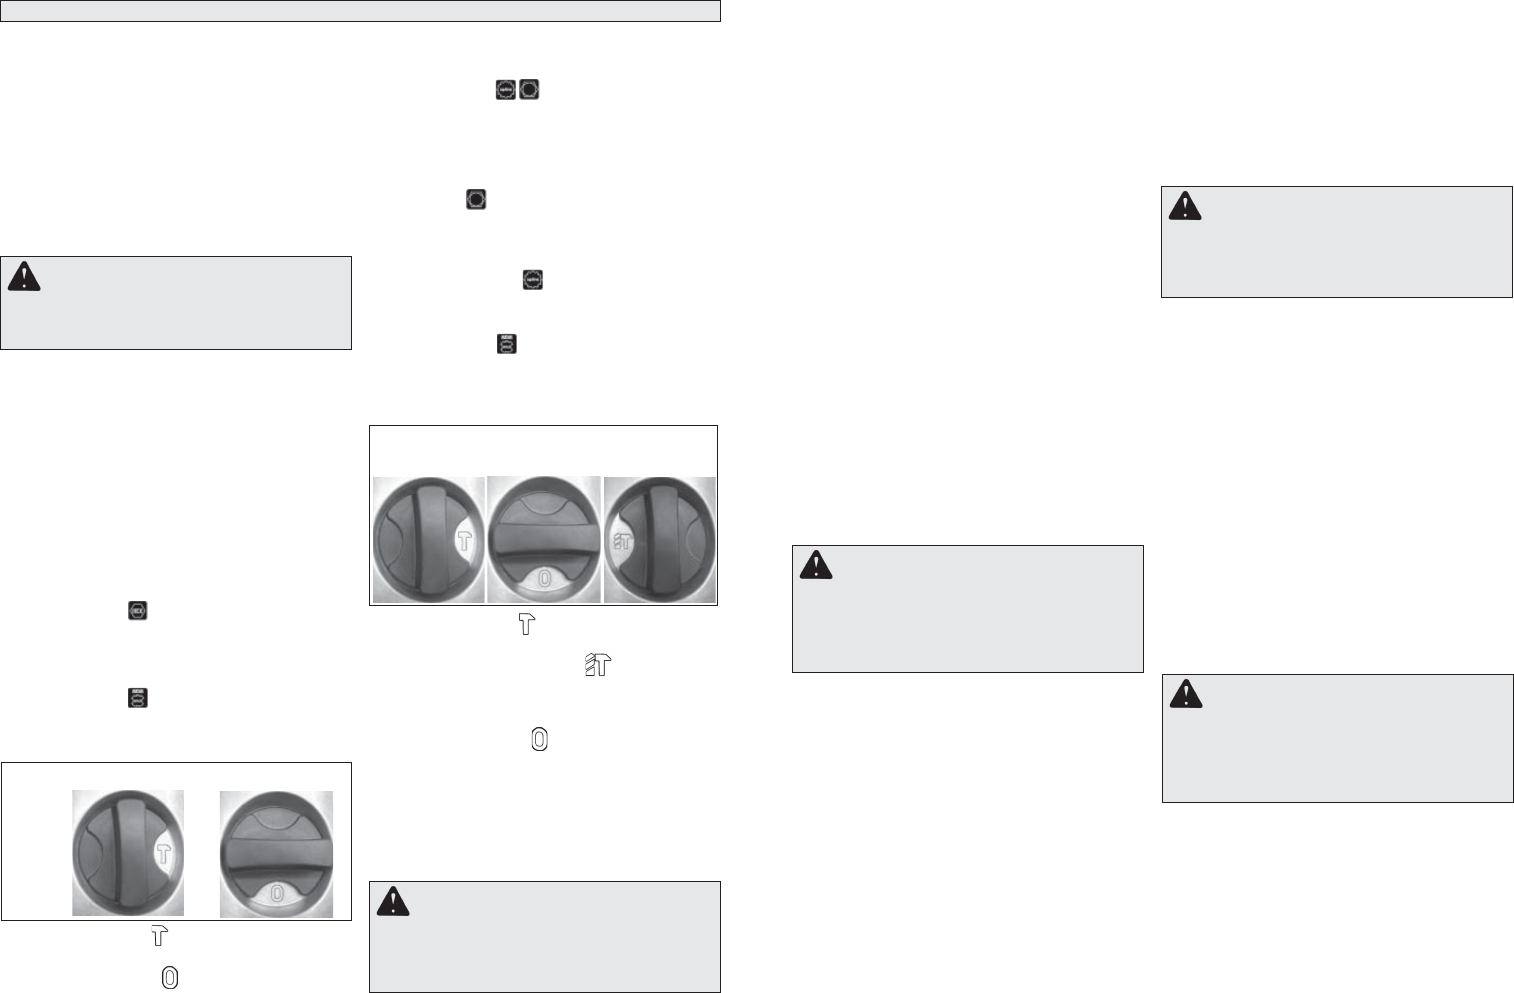
Fig. 3
Chisel AdjustmentHammering Only
Cat. No. 5340-20
The cat. no. 5340-20 rotary hammer has "hammer-
ing-only" and "hammering with rotation", depending
on the type of shank inserted into the tool.
For "hammering-only": Insert a chisel or other
"hammering-only" accessory with a 3/4" Hex with
21/32" Round
shank into the nose of the tool (see
"Inserting Bits and Chisels"). The rotational drive
mechanism will run but not engage with the chisel,
resulting in "hammering-only" action.
For "hammering with rotation": Insert a drill or
coring bit with a spline shank into the nose of the
tool (see "Inserting Bits and Chisels"). The rotational
drive mechanism engages with the bit, resulting in
"hammering with rotation" action.
Cat. No. 5342-20
Cat. no. 5342-20 rotary hammer has "hammering-
only", "hammering with rotation", and "chisel
adjustment" settings. The action selector is used
to select the action:
1. Hammering only.
For use with "hammering
only" accessories. Use this setting for chiseling.
2. Hammering with rotation. Use this setting
for drilling holes with drill bits. Do not use "ham-
mering with rotation" when using chisels or other
"hammering-only" accessories.
3. Chisel adjustment. Use this setting to adjust
the angle of the chisel blade in relation to the
tool. With a chisel mounted in the tool, twist the
chisel to the desired angle. Then, rotate the ac-
tion selector to the Hammering only setting for
use.
NOTE: To engage the hammering mechanism,
maintain pressure on the bit/chisel. When pressure
is released, hammering stops.
Starting and Stopping the Tool
1. To start the tool, pull the trigger.
2. To stop the tool, release the trigger.
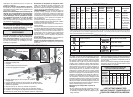
Fig. 4
Hammering
Only
Hammering
with Rotation
Chisel
Adjustment
WARNING To reduce the risk of injury,
when using chisels or other hammering-only
accessories in cat. no. 5342-20, the action
selector must be set to the "hammering only"
position.
Locking the Trigger (Cat. No. 5337-20, 5339-20 only)
The lock button on the demolition hammers holds
the trigger in the "On" position for continuous use.
1. To lock the trigger, hold in the lock button while
pulling the trigger. Release the trigger.
2. To unlock the trigger, pull the trigger and release.
The lock button will pop out.
Cold Hammering
If the hammer is stored for a long period of time or
at cold temperatures, the lubrication may become
stiff and the tool may not hammer initially or the
hammering may be weak. If this happens:
1. Insert a chisel into the tool.
2. Pull the trigger and apply the chisel against a
scrap piece of concrete.
3. Turn the tool On and Off every few seconds.
After 15 seconds to 2 minutes, the tool will start
hammering normally. The colder the hammer is,
the longer it will take to warm up.
Operator Force
These hammers feature the Vibration Isolation
System to provide the operator with comfort without
sacrifi cing power or performance. The motor hous-
ing is suspended independently from the switch
handle. Insulating elements absorb vibration when
hammering and drilling.
Ideal operator force compresses the handle slight-
ly and allows the tool to work aggressively while the
handle provides maximum vibration dampening.
Excessive operator force compresses the handle
too far and reduces the vibration dampening. Users
will be able to feel the difference and should adjust
the force to the handle accordingly.
Hammering Only
1. Insert a chisel or other "hammering only" ac-
cessory into the tool (see "Installing Bits and
Chisels").
2. Position the tool on the workpiece.
3. Grasp both handles fi rmly (trigger handle and
either the spade handle or straight handle).
4. Pull the trigger. Always hold the tool securely
using two handles and maintain control.
5. Use only enough pressure to hold the tool in
place, engage the hammering mechanism, and
prevent the tip of the chisel from wandering.
This tool has been designed to achieve top
performance with only moderate pressure. Let
the tool do the work.
NOTE: To engage the hammering mechanism,
maintain pressure on the bit/chisel. When pres-
sure is released, hammering stops.
6. When chiseling or chipping, hold the tool at an
angle to the work area. For best performance,
work from a corner or close the edge of the work
and break off a small area at a time.
WARNING Applying greater pressure
does not increase the tool's effectiveness.
If the applied working pressure is too high,
the shock absorber will be pushed together
making vibration to the handle noticeably
stronger.
If a hammer iron gets stuck:
1. Unplug the tool.
2. Pull out bit lock and rotate it 180°.
3. Pull the tool off of the stuck accessory.
4. Remove the accessory from the workpiece.
Hammering with Rotation
1. Insert a drill or coring bit into the tool (see "Install-
ing Bits and Chisels").
2. Position the tool on the workpiece.
3. Grasp both handles fi rmly (trigger handle and
straight handle).
4. Pull the trigger. Always hold the tool securely
using the straight handle and trigger handle and
maintain control.
5. Use only enough pressure to hold the tool in place,
engage the hammering mechanism, and prevent
the tip of the bit from wandering. This tool has
been designed to achieve top performance with
only moderate pressure. Let the tool do the work.
When pressure is released, hammering stops.
6. When drilling deep holes, the speed may begin
to drop off. Pull the bit partially out of the hole
while the tool is running to help clear dust.
NOTE: Do not use water to settle the dust since
it will clog the bit fl utes and tend to make the bit
bind in the hole.
If a bit binds:
If the bit should bind, a built in, nonadjustable slip
clutch prevents the bit from turning when the tool
is held or braced securely. If this occurs
1. Turn off and unplug the tool.
2. Free the bit from the workpiece.
3. Clear debris from the hole.
4. Begin drilling again.
Using Rotary Percussion Core Bits
Core bits are useful for drilling larger holes for
conduit and pipe. MILWAUKEE Heavy-Duty Core
Bits have heat-treated steel bodies with durable
carbide tips. These core bits are specially designed
for fast, accurate drilling with combined hammering
and rotary action.
1. Clean and lubricate the threads on the adapter
and core bit to make later removal easier. Screw
the threaded end of the adapter into the rear of
the core bit.
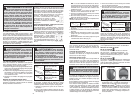
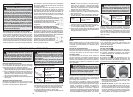
2. Push the guide plate onto the pointed end of the
center pin. Insert the center pin and guide plate
assembly into the core bit. Be sure the small end
of the center pin is securely placed into the hole
in the center of the core bit (Fig. 5).
WARNING To reduce the risk of injury,
hold or brace securely. Always be prepared
for drill reaction when bit binds, when hole
becomes clogged, when striking embedded
materials, and during hole breakthrough.
WARNING Use MILWAUKEE core bits
Cat. No. 48-20-5125 through 48-20-5165. Do
not use LHS (Large Hole System) Components
with rotary hammers 5340-20 and 5342-20. The
bits could fail, breaking apart at the threaded
stud and causing injury and property damage.