


page 7
The side handle works in a similar fashion, where moderate operator
force dampens vibration and excessive force reduces this effect.
Hammering or Hammering with Rotation
Position the tool, grasp the handles firmly and pull the trigger.
Always hold the tool securely using both handles and maintain control.
Use only enough pressure to hold the tool in place and prevent the tip of
the bit from wandering. This tool has been designed to achieve top
performance with only moderate pressure. Let the tool do the work.
If the speed begins to drop off when drilling deep holes, pull the bit
partially out of the hole while the tool is running to help clear dust.
NOTE: Do not use water to settle the dust since it will clog the bit flutes
and tend to make the bit bind in the hole. If the bit should bind, a built-in,
non-adjustable slip clutch prevents the bit from turning. If this occurs,
stop the tool, free the bit and begin again.
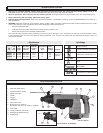
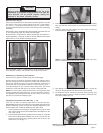
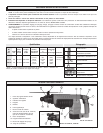
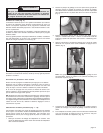
Using Rotary Percussion Core Bits (Fig. 7 - 10)
Core bits are useful for drilling large holes for conduit and pipe.
MILWAUKEE
Heavy-Duty Core Bits have heat-treated steel bodies with
durable carbide tips. These core bits are specially designed for fast,
accurate drilling with combined hammering and rotary action.
1. Clean and lubricate the threads on the adapter and core bit to make
later removal easier. Screw the threaded end of the adapter into the
rear of the core bit.
2. Push the guide plate onto the pointed end of the center pin. Insert the
center pin and guide plate assembly into the core bit. Be sure the
small end of the center pin is securely placed into the hole in the
center of the core bit (Fig. 7).
3. Insert the adapter into the nose of the tool as described in “Installing
Bits”. Set the stop rotation knob to the hammering-with-rotation
setting.
4. Press the center pin firmly against your center mark, hold the tool
firmly and pull the trigger (Fig. 8).
NOTE: If a center pin and guide plate are not available, use a tem-
plate or notched board to start the hole (Fig. 9).
5. After drilling to about the depth of the core bit teeth, remove the
center pin and guide plate from the core bit. Resume drilling.
6. To change the core bit, hold the tool upwards, pointing it away from
your body as shown, and run it briefly in forward to loosen the core
bit from the adapter (Fig. 10).
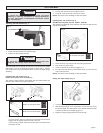
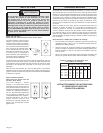
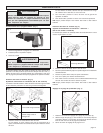
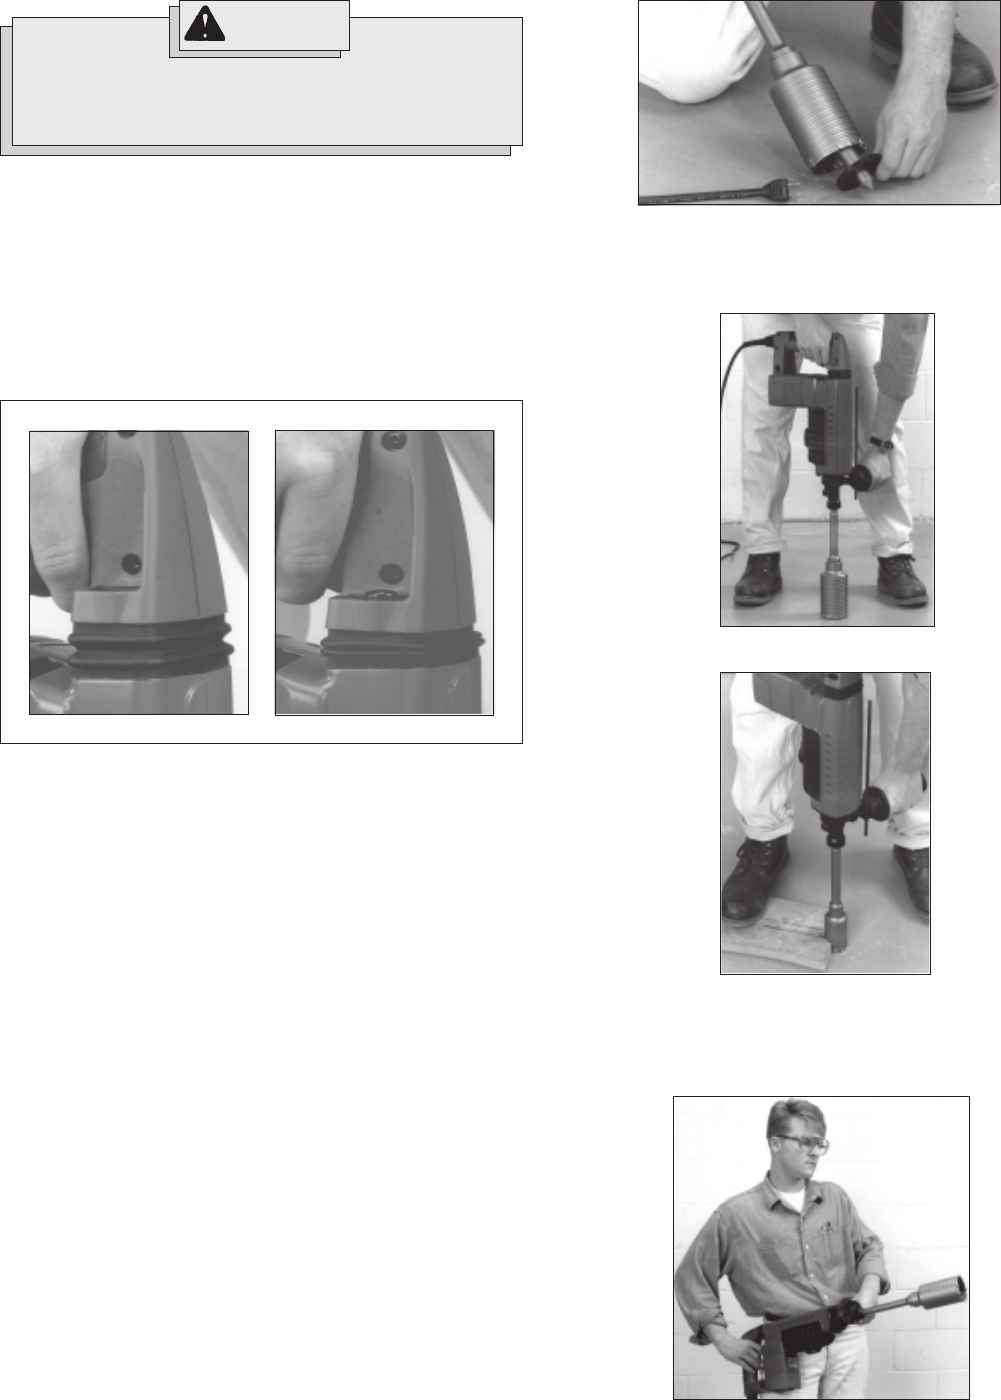
Operator Force (Fig. 6)
These rotary hammers feature the Vibration Isolation System to provide
the operator with comfort without sacrificing power or performance.
The motor is suspended independently from the switch handle.
Insulating elements absorb up to 50% of the vibration when hammering
and drilling.
Ideal operator force compresses the bellows slightly and allows the tool
to work aggressively while the handle remains steady.
Excessive force compresses the bellows significantly and reduces vi-
bration dampening. Users will be able to feel the difference and should
adjust the force to the handle accordingly (Fig. 6).
Fig. 7
Fig. 8
Fig. 9
Fig. 10
WARNING!
Applying greater pressure does not increase the tool's
effectiveness. If the applied working pressure is too high, the
shock absorber will be pushed together making the
vibrations to the handle noticeably stronger.
ideal applied force
excessive applied force
Fig. 6
NOTE: To make deeper holes, remove the core bit, break and remove the
core. Resume drilling.