14 15
Quik-Lok
®
Cord Sets
8' - Cat. No. 48-76-4008
25' - Cat. No. 48-76-4025
Carrying Case
Cat. No. 48-55-0711
FIVE YEAR TOOL
LIMITED WARRANTY
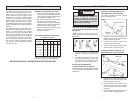
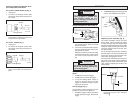
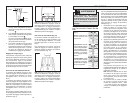
1. Insert screw into the hex socket and
align the screw against the work
surface.
2. Pull the trigger while pushing the tool
forward. This motion will engage the
drive clutch, causing the screw to start
rotating. If pressure is not maintained on
the tool, the drive clutch will disengage
and the screw will stop rotating.
When the selected torque is fully
reached, the torque clutch will ratchet.
If the screw is not fully seated, increase
the torque setting number until the
desired torque is obtained.
NOTE: Practice driving screws into
pieces of scrap material to become
familiar with the tool and the clutch
action before attempting to drive screws
into the workpiece.
3. To remove screws, switch the forward/
reverse switch to the reverse position.
Driving Wood Screws
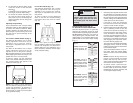
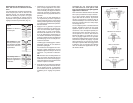
When driving wood screws, a pilot hole is
recommended to make driving easier and
to prevent splitting the wood. As a general
rule, the pilot hole should have a diameter
of approximately 70% the size of the screw
diameter. Hardwood pilot holes should have
a diameter of approximately 90% the size of
the screw diameter. The depth of the pilot
hole should be shorter than the length of the
screw by at least one screw diameter. This
allows the tip of the screw to bite into the
wood for extra holding power.
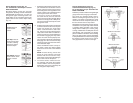
Counterbore the top portion of the hole for
a free fi t of the shank between the screw
head and the threads. When using fl at head
screws, countersink the top of the hole to
allow the screw head to be driven fl ush with
the work surface. Use soap or wax for easier
screw insertion if necessary.
Maintaining Tools
Keep your tool in good repair by adopting a
regular maintenance program. Before use,
examine the general condition of your tool.
Inspect guards, switches, tool cord set and
extension cord for damage. Check for loose
screws, misalignment, binding of moving
parts, improper mounting, broken parts and
any other condition that may affect its safe
operation. If abnormal noise or vibration oc-
curs, turn the tool off immediately and have
the problem corrected before further use.
Do not use a damaged tool. Tag damaged
tools “DO NOT USE” until repaired (see
“Repairs”).
Under normal conditions, relubrication is not
necessary until the motor brushes need to
be replaced. After six months to one year,
depending on use, return your tool to the
nearest MILWAUKEE service facility for the
following:
• Lubrication
• Brush inspection and replacement
• Mechanical inspection and cleaning
(gears, spindles, bearings, housing,
etc.)
• Electrical inspection (switch, cord,
armature, etc.)
• Testing to assure proper mechanical and
electrical operation
WARNING
To reduce the risk of injury, always un-
plug your tool before performing any
maintenance. Never disassemble the
tool or try to do any rewiring on the
tool's electrical system. Contact a
MILWAUKEE service facility for ALL
repairs.
WARNING
To reduce the risk of injury, electric
shock and damage to the tool, never
immerse your tool in liquid or allow a
liquid to fl ow inside the tool.
MAINTENANCE
Cleaning
Clean dust and debris from vents. Keep
the tool handles clean, dry and free of oil
or grease. Use only mild soap and a damp
cloth to clean your tool since certain cleaning
agents and solvents are harmful to plastics
and other insulated parts. Some of these
include: gasoline, turpentine, lacquer thinner,
paint thinner, chlorinated cleaning solvents,
ammonia and household detergents con-
taining ammonia. Never use fl ammable or
combustible solvents around tools.
Repairs
If your tool is damaged, return the entire tool
to the nearest service center.
ACCESSORIES
WARNING
To reduce the risk of injury, always
unplug the tool before attaching or
removing accessories. Use only spe-
cifi cally recommended accessories.
Others may be hazardous.
For a complete listing of accessories refer to
your MILWAUKEE Electric Tool catalog or go
on-line to www.milwaukeetool.com. To obtain
a catalog, contact your local distributor or a
service center.
Every MILWAUKEE tool is tested before
leaving the factory and is warranted to be
free from defects in material and workman-
ship. MILWAUKEE will repair or replace (at
MILWAUKEE’s discretion), without charge,
any tool (including battery chargers) which
examination proves to be defective in ma-
terial or workmanship from fi ve (5) years
after the date of purchase. Return the tool
and a copy of the purchase receipt or other
proof of purchase to a MILWAUKEE Factory
Service/Sales Support Branch location or
MILWAUKEE Authorized Service Station,
freight prepaid and insured. This warranty
does not cover damage from repairs made
or attempted by other than MILWAUKEE au-
thorized personnel, abuse, normal wear and
tear, lack of maintenance, or accidents.
The warranty period for V28 Battery Packs
is two (2) years from the date of purchase.
The warranty period for Ni-Cd battery Packs,
Flashlights, Radios are warranted for one (1)
year from the date of purchase.
THE REPAIR AND REPLACEMENT REM-
EDIES DESCRIBED HEREIN ARE EXCLU-
SIVE. IN NO EVENT SHALL MILWAUKEE
BE LIABLE FOR ANY INCIDENTAL, SPE-
CIAL, OR CONSEQUENTIAL DAMAGES,
INCLUDING LOSS OF PROFITS.
THIS WARRANTY IS EXCLUSIVE AND IN
LIEU OF ALL OTHER WARRANTIES, OR
CONDITIONS, WRITTEN OR ORAL, EX-
PRESSED OR IMPLIED FOR MERCHANT-
ABLILITY OR FITNESS FOR PARTICULAR
USE OR PURPOSE.
This warranty gives you specifi c legal rights.
You may also have other rights that vary from
state to state and province to province. In
those states that do not allow the exclusion of
implied warranties or limitation of incidental
or consequential damages, the above limi-
tations or exclusions may not apply to you.
This warranty applies to the United States,
Canada, and Mexico only.


