


6 7
ASSEMBLY
WARNING
Always lock trigger or remove
battery pack before changing or
removing accessories. Only use
accessories specifically recom-
mended for this tool. Others may
be hazardous.
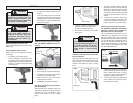
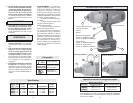
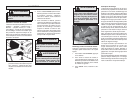
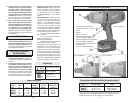
Attaching and Removing the Tool Hanger
(Cat. No. 9098-23, 9099-20 or as an ac-
cessory)
Fig. 3
Gear case
screws
Tool
hanger
Ring
1. To attach, remove the two top gear case
screws (Fig. 3).
2. Place the ring through the tool hanger.
3. Position the tool hanger on the tool over
the two gear case screw holes.
4. Replace the two gear case screws.
Hand tighten the screws.
5. To remove, reverse the procedure.
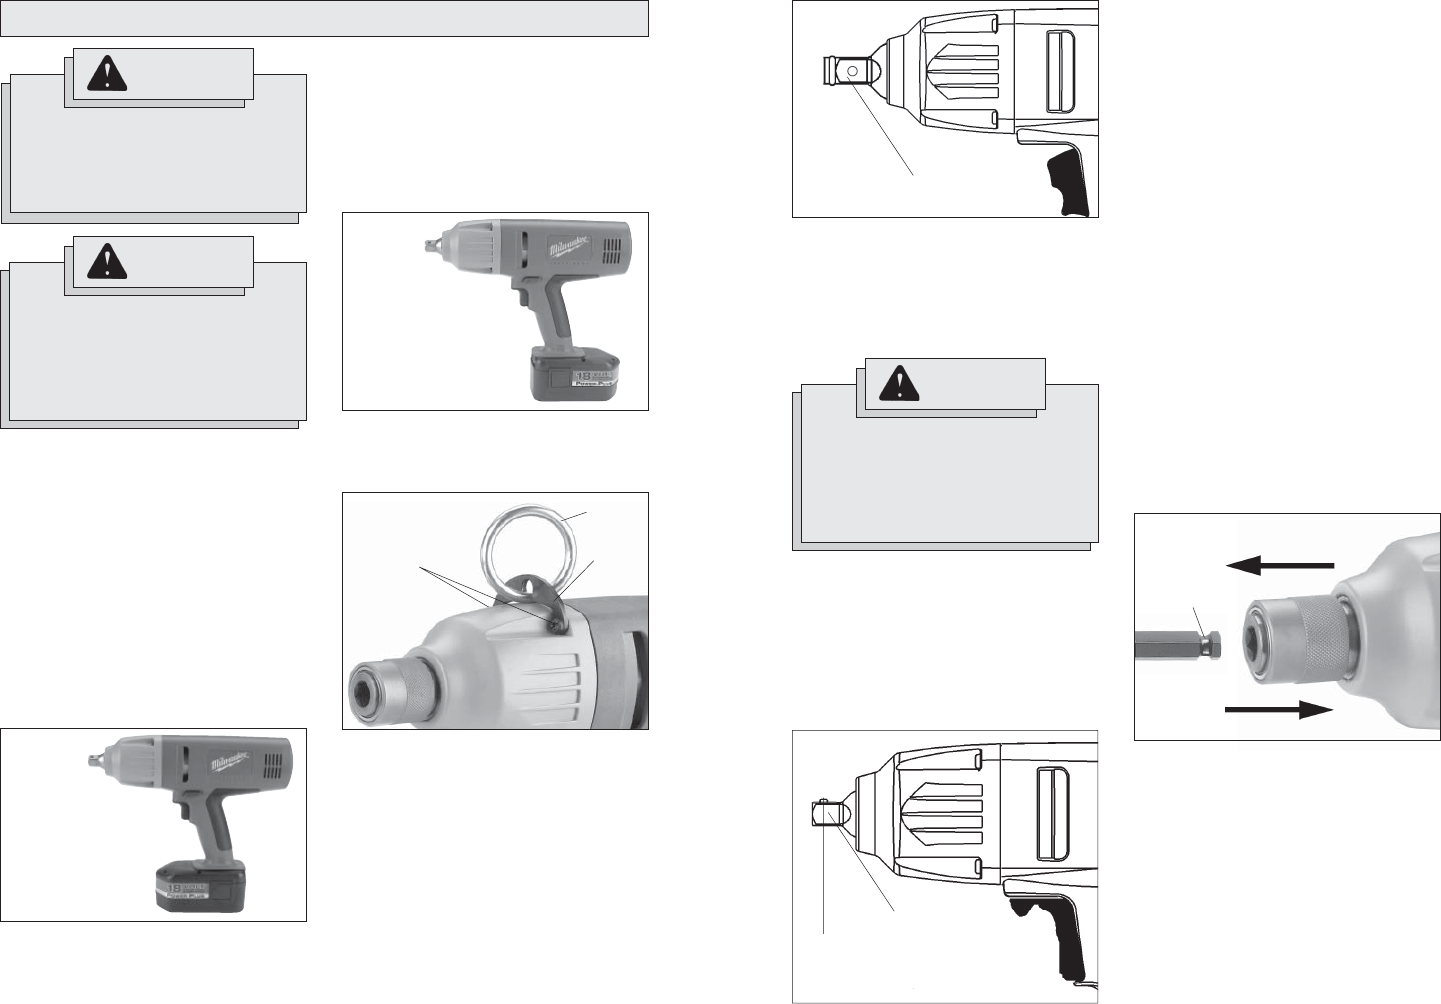
Attaching and Removing Accessories
(Cat. No. 9078-20)
This impact wrench is intended only for use
with sockets designed for impact wrenches
and that have a 3/4" square drive. Other
sockets could shatter or break, causing
injury.
Attaching and Removing Accessories
(Cat. No. 9079-20)
This impact wrench is intended only for use
with sockets designed for impact wrenches
and that have a 1/2" square drive. Other
sockets could shatter or break, causing
injury.
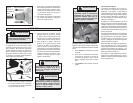
Fig. 5
Drive shank
Detent pin
1. To attach a socket or other accessory,
align the hole in the accessory with the
detent pin on the drive shank. Hold the
detent pin in while pushing the socket
onto the drive shank. The detent pin will
snap into place in the hole to secure the
socket.
2. To remove the accessory, insert a nail
or other thin object into the hole in the
accessory and press the detent pin in.
Pull the accessory off the drive shank.
1. To attach a socket or other accessory,
push the accessory onto the drive
shank until it snaps into place.
2. To remove the accessory, pull it off the
drive shank.
Fig. 4
Drive shank
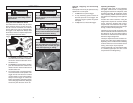
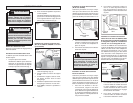
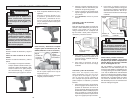
Removing Battery Pack from Tool
Push in the release buttons and remove the
battery pack.
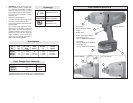
Inserting Battery Pack into Tool
Battery pack can be inserted into the tool
in two ways.
1. For working in restricted spaces.
Insert the battery pack from the front
by pressing in the release buttons and
sliding battery pack into the body of the
tool (Fig. 1). Insert the battery pack until
clamp engages.
Fig. 1
Fig. 2
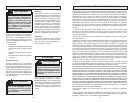
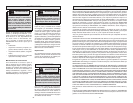
Attaching and Removing Accessories
Cat. No. 9098-23, 9099-20, or other Impact
Wrenches using the Quick Change 1/2"
Square Drive to 7/16" Hex Adapter
Cat. No. 9099-20 and accessory Cat. No.
48-66-0061 are intended for use with drill
bits and adapters with a 7/16" Hex Quick
Change shank. Cat. No. 9098-23 is intended
for use with drill bits and adapters with a
5/8" Hex Quick Change shank. Both Hex
Quick Change shanks have a ball-retainer
groove. They are not intended for use with
Hex Shank Bit Extensions.
Fig. 6
Open (Release)
Closed (Locked)
Ball-retainer
groove
1. To attach an accessory, pull the chuck
collar forward and insert the accessory
shank. Release the collar. It may be
necessary to pull the bit out slightly to
engage the holding mechanism.
2. To remove the accessory, pull the chuck
collar forward and remove the acces-
sory. Release the collar.
2. For optimum weight distribution and
balance.
Insert the battery pack from the back
by pressing in the release buttons and
sliding the battery pack into the body of
the tool (Fig. 2). Insert the battery pack
until clamp engages.
WARNING
Use only sockets and other acces-
sories specifi cally designed for use
on impact wrenches and drivers.
Other sockets and accessories
might shatter or break causing
injury.
WARNING
Recharge only with the charger
specifi ed for the battery pack. For
specifi c charging instructions, read
the operator's manual supplied with
your charger and battery pack.