


page 5
TOOL ASSEMBLY
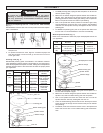
Removing and Replacing Quik-Lok
®
Cords (Cat. No. 5460 and 5540)
(Fig. 1)
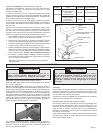
MILWAUKEE's exclusive Quik-Lok
®
Cords provide instant field replace-
ment or substitution.
Fig. 1
1. To remove the Quik-Lok
®
Cord, turn the cord nut 1/4 turn to the left
and pull it out.
2. To replace the Quik-Lok
®
Cord, align the connector keyways and
push the connector in as far as it will go. Turn the cord nut 1/4 turn
to the right to lock.
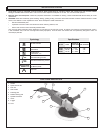
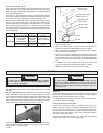
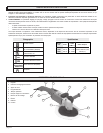
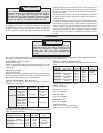
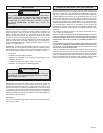
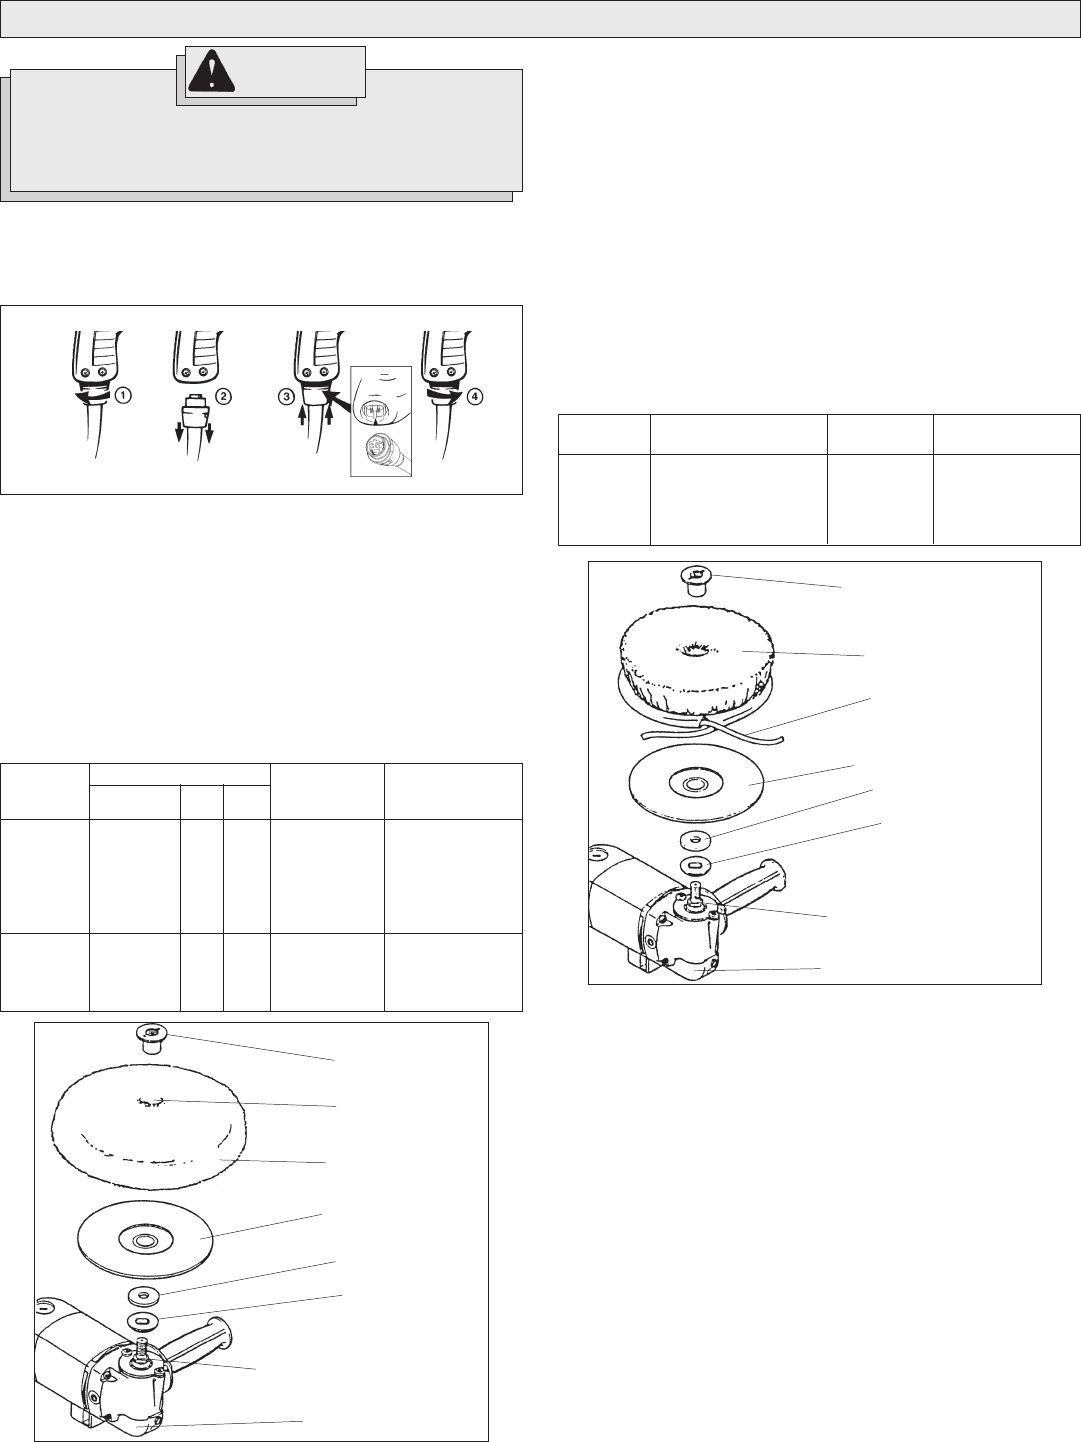
Polishing Pads (Fig. 2)
MILWAUKEE polishing pads are available in two different materials.
100% lambswool pads are ideal for compounding on non-clearcoat fin-
ishes. Wool/polyester blend pads are softer, making them acceptable for
clearcoat finishes. Refer to the chart below to select the proper pad for
your application.
1. To install polishing pads, unplug the tool and place it on its tool rest
with the spindle upright.
2. Make sure the washer flange and spindle washer are installed on
spindle. Then, slide the disc nut through the arbor hole in both the
polishing pad and the rubber backing pad, making sure to spread the
fibers in the pad so the disc nut seats on pad backing.
3. Push in the spindle lock button (located on left side of gear case)
and simultaneously screw the disc nut & polishing pad assembly
clockwise onto the spindle. Securely hand-tighten the disc nut and
polishing pad.
4. To remove the polishing pad, push in the spindle lock button and
turn the disc nut counterclockwise to unscrew the assembly.
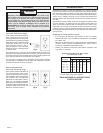
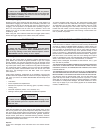
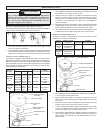
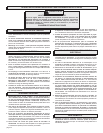
Wool/Polyester Bonnets (Fig. 3)
Refer to the chart below to select the proper wool/polyester bonnet for
your application.
1. To install wool/polyester bonnets, unplug the tool and place it on a
tool rest with the spindle upright.
2. Make sure the washer flange and spindle washer are installed on
spindle. Then, slide the rubber backing pad onto the spindle.
3. Push in the spindle lock button and screw the disc nut onto the
spindle clockwise. Securely hand-tighten the disc nut.
4. Cover the rubber backing pad with the bonnet. Securely tie bonnet
strings and tuck the strings into the bonnet so they do not interfere
with polishing.
5. To remove, untie and remove the bonnet. Push in the spindle lock
button and turn the disc nut and rubber backing pad counterclock-
wise.
Fig. 2
Arbor hole
Disc nut
Polishing pad
Rubber backing pad
Spindle washer
Washer flange
Spindle
Tool rest
Pile
Depth
1-1/2"
2"
1-1/2"
1-1/2"
1-1/2"
Polishing Pad
Pad
Size
7-1/2"
7"
7-1/2"
9"
9"
Application
Compounding
Compounding
High Gloss
Finishing
Compounding
High Gloss
Finishing
Recommended
Surface
Paints, clearcoats
and fiberglass
Paints, clearcoats
and fiberglass
Paints and
clearcoats
Paints, clearcoats
and fiberglass
Paints and
clearcoats
Backing
Pad
49-36-2500
(7")
49-36-2200
(9")
49-36-1450
100% Wool
49-36-1455
100% Wool
49-36-0500
Wool/Poly.
49-36-1600
100% Wool
49-36-0700
Wool/Poly.
Fig. 3
Wool/polyester bonnet
Disc nut
Bonnet strings
Rubber backing pad
Spindle washer
Washer flange
Spindle
Tool rest
Backing
Pad
49-36-2500
(7")
49-36-2200
(9")
Bonnets
48-48-0500
Wool/Poly Bonnet 7"
48-48-1000
Wool/Poly Bonnet 9"
Application
High Gloss
Finishing
High Gloss
Finishing
Recommended
Surface
Non-clearcoat or
clearcoat
Non-clearcoat or
clearcoat
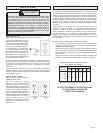
WARNING!
To reduce the risk of injury, always unplug tool before
attaching or removing accessories or making adjustments.
Use only specifically recommended accessories. Others
may be hazardous.