


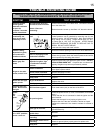
13
W415-0689 / 06.25.08
Closing the air shutter will cause
a more yellow fl ame, but can
lead to carboning. Opening the
air shutter will cause a more
blue fl ame, but can cause fl ame
lifting from the burner. The
flame may not appear yellow
immediately; allow 15 to 30
minutes for the fi nal fl ame color
to be established.
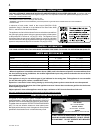
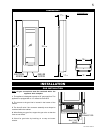
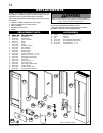
NOTE: It is important that the venturi sits down tight on
the orifi ce. The burner is adjustable up/down to ensure
this. The electrode sensors should be located 1/4” above
the burner for proper operation.
ADJUSTMENTS
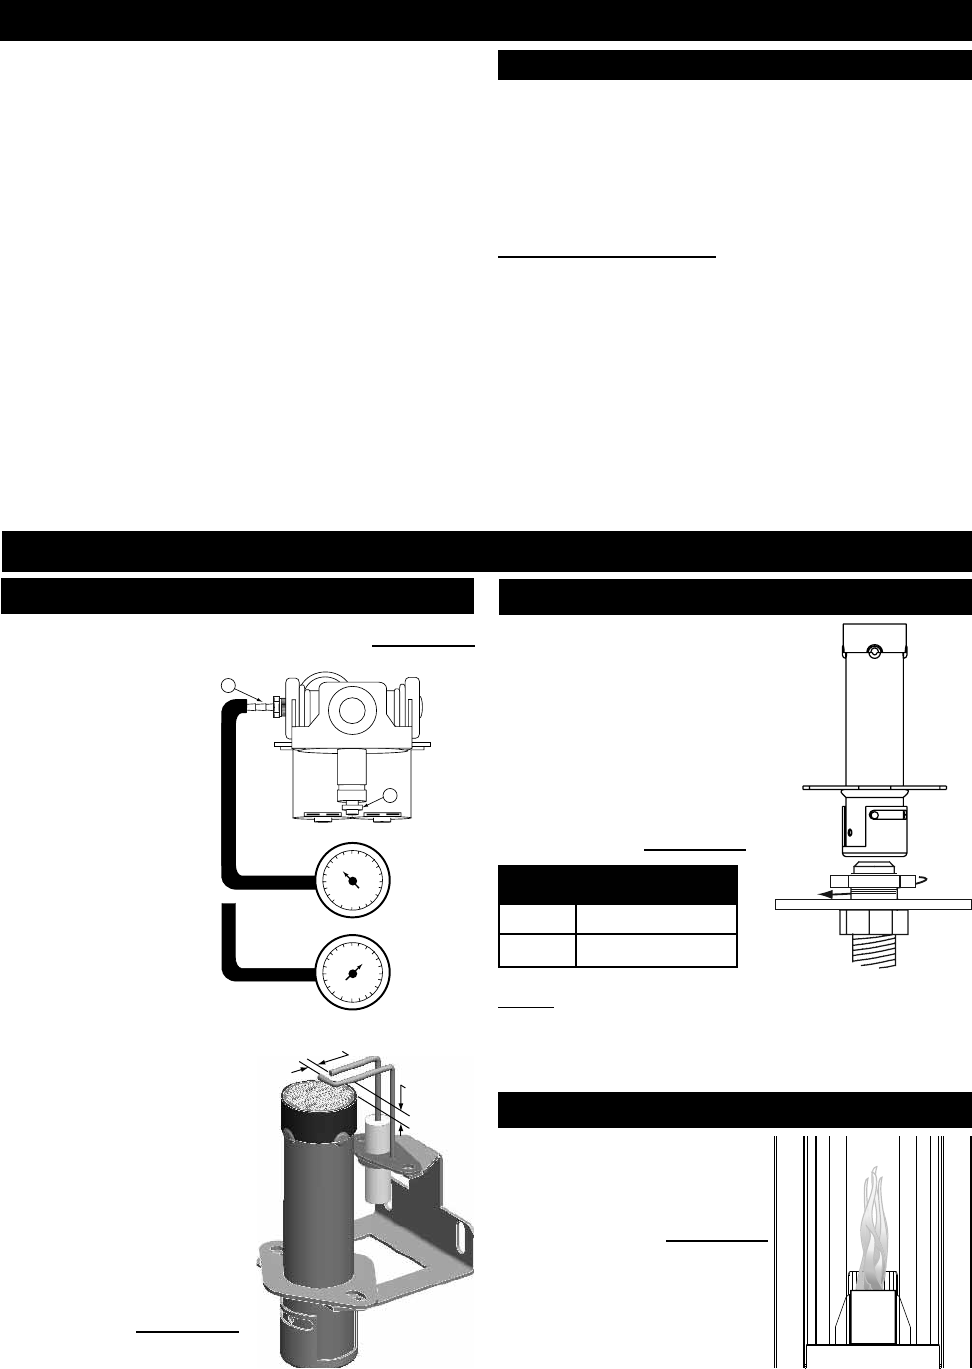
GAS PRESSURE ADJUSTMENT
VENTURI ADJUSTMENT
ORIFICE
VENTURI
BURNER
AIR
SHUTTER
OPENING
FIGURE 21
AIR SHUTTER OPENINGS
LP 3/16” DIA
NG 1/16” DIA
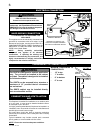
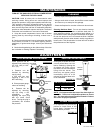
Outlet pressure can be
adjusted if not measuring
3.5” W.C. (NG) or 10.0”
W.C. (LP).
1. Pressure can be
checked by removing
cap (A) using
a 3/16 allen key and
replacing it with a 1/8
NPT barb fi tting.
2. Place pressure gauge
tube over the fi tting.
3. Pressure can be
adjusted by removing
cap (B) using a fl at
screwdriver, and
adjusting the nylon plug
with the same screw
driver. Turning the plug in
(clockwise) will increase
the pressure.
FIGURE 20
A
B
1/8
NPT BARB
FITTING
3.5
10
NATURAL
GAS
PROPANE
GAS
PRESSURE
GAUGE
FIGURE 19
TURN OFF THE GAS AND ELECTRICAL POWER BEFORE
SERVICING THE APPLIANCE.
CAUTION: Label all wires prior to disconnection when
servicing controls. Wiring errors can cause improper and
dangerous operation. Verify proper operation after servicing.
This appliance should be inspected before use and at
least annually by a qualifi ed service person. The appliance
area must be kept clear and free of combustible materials,
gasoline or other fl ammable vapours and liquids. The fl ow of
combustion and ventilation air must not be obstructed.
1. Keep the control compartment, burner, and air shutter
opening clean by vacuuming or brushing, at least once a
year.
2. Check to see that the main burner ignites when the switch
for the burner is turned on. A 5 second light-up period is
satisfactory. If ignition takes longer, consult your authorized
dealer.
3. Check that the gasketing on the sides and top of the door
are not broken or missing. Replace if necessary.
MAINTENANCE
It is important to periodically
perform a visual check of the
burner fl ame. Compare them to
the illustration provided.
FLAME CHARACTERISTICS
FIGURE 22
• Visually inspect the appliance for carbon buildup.
• Using a small whisk or brush, brush off the excess carbon
and vacuum up or sweep into the garbage.
• Check the fi replace for corrosion of the main burner base.
Cleaning Stainless Steel: Do not use abrasive cleaners
to clean any painted, porcelain or stainless steel parts. To
clean stainless surfaces, use a stainless steel cleaner or a
non-abrasive cleaner. Always wipe in the direction of the grain.
Do not use steel wool, as it will scratch the fi nish. Stainless
steel parts will discolour when heated, usually to a golden or
brown colour. This discoloration is normal and will not affect
the performance of the fi replace.
CLEANING
1/8”
1/4”