


www.norcold.com/cda 41N6XX/N8XX ModelsRefrigerator Service Manual
Replacing the Cooling Unit
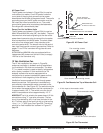
5. Disconnect the RV LP gas supply line from the
gas valve.
N64XIM/N84XIM (ice maker)
a. Close the water supply valve to the ice maker.
b. Disconnect the RV water supply line from the ice
maker water valve.
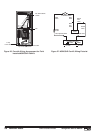
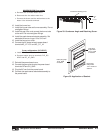
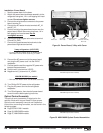
6. Remove two retaining screws from the bottom trim
piece, then remove trim piece. See Figure 31, page
44.
7. Remove two retaining screws from the bottom of
the cabinet. See Figure 31, page 44.
8. Remove two hole plugs from the top trim. See
Figure 32, page 44.
9. Remove two top cabinet retaining screws. See
Figure 32, page 44.
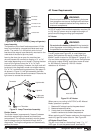
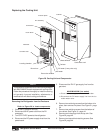
Removing the Refrigerator from the Enclosure
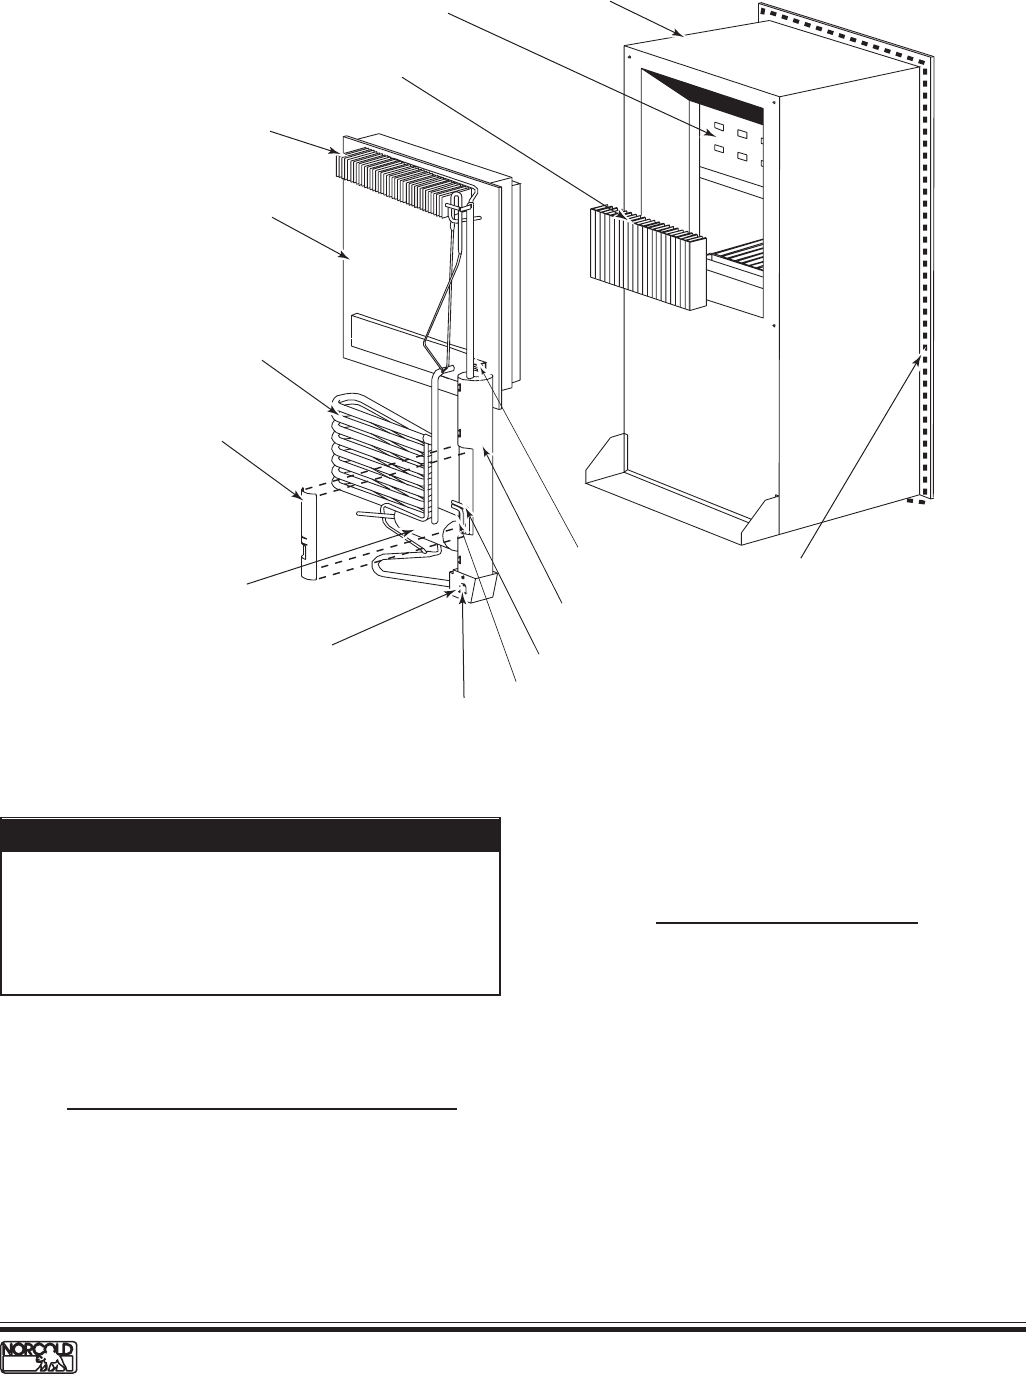
Refer to Figure 28 to locate components.
1. Close the LP gas tank valve(s).
2. Disconnect the AC power cord from the RV
receptacle.
3. Turn OFF RV DC power to the refrigerator.
4. Disconnect the DC power supply wires from the
power board.
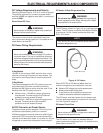
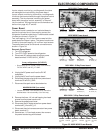
Figure 28. Cooling Unit and Components.
Cabinet
Fin assembly
Foam block
Heat deflector
Canister
Burner box
AC heater
DC heater (3-way units only)
Absorber
Canister door
Freezer plate
Condenser
Burner box window
Combustion seal
Leveling chamber
NOTE
This procedure supplements the instructions packaged
with N6XX/N8XX models replacement cooling units.
Follow the procedure thoroughly to install the cooling
unit correctly. Incorrect installation, adjustments, or
modifications will affect cooling performance.