


11 GB
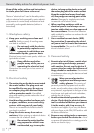
Before first use
1. Insert the battery pack
7
into the quick-
charger
10
(see Fig. C).
2. Insert the power plug into the socket. The now
glowing red charging control LED
12
indicates
that the charging process has begun. The red
charging control LED
12
extinguishes as soon
as the battery pack is fully charged.
3. The green charging control LED
11
signals to
you that the charging process is complete and
the battery pack
7
is ready for service.
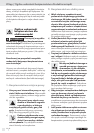
½ Never charge the battery pack for a second time
immediately after a fast charging process has
been completed. This can give rise to the battery
pack becoming overcharged and to a reduced
service life of the battery and charging station.
˽ Switch the charger off for at least 15 minutes
between two successive charging procedures.
Remove the power plug from the wall socket.
©
Insertion / removal of a battery
pack into the appliance
Ensure that the appliance is switched off before in-
serting the battery. The insertion of a battery into an
electrical appliance that is switched on can lead to
accidents.
Inserting the battery pack:
˽ Bring the rotation direction switch
3
into the
middle position (Locked) and insert the battery
pack
7
into the handle until it engages.
Removing the rechargeable battery pack:
˽ Press the release button
6
and remove the
rechargeable battery pack
©
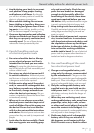
Checking battery status
˽ To check the battery status, press the battery
LED button
2
(see also Fig.). The status or re-
sidual capacity will be indicated in the battery
LED
2
as follows:
GREEN / RED / ORANGE = maximum charge /
capacity
RED / ORANGE = medium charge / capacity
RED = weak charge – recharge battery
©
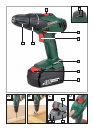
Changing tools
Your cordless electric drill / screwdriver has a fully
automatic spindle lock
and is fitted with an
enclosed keyless chuck incorporating the latest
technology from
”Made in Germany”.
Once the motor has come to a halt, the drive shaft
is automatically locked, so that the chuck
9
can
be opened simply by turning it
.
After you have inserted the required bit and fixed it
in place by turning the chuck
, you can immedi-
ately continue working. The spindle lock releases
itself automatically when the motor is started (by
operation of the ON / OFF switch
4
).
©
Torque pre-selection
You can adjust the torque by using
8
torque pre-
selection. The torque levels regulate a range of up
to ca. 8 Nm.
˽ Select a low setting for small screws, soft work
material.
˽ Select a high setting for large screws, hard
work materials and for the extraction of screws.
˽ For drilling, push the selector to the setting for
drilling, in that you adjust the torque pre-selector
to the position
.
˽ For drilling tasks, also push the gear selector
switch
1
to the front (Position: 2).
©
2 Gear Drive
CAUTION! Move the gear selector switch
1
only after the device has come to a standstill.
Failure to observe this advice may result in damage
to the device.