


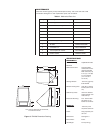
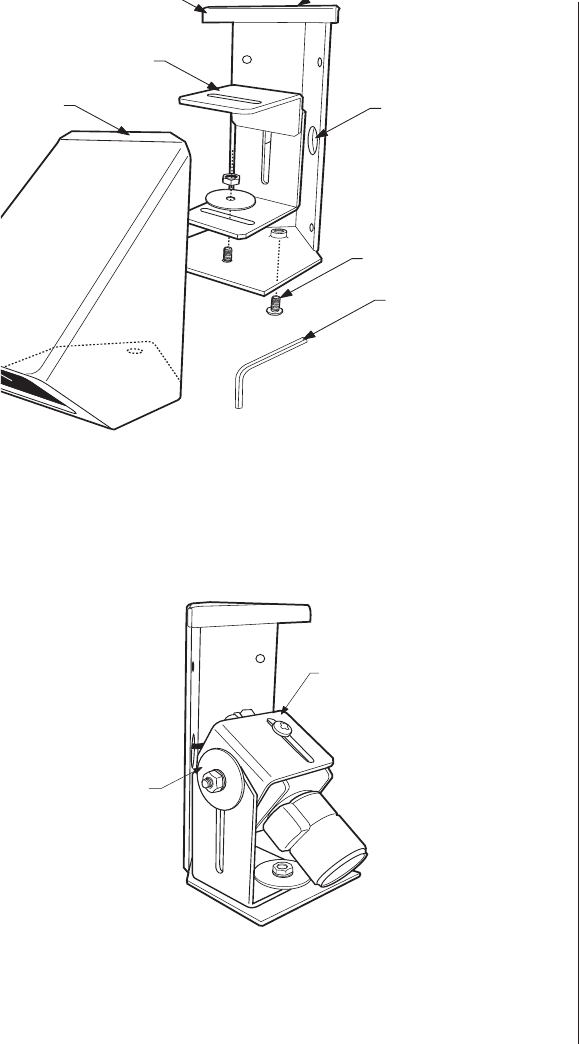
To install the EH2200 refer to Figure 1 and
do the following:
1. Ensure that the mounting surface is
capable of supporting four times the
weight of the enclosure, camera and
lens.
2. Remove the cover by loosening the
tamper-resistant screw with the
enclosed hex key.
3. Remove the tilt table assembly.
4. Determine the mounting location. Use
the mounting bracket as a template and
mark the four fastener positions onto
the mounting surface.
5. Remove the appropriate knockouts
needed for camera power and video
wiring. Pull wiring into the enclosure.
6. Fasten the mounting bracket to the
surface. Secure with a recommended
minimum of 1/4-20 screws (not
supplied).
7. Reinstall the tilt table assembly.
8. Mount the camera and lens to the top
or bottom of the tilt table with the
1/4-20 x .375-inch screw. Extend the
lens to its maximum length before in-
stalling. This will ensure that the lens
has enough clearance and will not hit
the window during focusing. Refer to
Figure 2.
9. Replace the enclosure cover. Check
that all components clear the cover and
that the camera angle and lens
adjustments are satisfactory. When all
adjustments are complete, secure the
cover.
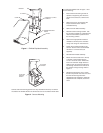
KNOCKOUT-1/2-INCH
CONDUIT
TAMPER-RESISTANT
SCREW
HEX KEY
BRACKET
TILT TABLE
COVER
ADJUSTABLE
MOUNTING
BRACKET
ADJUSTABLE
TOP MOUNT
Figure 1. EH2200 Exploded Assembly
Camera and lens mounting position can vary. Illustration shows top of camera
mounted to the tilt table. Bottom of camera also can be mounted to the tilt table.
Figure 2. Camera Mounting