8
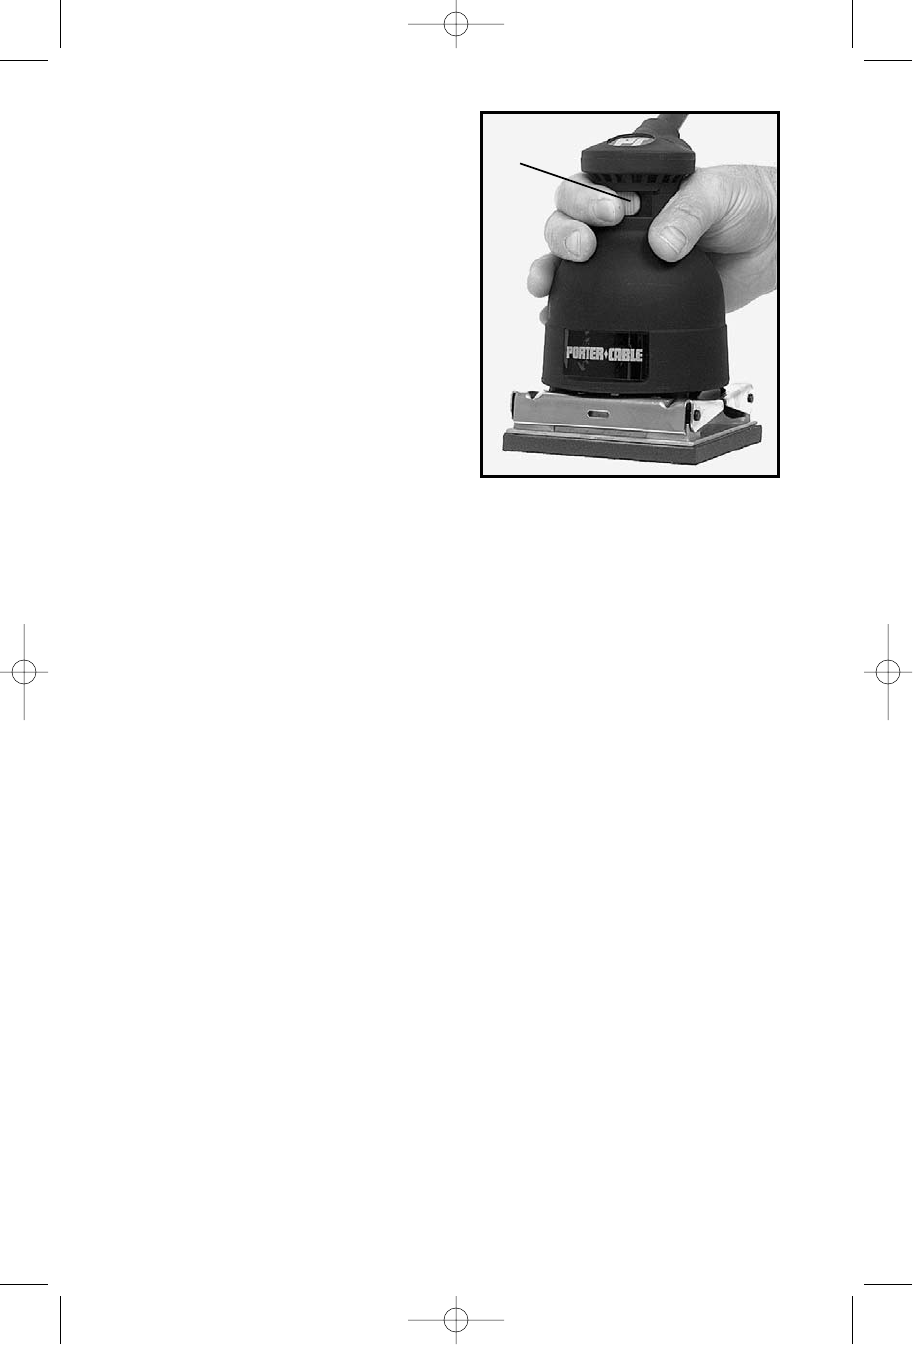
4. While holding sander firmly and off
of work surface, slide switch (A), Fig. 3,
to the “ON” position.
5. Allow sander to reach full speed.
Set it down on the work evenly and
move it slowly back and forth in wide
overlapping arcs (see SANDING
PROCEDURE).
6. When you are finished sanding, lift
sander up off work and slide switch
(A), Fig. 3, to the “OFF” position to
stop sander.
USING THE SANDER
SANDING PROCEDURE
The Porter-Cable Finishing Sander has
been designed for one-hand operation
(Fig. 3). Because it is light in weight, vibration-free and perfectly balanced, the
sander can be easily guided over the work surface with one hand. The normal
weight of the machine is sufficient for efficient sanding. Do not put additional
pressure on the machine. This would only slow down the speed of the pad,
reducing the sanding efficiency and put an additional burden on the motor. In
addition, it might cause the sander to jump on the work. Let the sander do the
work.
FINE FINISHING
The action of the Porter-Cable Finishing Sander causes thousands of tiny
abrasive grits to move in circular orbits against the work at high speed. Each
grain moves in the same direction at a constant speed so the cutting action
is uniform over the entire pad surface. Crossing and re-crossing of the
abrasive grits from all directions quickly levels surface irregularities to a fine,
uniform smoothness. Start the work with an abrasive grit just coarse enough
to remove the high spots and excessive roughness. Follow with a second
sanding using a grit one or two grades finer. Continue with successively finer
grits until the desired finish is obtained. DO NOT GO FROM A COARSE GRIT
TO A VERY FINE GRIT IN ONE STEP.
Going from a coarse grit to a very fine grit in one step could make it difficult
to remove swirl marks that might have been made by the coarse grit
abrasive. Use the finest grits practical for the roughing operation and then
finish by using successively finer grits.
REMOVING PAINT AND VARNISH
CAUTION: Read and follow all instructions in the ADDITIONAL
SAFETY RULES FOR PAINT REMOVAL section of this manual.
Your sander will do a good job of removing old paint and varnish if two
precautions are taken. First, be sure to use a coarse, open coat abrasive to
avoid the usual clogging of the abrasive surfaces. Second keep the machine
moving over new areas to avoid heating and softening the material being
removed. Try to work the entire surface down at the same time by working in
Fig. 3
A
900316 - 02-19-02.qxd 3/4/02 2:15 PM Page 8


