


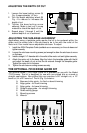

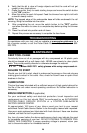

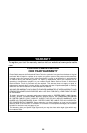
1. Loosen the bit in the collet (See "TO INSTALL & REMOVE THE BIT").
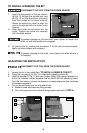
2. Place the hex wrench (A) Fig. 14 in the depth-adjusting screw (B).
3. Hold the spindle (C) Fig. 14 with your fingers. Apply light upward pressure on
the bit to maintain contact between the bit shank and the adjusting screw.
Turn the hex wrench counter-clockwise to increase exposure and clockwise
to decrease exposure.
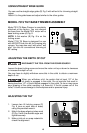
4. To turn the sub-base over for long-shank bits:
A. Remove three sub-base mounting screws.
B. Turn sub-base over and re-attach using screws removed in STEP A.
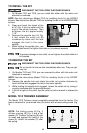
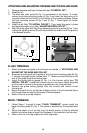
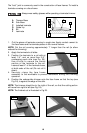
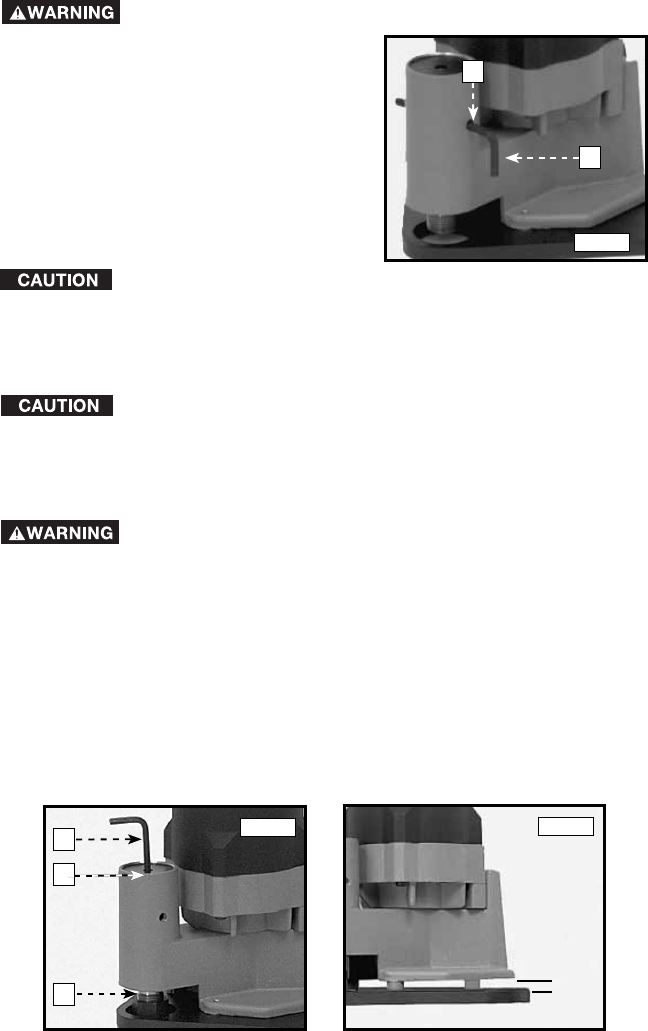
1. Insert the long portion of the hex wrench
(A) Fig. 13 through the spindle lock hole
(B) Fig. 13, so that the wrench protrudes
from both sides of the base housing.
Rotate the spindle by hand to align the
hole in the spindle with the holes in the
housing.
2. Clean and insert the bit shank into the
collet. Tighten the collet nut securely
with the collet wrench.
To prevent damage to the drive belt, never tighten or loosen the
collet nut with the spindle lock engaged.
3. To remove the bit, reverse the procedure. If the bit will not remove easily,
lightly tap the bit shank with a wrench.
To prevent damage to the collet, never tighten the collet without a
bit inserted.
15
TO INSTALL & REMOVE THE BIT
DISCONNECT THE TOOL FROM THE POWER SOURCE!
ADJUSTING THE DEPTH OF CUT
DISCONNECT THE TOOL FROM THE POWER SOURCE!
Fig. 13
A
B
SUB-BASE
INVERTED
3
/16"
Fig. 14
Fig. 15
A
B
C