


9
The harder the material, the slower the speed required. The softer the
material, the faster the speed.
3. When drilling a large hole, it is easier to first drill a smaller hole and then
enlarge it to the required size.
4. The use of a lubricant, such as oil, on the drill point helps keep the bit
cool, increases drilling action and prolongs drill bit life.
MAINTENANCE
KEEP TOOL CLEAN
Periodically blow out all air passages with dry compressed air. All plastic
parts should be cleaned with a soft damp cloth. NEVER use solvents to clean
plastic parts. They could possibly dissolve or otherwise damage the material.
CAUTION: Wear safety glasses while using compressed air.
FAILURE TO START
Should your tool fail to start, check to make sure the prongs on the cord plug
are making good contact in the outlet. Also, check for blown fuses or open
circuit breakers in the line.
CHUCK REPLACEMENT
1. CAUTION: DISCONNECT TOOL FROM POWER SOURCE.
2. Open chuck jaws as wide as possible to gain access to the chuck
retaining screw.
3. Remove chuck retaining screw. Turn screw clockwise (left hand threads).
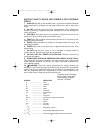
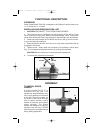
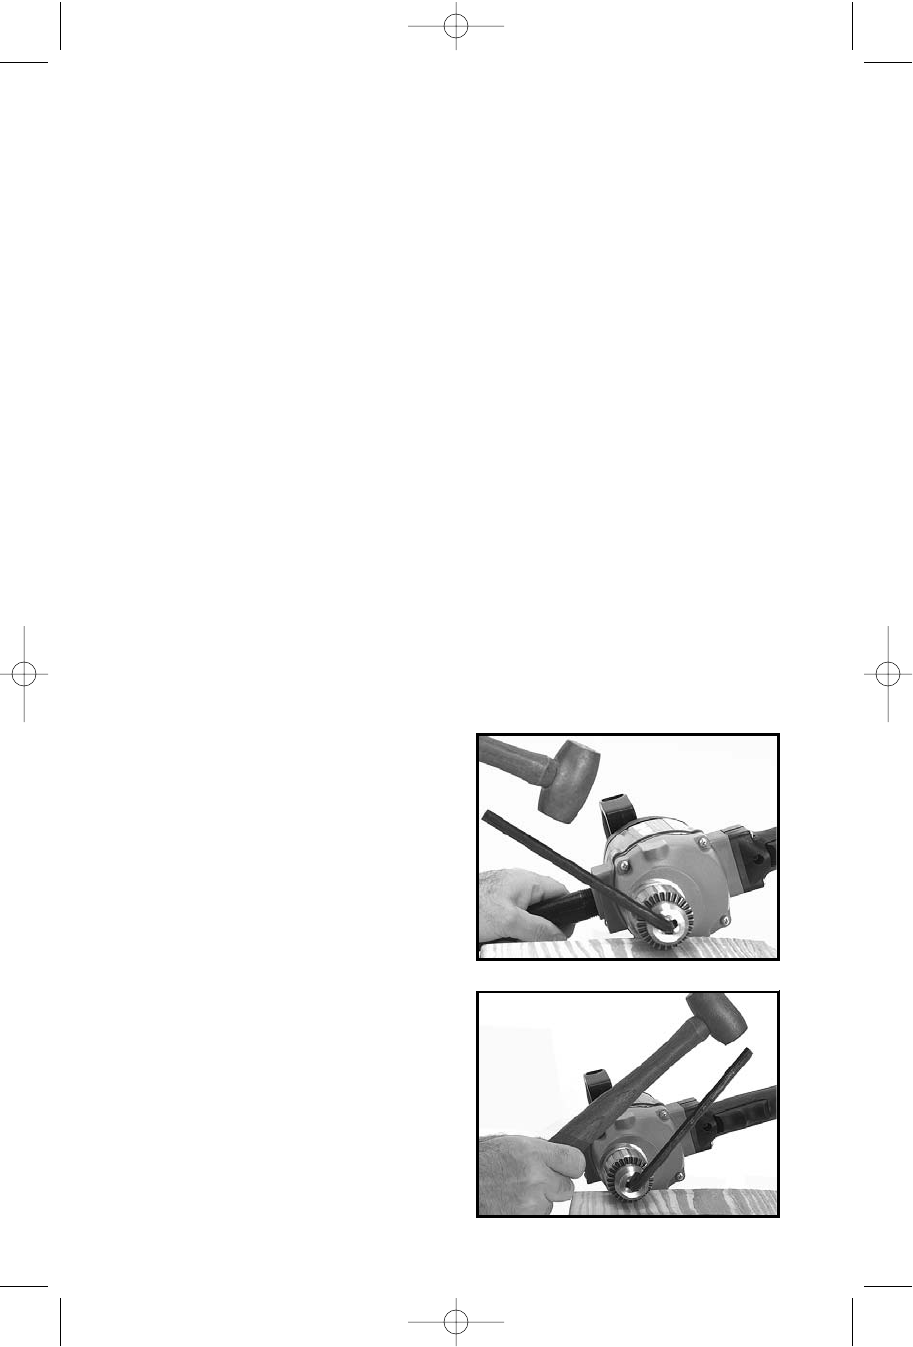
4. Place the short end of a large hex
wrench (
1
/4" or larger) into the chuck.
Align wrench flats with chuck jaws and
tighten chuck securely using chuck
key. While supporting chuck on a solid
surface, position hex wrench to left
(see Fig. 5) and strike wrench a sharp
blow with a hammer to loosen chuck.
Turn chuck counterclockwise to
remove.
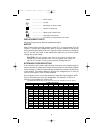
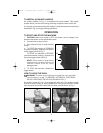
5. INSTALL CHUCK: Open jaws of
replacement chuck as wide as
possible. Thread chuck by turning
chuck clockwise. Hand tighten. Install
hex wrench in chuck (see Step 4).
While supporting chuck on a solid
surface, position hex wrench to the
right (see Fig. 6) and strike a sharp
blow with a hammer to seat chuck
onto spindle.
6. Remove hex wrench from chuck.
7. INSTALL CHUCK RETAINING
SCREW. Turn screw counterclockwise
and tighten securely.
Fig. 5
Fig. 6
REMOVE CHUCK
INSTALL CHUCK
903549 - 09-30-01.qxd 2/13/02 9:17 AM Page 9