


12
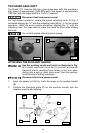
3. Insert the clamping screw (D) through the clamping plate (C), and the
auxiliary handle (B). Thread it into the nut (A). Do not tighten.
4. Slide the auxiliary handle assembly over the chuck and on the front of the
gear case.
5. Locate the handle in the desired position and align the recesses in the
handle to engage the bosses (F) Fig. 5 on the gear case. The handle may
be located in any one of 12 positions (360°) around the gear case.
6. Tighten the clamping screw (D) securely.
1. Loosen the clamping screw (D) Fig. 5.
2. Insert the depth rod (E) Fig. 5 through the hole in the auxiliary handle
being certain that the serations of the rod engage the serations on the
clamping plate (C).
3. Tighten the clamping screw (D) securely to retain both the auxiliary handle
and the depth gauge.
4. Install a drill bit as instructed in "INSTALLING AND REMOVING DRILL
BITS".
5. Loosen the clamping screw (D) Fig. 5 and adjust the depth gauge so that
the distance from the end of the depth gauge to the tip of the drill bit is
equal to the desired depth of the hole.
NOTE: If the depth gauge interferes with the drill housing, remove the auxiliary
handle from the gear case, turn it over and reassemble.
6. Tighten the clamping screw (D) securely.
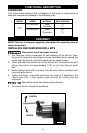
INSTALLING AND ADJUSTING THE DEPTH GAUGE
Disconnect tool from power source!
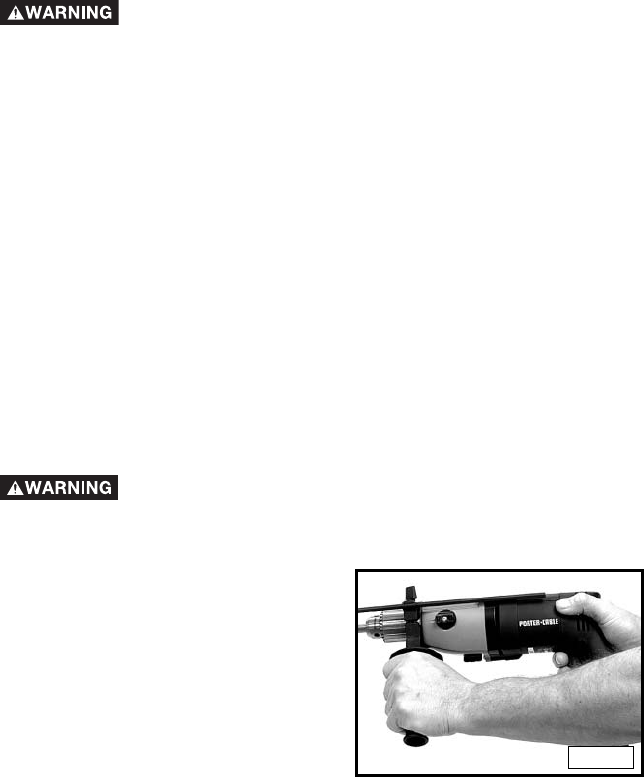
The front end of the drill may be made live if tool drills into live
wiring in a wall. TO PREVENT ACCIDENTAL ELECTRICAL SHOCK, HOLD
THE DRILL AS SHOWN IN FIG. 6.
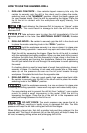
HOW TO HOLD THE HAMMER-DRILL
Fig. 6
Apply forward force ONLY on the
pistol grip handle and ONLY with your
hands when drilling. Use your other
hand to grasp the auxiliary handle to
resist the rotational force.