


MAINTENANCE
KEEP TOOL CLEAN
All plastic parts should be cleaned with a soft damp cloth. NEVER use
solvents to clean plastic parts. They could very possibly dissolve or otherwise
damage the material.
FAILURE TO START
Should your tool fail to start, make sure battery pack is charged and properly
installed in drill.
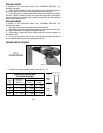
BATTERY
The battery pack will discharge by itself without damage if stored for long
periods of time, and may require recharging before use.
LUBRICATION
For your continued safety and electrical protection, lubrication and service on
this tool should ONLY be performed by an AUTHORIZED PORTER-CABLE
SERVICE STATION or a PORTER-CABLE/DELTA FACTORY SERVICE
CENTER.
At approximately 100 hours of use, take or send your tool to your nearest
Authorized Porter-Cable Service Station to be thoroughly cleaned and
inspected; worn parts replaced, when necessary; relubricated with fresh
lubricant, and performance tested.
15
SERVICE AND REPAIRS
All quality tools will eventually require servicing or replacement of parts due to
wear from normal use. These operations, including brush inspection and
replacement, should ONLY be performed by either an AUTHORIZED
PORTER-CABLE SERVICE STATION or a PORTER-CABLE/DELTA FACTORY
SERVICE CENTER. All repairs made by these agencies are fully guaranteed
against defective material and workmanship. We cannot guarantee repairs
made or attempted by anyone other than these agencies.
Should you have any questions about your tool, feel free to write us at any
time. In any communications, please give all information shown on the
nameplate of your tool (model number, type, serial number, etc.).
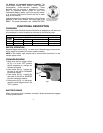
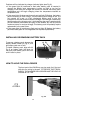
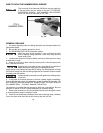
CHUCK REPLACEMENT
Remove battery pack to prevent accidental starting.
1. Open chuck jaws (A) Figs. 12 and 13 as wide as possible to gain access
to the chuck retaining screw (B) Fig. 12.
2. Remove chuck retaining screw by turning it clockwise (left-hand thread)
with a hex wrench.
3. Use a 19mm wrench on nose of chuck (B) Fig. 13. Turn counter-clockwise
to remove.
4. To install new chuck, reverse the procedure.