


8
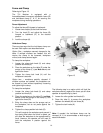
Operating Handle
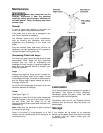
Referring to Figure 2:
The operating handle can be mounted on either
the left- or right-hand side of the mortiser. The
handle hub (D) comes mounted on the right-hand
side from the factory. If right-hand operation is
desired skip steps 1–3 and proceed to step 4. For
left-hand operation the hub must be moved to the
left side as follows:
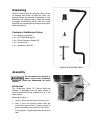
1. Unscrew and remove the hub lock knob (A),
flat washer (B), spring (C) and hub (D) from
the pinion shaft (E).
2. Remove the protective sleeve from the gear
shaft on the left side of the mortiser.
3. Install the hub (D), spring (C) and flat washer
(B) on the left-side pinion shaft and secure the
assembly with the hub lock knob (A).
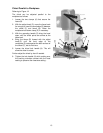
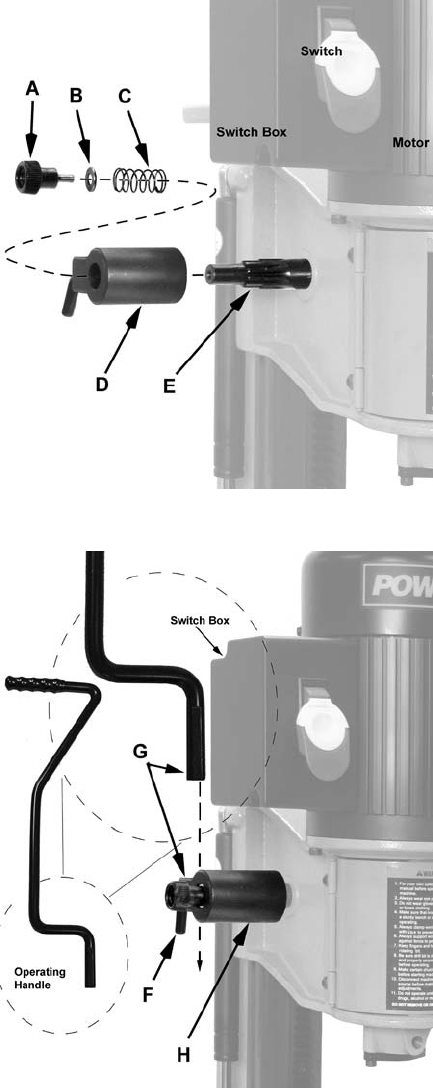
Referring to Figure 3:
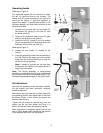
4. Loosen the lock handle (F) located on the
hub (H).
5. Insert the operating handle into the bracket on
the hub. Position the upper part of the handle
away from the mortiser allowing it to clear the
switch box during operation.
Note: If handle is mounted on the right side,
also position the handle so the upper portion is
away from the mortiser
Note: The handle assembly is spring-loaded
permitting the operating handle to be repositioned
by pulling out the hub (H) and repositioning it in 36º
increments (ten positions total) on the pinion shaft.
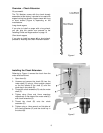
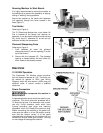
Gib Adjustment
Now that the operating handle has been installed,
the gib screws that were previously loosened
should be adjusted.
Alternately raise and lower the mortiser head with
the operating handle, then adjust each of the three
set screws (Figure 1) with a 3mm hex wrench the
same number of turns.
Tighten the set screws to remove play from the
column but do not over tighten such that it is
difficult to raise and lower the operating handle.
When adjustment is complete, tighten the lock nut
with a 10mm wrench while maintaining the position
of the setscrew with the 3 mm hex wrench.
Figure 2
Figure 3