


4
Unpacking
Open shipping cartons and check that all parts
are intact. Report any damage immediately to
your distributor. Read the instruction manual
thoroughly for assembly, alignment, and
maintenance instructions.
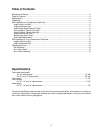
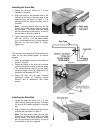
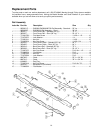
Box contents
Box One
1 Accu-Fence (A)
1 Lock Lever Knob (B)
2 Plastic Shims (not shown)
1 Owner’s Manual (not shown)
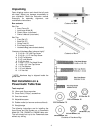
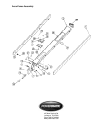
Box Two
1 Front Rail (C)
1 Back Rail (D)
1 Guide Tube (E)
2 End Caps (not shown)
1 Hardware Bag (see contents below)
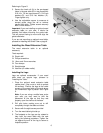
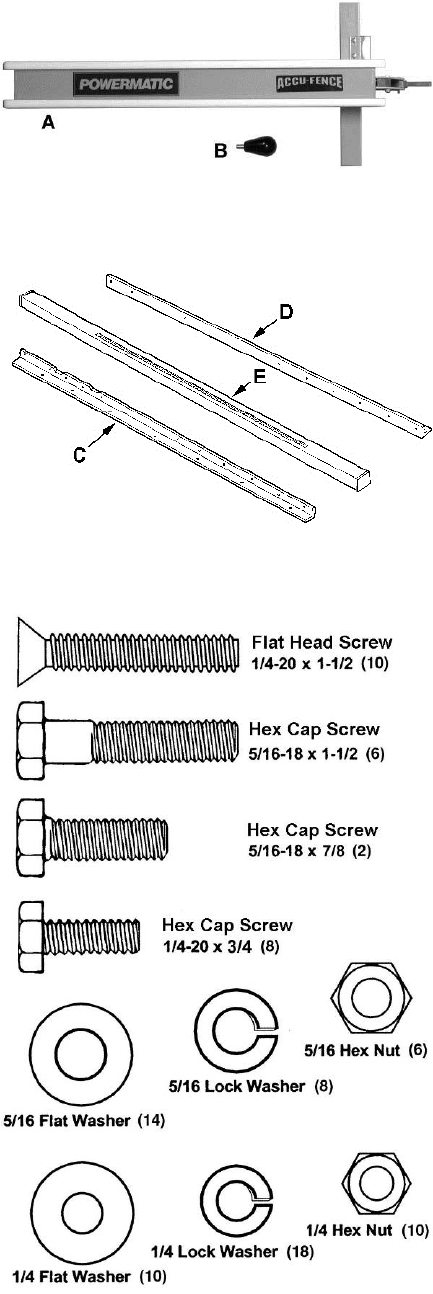
Contents of Hardware Bag (shown at right)*
02 5/16-18 x 7/8" Hex Cap Screw
06 5/16-18 x 1-1/2" Hex Cap Screw
14 5/16" Flat Washer
08 5/16" Lock Washer
06 5/16" Hex Nut
10 1/4-20 x 1-1/2" Flat Head Screw
08 1/4-20 x 3/4" Hex Cap Screw
10 1/4" Flat Washer
18 1/4" Lock Washer
10 1/4" Hex Nut
* NOTE: Hardware bag is shipped inside the
guide tube.
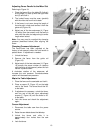
Rail Installation on a
Powermatic Table Saw
Tools required
10mm and 12mm wrenches
Cross-Point (“Philips”) screwdriver
5mm hex wrench
Adjustable square
Rubber mallet (or hammer and wood block)
Straight edge
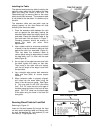
The following instructions are for installing the
Accu-Fence and Rail System on a Powermatic
Model 66, 72A, PM2000 or PM3000 table saw.
The rails should bolt up to the Powermatic saw
without any drilling.
Contents of Box 1
Contents of Box 2
Contents of Hardware Bag