9
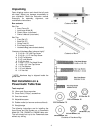
Mounting the Accu-Fence
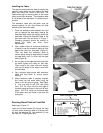
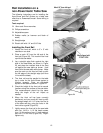
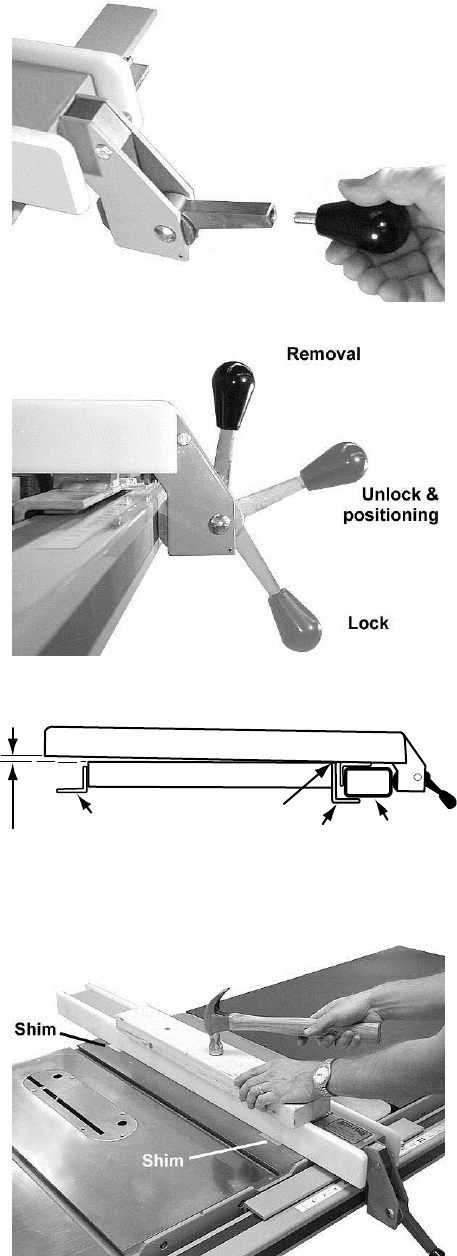
1. Screw the lock lever knob into the threaded
handle on the Accu-Fence (see Figure 14).
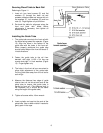
The lock lever has three functional positions.
Referring to Figure 15:
• The upright position permits mounting
and removal of fence from the saw.
• The unlock position permits easy fence
positioning.
• The lower position locks the fence to the
front rail. The cam handle should be
pushed down firmly against the pin.
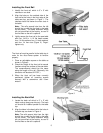
2. Place the Accu-Fence on the table top and
check the height of the side plates from the
table top. The Accu-Fence has been pre-set
at the factory for a side plate height of 1/32"
from the table top of your saw. If, however,
some misalignment has occurred during
shipment, you can easily reset your side
plates to the correct height as described in
the following section.
Setting the Side Plate Height
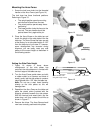
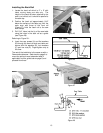
1. Figure 16 shows a fence where
misalignment of the side plates has
occurred; the side plates are in contact with
the front edge of the table saw top.
2. Turn the Accu-Fence upside down and with
a rubber mallet (or a hammer and block of
wood), gently tap the side plates to create a
height greater than 1/32" from the table top.
Note: Do not use a steel faced hammer
directly on the side plates as this will
damage them.
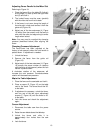
3. Reposition the Accu-Fence on the table and
place the plastic shims (included with the
shipping contents) beneath the side plates.
With the hammer and wood block, tap the
sides down until they contact the shims as
shown in Figure 17.
4. Remove the shims. The Accu-Fence should
now have correctly positioned side plates.
Figure 14
Figure 15
Fence Side Plate
Table Top
Incorrect contact
Guide Tube
Back Rail
Front Rail
Space should be 1/32"
along entire length of fence
Figure 16
Figure 17