


10
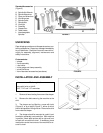
5. Secure the machine to the floor with good qual-
ity lag screws through the holes in the bottom of the
cabinet.
6. Exposed metal parts such as the table top have
been given a protective coating at the factory. This
should be removed with a soft cloth and solvent (such
as mineral spirits). Do not use an abrasive pad.
ELECTRICAL CONNECTIONS
WARNING: Electrical connections must
be made by a qualified electrician. The
machine must be properly grounded to
help prevent electrical shock and possible
death.
Before connecting power, make sure the electrical
current of your power source matches the electrical
system on the shaper.
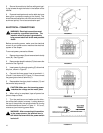
To connect power, proceed as follows:
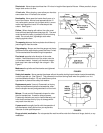
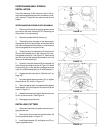
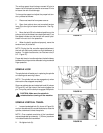
1. Remove two screws (A) and remove terminal strip
cover (B). See Figure 8.
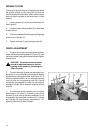
2. Remove clear plastic insulator (C) that covers the
terminals. See Figure 9.
3. Insert power line through opening (D) of terminal
strip box, shown in Figure 8.
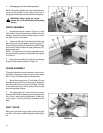
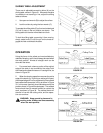
4. Connect the three power lines to terminals L1,
L2 and L3, as shown at (E) Figure 10. Also connect
the green ground wire to terminal (F).
5. Reassemble the clear plastic insulator (C) and
the terminal strip cover (B).
CAUTION: Make sure the incoming power
matches the voltage on the motor plate.
6. When wiring is completed, tape all power box
joints to keep out dust.
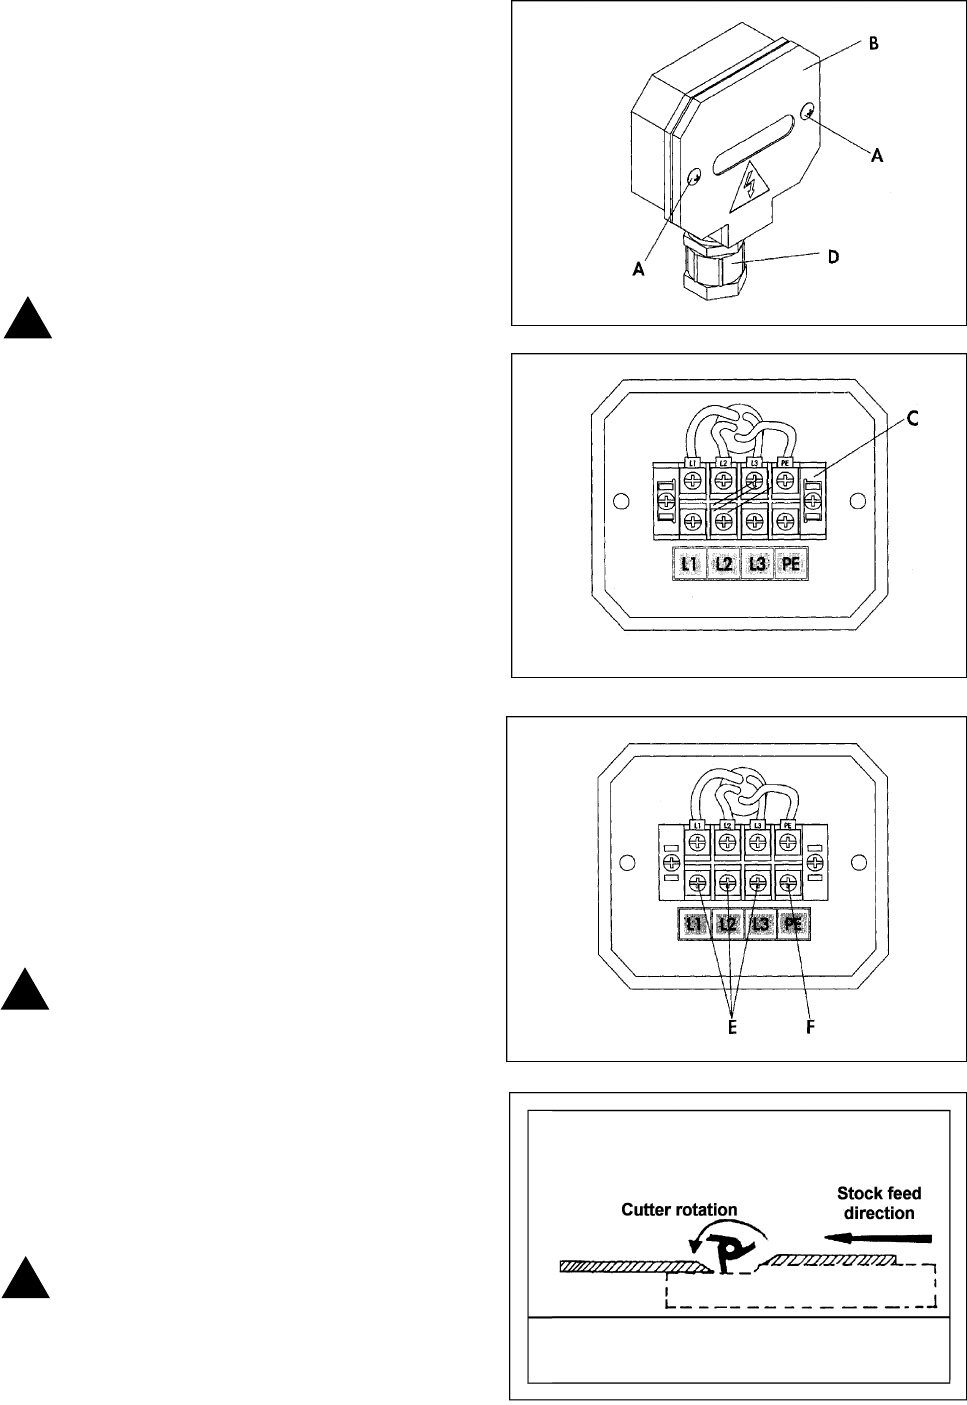
7. Turn the machine on and make sure the direc-
tion of the shaft rotation is correct. Looking down on
the top of the spindle, the spindle should be turning
counterclockwise as shown in Figure 11. If it is not,
reverse any two incoming power leads.
WARNING: After connecting this machine
to the power source, the terminal box is
still electrified even while the power switch
is shut off.
FIGURE 8
FIGURE 9
!
!
FIGURE 10
!
FIGURE 11