24
MA11
9. Maintenance
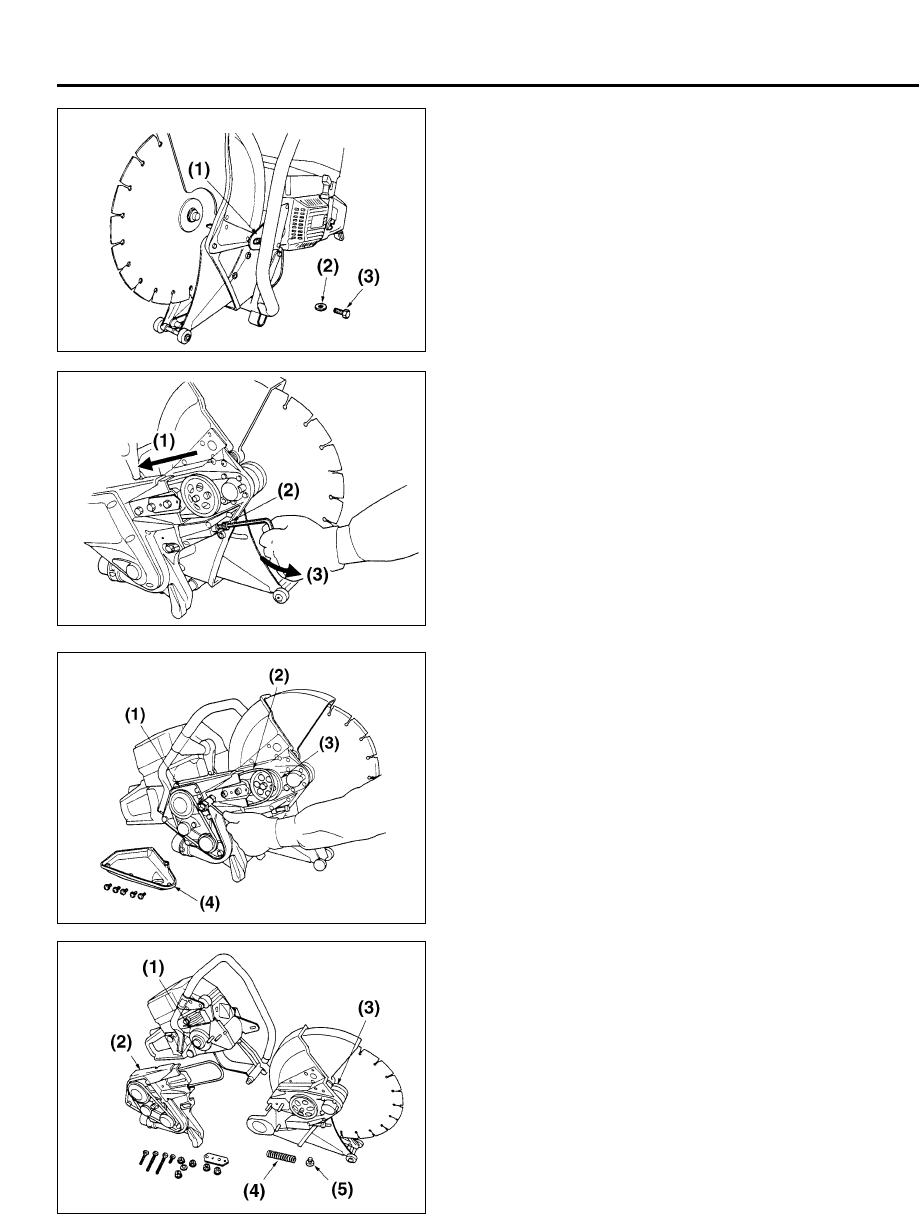
3. Slacken a stay bolt on opposite side and remove
together with a washer. (MA10)
(1) Stay
(2) Washer
(3) Bolt
4. Slacken a semi-auto tensioner bolt using angle
wrench. Push the cutting head toward the
engine while swinging it up and down to slacken
the belt tension. (MA11)
(1) Push toward the engine
(2) Bolt
(3) Slacken
5. Remove the belt out from groove of pulley on the
cutting head.
6. Remove a belt cover on the drive case.
7. Slacken and remove 4 screws and 2 nuts which
are fixing the drive case on the main body.
(MA12)
(1) Drive case (2) Drive belt
(3) Pulley (4) Belt cover
8. As removing the drive case and cutting head
together from the main body, remove the belt out
from a pulley on the main body.
9. Slacken 3 nuts which are fixing the cutting head,
then separate the drive case and the cutting
head. Remove the belt. At this time, a belt
tensioner spring and a boss built into the cutting
head come out together. (MA13)
(1) Clutch drum (2) Drive case
(3) Cutting head (4) Spring
(5) Boss
ASSEMBLING PROCEDURE
1. Lay the belt inside the drive case temporarily.
Temporarily fix the cutting head with built-in belt
tensioner spring and a guide to the drive case
using 3 nuts.
MA10
MA12
MA13


