


10
OPERATION
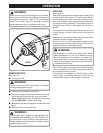
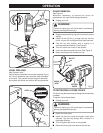
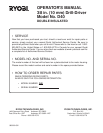
LEVEL DRILLING
See Figures 6 and 7.
Two levels are recessed in the motor housing of your
drill. One is located on top, while the other is located
on the end. They can be used to keep drill bits level
during both horizontal and vertical drilling operations.
Fig. 7
LEVEL
Fig. 6
LEVEL
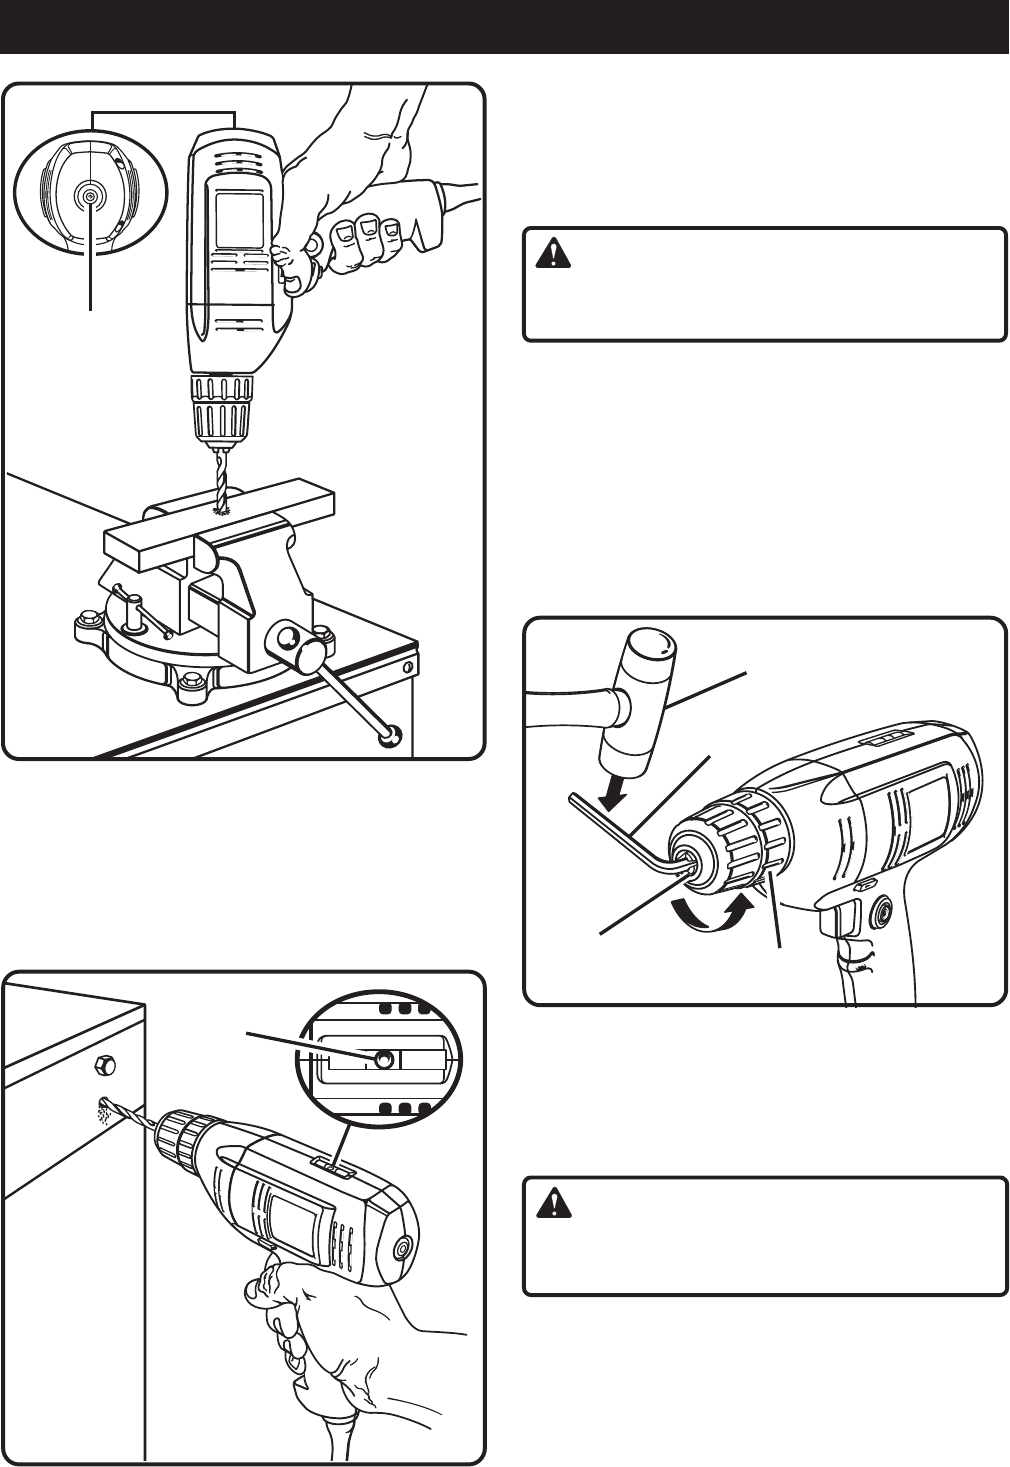
CHUCK REMOVAL
See Figure 8.
Whenever necessary to remove the chuck for
replacement, etc. use the following procedure:
■ Unplug your drill.
WARNING:
Failure to unplug your drill could result in accidental
starting causing serious injury.
■ Rotate torque adjusting ring to the maximum torque
setting.
■ Insert a 8 mm (5/16 in.) or larger hex key into the
chuck of your drill and tighten chuck jaws securely.
■ Tap the hex key sharply with a mallet in a
counterclockwise direction.
See Figure 8.
■ This will loosen the chuck on the spindle.
■ It can now be unscrewed by hand.
See Figure 8.
■ Open chuck jaws and remove hex key
.
TO RETIGHTEN A LOOSE CHUCK
The chuck may become loose on the spindle and develop
a wobble.
To tighten, follow these steps:
■ Unplug your drill.
WARNING:
Failure to unplug your drill could result in accidental
starting causing serious injury.
■ Open the chuck jaws.
■ Insert hex key into chuck and tighten chuck jaws
securely. Tap hex key sharply with a mallet in a
clockwise direction.
■ This will tighten the chuck on the spindle.
■ Open the chuck jaws and remove the hex key.
HEX KEY
KEYLESS
CHUCK
MALLET
CHUCK
JAWS
Fig. 8