


12 13
OPERATION
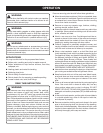
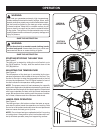
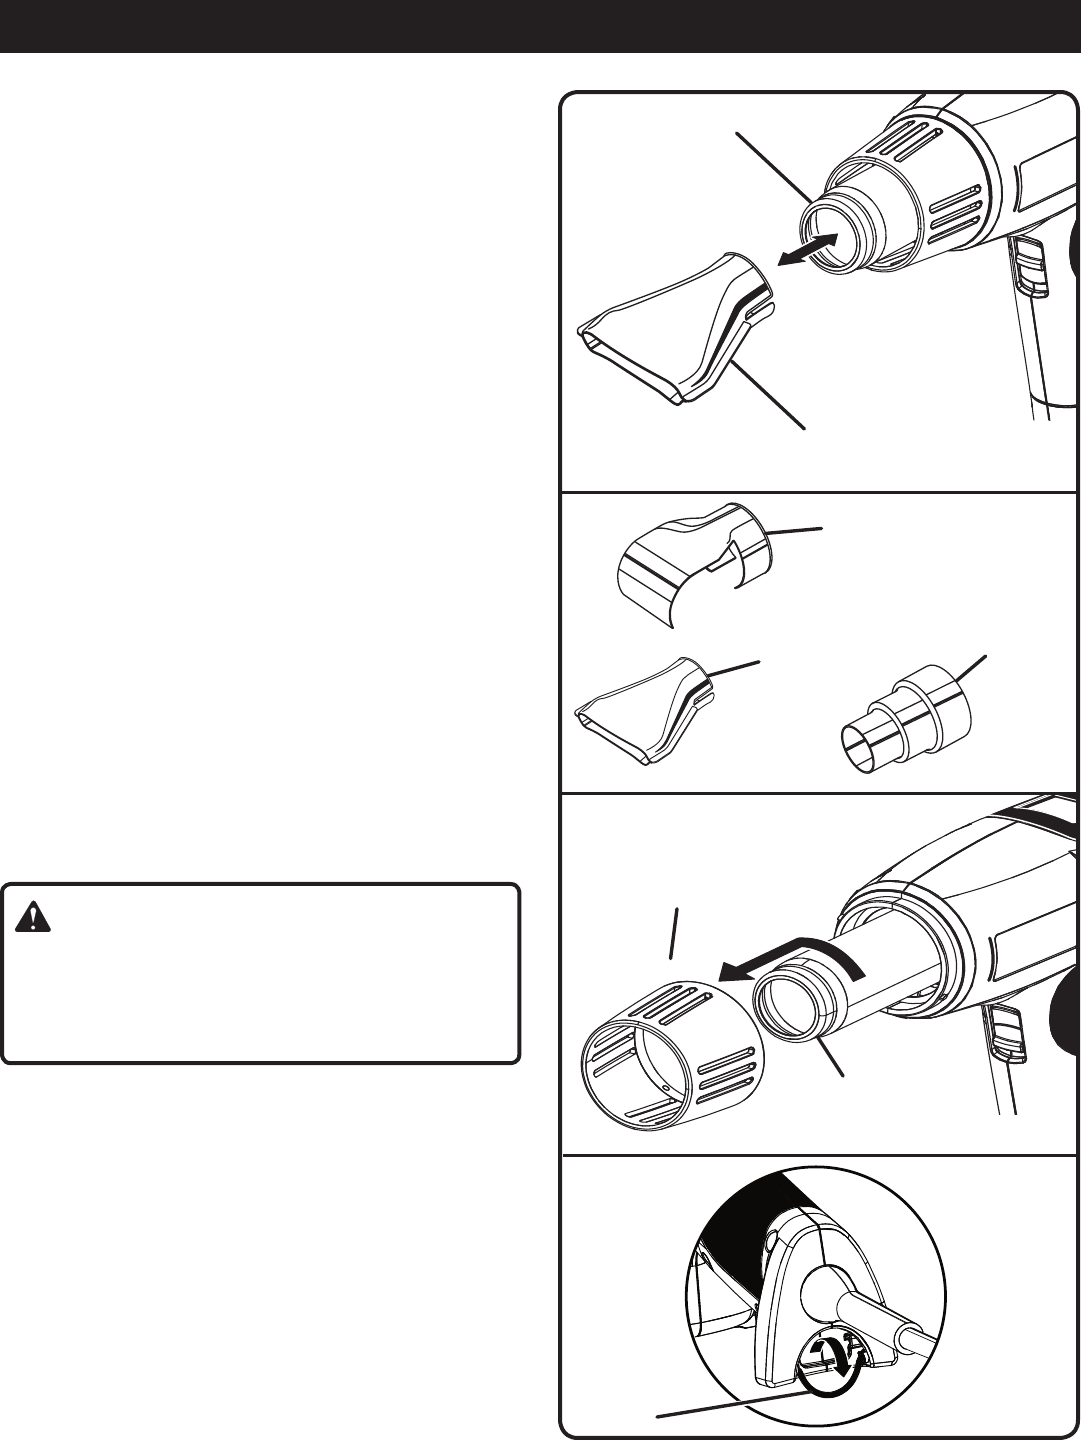
INSTALLING ATTACHMENTS
See Figures 5 - 6.
Several attachments are included with the heat gun to expand
its capabilities. Attachments are installed simply by placing
them on the end of the heat gun’s nozzle.
NOTE: Install or remove attachments only when both the
heat gun nozzle and the attachment nozzle are cool.
Scraper nozzle: The scraper nozzle reduces the airflow
from a circular area to a wide, narrow line. This nozzle can
be used along with the handheld scraper to remove paint.
It can also be used for softening and forming acrylic sheets,
vinyl floor tiles, linoleum, and laminate surfaces.
Tube bender nozzle: The tube bender nozzle is useful
for surround bending, soldering pipe, and applying heat to
shrinkable tubing.
Concentrator nozzle: The concentrator nozzle intensifies
the application of heat in a specific area. Uses for this nozzle
include bending acrylic plastic sheets, soldering pipe joints,
and directing heat into corners.
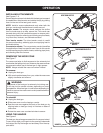
REMOVING THE NOSE CONE
See Figure 7.
The nose cone helps to limit exposure to the extremely hot
nozzle when the heat gun is in use. However, the nose cone can
be removed to allow use of the heat gun in tight spaces.
NOTE: Always reinstall the nose cone when finished.
To remove:
n Unplug the heat gun.
n With nozzle pointed away from you, rotate the nose cone
slightly clockwise and remove.
WARNING:
The nozzle of the heat gun is extremely hot during use.
It will stay hot for several minutes, depending on room
temperature. Allow heat gun to cool before attempting to
install or remove the nose cone to avoid possible serious
personal injury.
To reinstall:
n Unplug the heat gun.
n Slide nose cone over the heat gun nozzle.
n Seat the nose cone against the body of the heat gun by
aligning tabs on heat gun body to notches on base of
nose cone.
n Rotate the nose cone counterclockwise to secure.
USING THE HANGER
See Figure 8.
The heat gun has a hanger recessed into the support stand.
To use, simply slide your finger into the opening underneath
the hanger and flip the hanger out and away from the sup-
port stand.
HEAT GUN NOZZLE
ATTACHMENT
NOZZLE
HEAT GUN
NOZZLE
NOSE
CONE
SCRAPER
NOZZLE
CONCENTRATOR
NOZZLE
TUBE BENDER NOZZLE
Fig. 8
Fig. 5
Fig. 6
Fig. 7
HANGER