


Page 8
ELECTRICAL CONNECTION
Your radio charger must be connected to a power supply
that is 120 volts, 60 Hz, AC only (normal household
current). Do not operate this radio charger on direct current
(DC). A substantial voltage drop will cause a loss of power. If
the radio charger does not operate when plugged into an
outlet, check the radio charger, and then double check the
power supply.
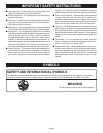
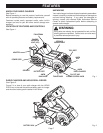
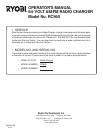
TO OPERATE RADIO
See Figure 3.
■ Connect adapter to power supply. Note: Radio does not
operate on power from your drill's battery pack.
■ Set the AM/FM Band Knob to AM or FM position.
■ Turn radio ON by turning the ON/OFF Knob in a clockwise
direction. Note: You will hear a soft click when radio
comes ON.
■ Extend the antenna if radio is selected to listen to FM. If
reception is poor, fully extend antenna and rotate in all
directions until reception improves.
■ Adjust the volume up and down by turning the Volume
Control Knob.
■ Set radio to the desired station by turning the Tuning Knob.
■ Turn radio OFF by turning the ON/OFF Knob in a
counterclockwise direction. Note: You will hear a soft click
when radio turns OFF.
OPERATION
Your radio charger is a AM/FM Radio with a built in charger
for charging the battery pack supplied with your HP962 Drill-
Driver. Use this charger to charge only battery pack No.
1311146.
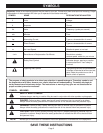
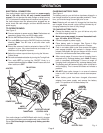
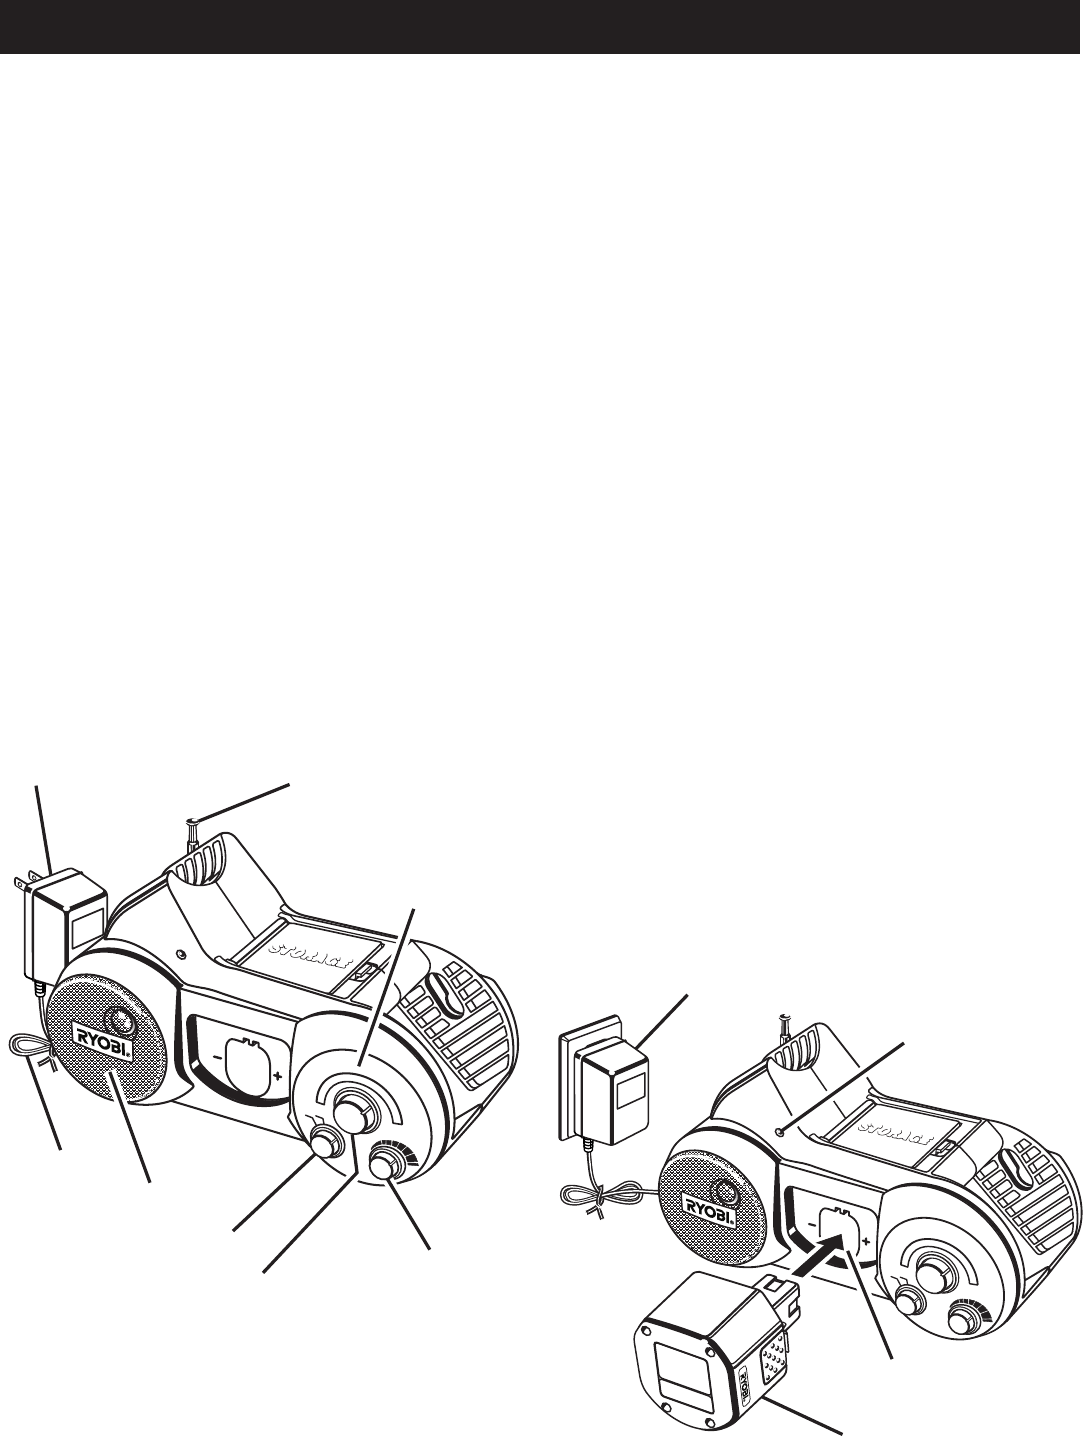
CHARGING BATTERY PACK
See Figure 4.
The battery pack for your drill-driver has been shipped in a
low charge condition to prevent possible problems. There-
fore, you should charge it overnight prior to use.
Note: Batteries will not reach full charge the first time they
are charged. Allow several cycles (drilling followed by re-
charging batteries) for them to fully charge.
TO CHARGE BATTERY PACK
■ Charge the battery pack for your drill-driver only with
the radio charger provided.
■ Make sure power supply is normal household volt-
age, 120 volts, 60 Hz, AC only.
■ Connect adapter to power supply.
■ Place battery pack in charger.
See Figure 4
. Align
raised rib on battery pack with groove in charger.
■ Push in on battery pack to be sure contacts on battery
pack engage properly with contacts in charger. When
properly connected, red light on charger will turn on and
remain on until disconnected from power supply.
■ After normal usage, 3 hours or less of charging time is
required to fully recharge battery pack. Note: If battery
pack is completely discharged, 6 hours or longer of
charging time is required to fully recharge battery pack.
■ The battery pack will become slightly warm to the touch
while charging. This is normal and does not indicate a
problem.
■ DO NOT place radio charger in an area of extreme
heat or cold. It will work best at normal room tempera-
ture.
■ When battery pack has been charged, disconnect
adapter from power supply and remove the battery
pack. This practice will increase battery life.
AM/FM
STORAGE
c
h
a
r
g
i
n
g
6
0
0
800
1200
1700
kHz
M
H
z
FM
T
U
N
IN
G
1
4
0
0
108
1
0
6
104
100
1000
98
92
88
7
0
0
53
0
AM
FM
AM
M
E
Fig. 3
ADAPTER
ON/OFF AND VOLUME
CONTROL KNOB
FM ANTENNA
TUNING KNOB
AM/FM
DIAL
SPEAKER
POWER CORD
AM/FM
BAND KNOB
A
M
/
F
M
STORAGE
c
h
a
rg
in
g
6
0
0
8
0
0
1200
1700
k
H
z
M
H
z
FM
T
U
N
IN
G
14
00
108
1
0
6
104
1
0
0
1
0
0
0
98
92
88
7
0
0
53
0
A
M
F
M
AM
M
E
CHARGE
INDICATOR
LIGHT (LED)
ADAPTER
BATTERY PORT
Fig. 4
BATTERY PACK