Supply
Cable
Plug
M4 x14
M6 x12
M4 x10
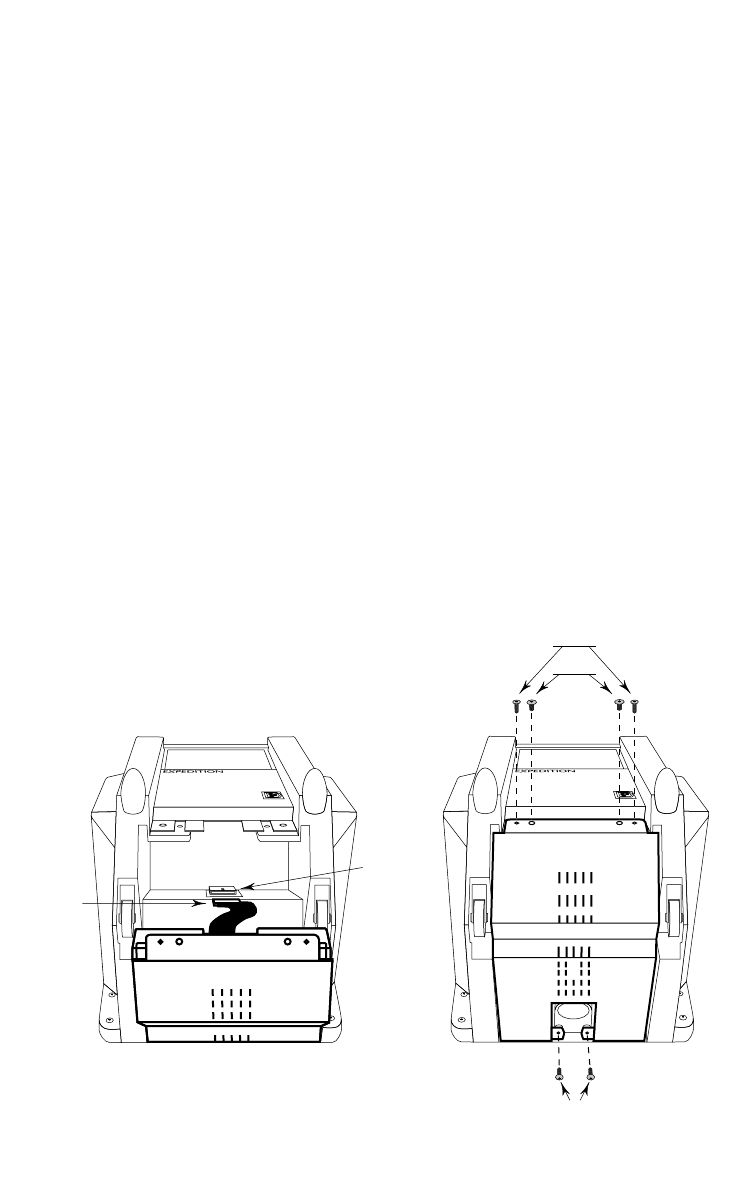
figure 3 figure 4
Instructions for Installation of Battery
1 With the rear of the Expedition cabinet facing you, lie the cabinet face down
on a soft surface as not to scratch the front grille. (figure 1)
2 Using a phillips screwdriver, remove the two M4 x 10 lower rear panel screws
(to be re-used in step 6) and pole mount thumb screw (figure 1)
NOTE: If the
cabinet is to be pole mounted, it should be secured to the pole at this time. You
will not have access to the pole mounting screw after the battery is installed.
3 Replace thumb with the M6 x 16 screw (figure 2)
4 Align the battery as in figure 2 and set its legs in the bottom of the EX20 or
EX30 as in figure 3.
5 Connect the Battery supply cable as in figure 3.
IMPORTANT! Both the con-
nectors on the supply cable (from the battery) and plug (on the cabinet)
are keyed. Be sure to connect the cable correctly or you’ll risk shorting
the battery which may result in fire and or internal amplifier failure.
6 Lift the battery into place and screw the two M4 x 14 screws into the two outer
holes and the two M6 x 12 screws in the inner holes on the battery lip. Use
the two M4 x 10 screws (from step 2) to secure the bottom of the battery to
the cabinet.


