


• 7 •
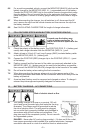
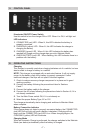
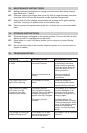
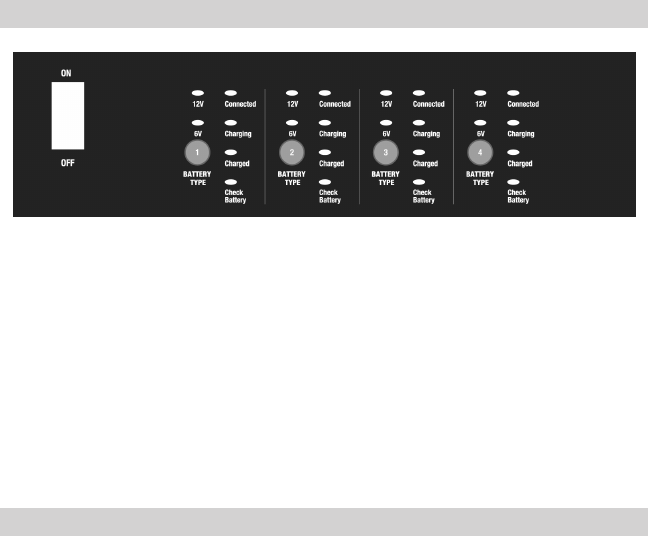
CONTROL PANEL11.
Illuminated ON/OFF Power Switch
Use this switch to turn the charger ON or OFF. When it is ON, it will light red.
LED Indicators
CONNECTED (red) LED - When lit, this LED indicates the battery is 1.
properly connected.
CHARGING (yellow) LED - When lit, this LED indicates the charger is 2.
charging the battery.
CHARGED (green) LED - When lit, this LED indicates the battery has 3.
reached full charge and the charger has gone into Maintain Mode.
CHECKBATTERY(red)LED-Whenashing,thisLEDindicatesthereisa4.
problem with the battery.
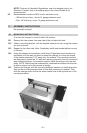
OPERATING INSTRUCTIONS12.
Charging
This charger is normally used when charging batteries out of a vehicle, but can
also be used to charge a battery in a vehicle.
NOTE: This charger is equipped with an auto-start feature. It will not supply
current to the battery clips until a battery is properly connected. Unlike
traditional chargers, the clips will not spark if touched together.
Check to make sure every charger component is in place and in good 1.
working condition.
Connect the battery following the precautions listed in Sections 2.
6 and 7.
Connect the battery cable to the charger.3.
Connect the AC power following the precautions listed in Section 8, if it is 4.
not already connected.
Turn the Main Power switch ON, if it is not already on.5.
Select the proper Battery Type, 6V or 12V.6.
The charger automatically starts charging and switches to Maintain Mode
when complete.
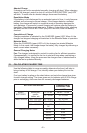
Battery Connection Indicator
If the charger does not detect a properly connected battery, the CONNECTED
(red) LED will not light until such a battery is detected. Charging will not
begin until the CONNECTED (red) LED is on. When charging begins, the
CHARGING (yellow) LED will illuminate.
Charging Mode
When an Automatic Charge is performed, the charger switches to the Maintain
Mode (see below) automatically after the battery is charged.