


5
G. OPERATING INSTRUCTIONS
1. Disconnect the vehicle’s wiring harness to remove the
battery and then place battery upright. Examine the battery
for excessive wear, cracks, bulging or damage each time
you charge the battery. If damage is detected, do not charge
the battery and replace immediately. If the battery is hot,
allow it to cool before charging.
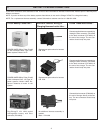
2. Select the proper charging connector for the battery – See
“BATTERY TYPES AND CONNECTORS” in Section F.
3. With the charger disconnected from the wall outlet, connect
the charger connector to the battery. Make sure the
connector is fully inserted into the battery or battery wire
harness.
4. Plug the charger into a standard wall outlet. If the battery is
connected correctly, the red LED will light solid and the unit
will begin charging the battery. If the red LED is flashing,
check the connection (See TROUBLESHOOTING).
5. QUICK CHARGE - When the green LED begins to flash,
the battery is “Ready to use”. Disconnect the charger from
the wall outlet and then disconnect the battery charger from
the battery.
NOTE: The red LED will remain lit while the green LED is
flashing. For better results, leave the charger connected
until vehicle is ready to be used.
6. COMPLETE CHARGE – When the green LED turns solid
and the red LED turns off, the battery is completely charged
and is being maintained by the Charge ‘n Ride™. When
ready to use, disconnect the charger from the wall outlet
and then disconnect the battery charger from the battery.
NOTE: For longer battery life, the battery must be completely
charged after two consecutive quick charges.
NOTE: A pulsing noise is normal while the battery charger
is charging the battery. A buzz or hum is normal anytime
the AC power cord is connected to an electrical source (i.e.
wall outlet).
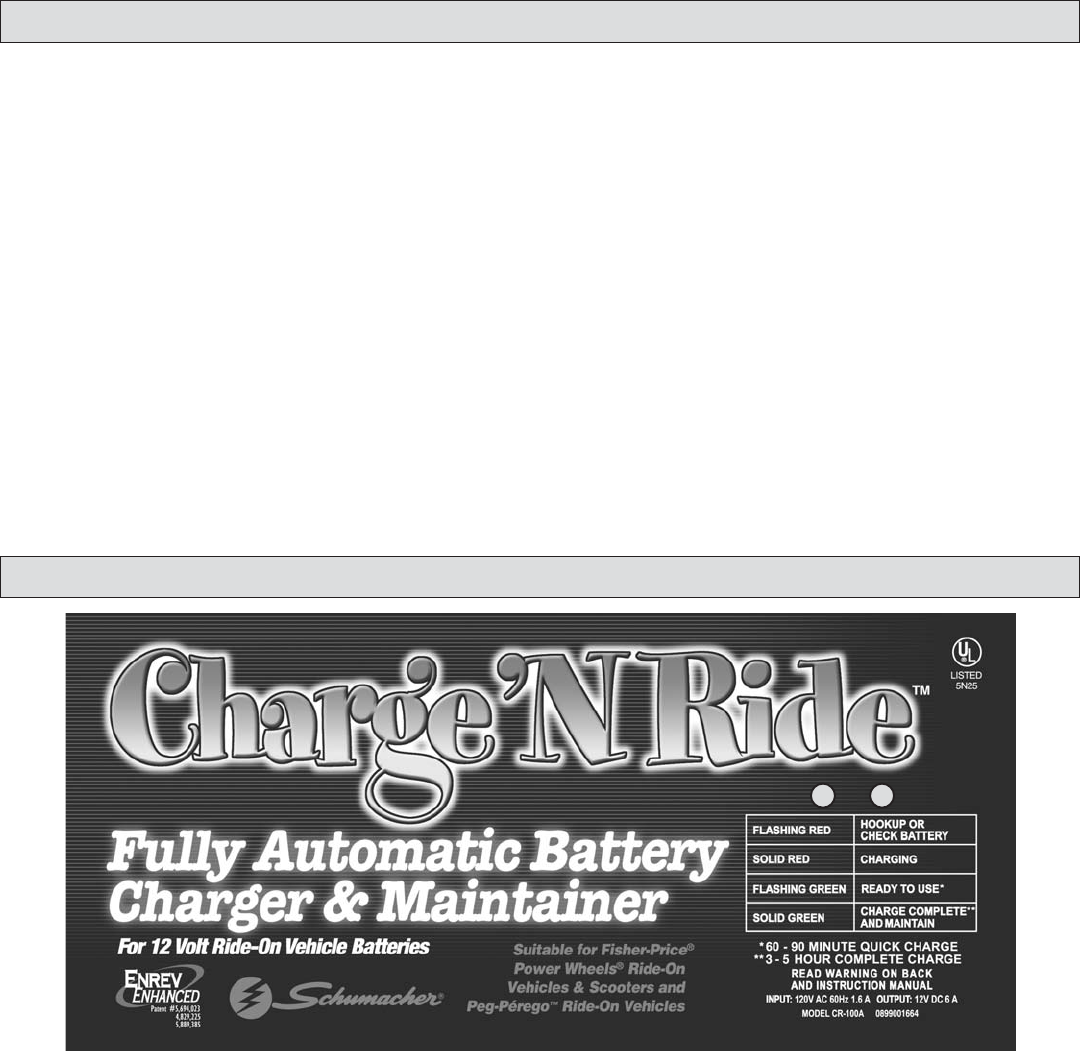
H. LED DISPLAY
LED Indicators: The battery charger has two LED lights. They
indicate different functions.
FLASHING RED LED – A SLOW flashing red LED indicates the
battery is NOT correctly connected and the connections need to
be checked. The charger must detect a minimum of 1V in order
to turn the charger on. A RAPIDLY flashing red LED will indicate
the charger has detected a fault condition within the battery and
has aborted the charge. Disconnect the charger from the wall
outlet and from the battery. The battery should be replaced and
recycled.
SOLID RED LED – A steady glow indicates the charger is
CHARGING.
FLASHING GREEN LED – A flashing green LED indicates the
battery is nearing a complete charge. The battery is “Ready to
use”.
SOLID GREEN LED – A steady glow indicates that the battery
is COMPLETELY CHARGED and is being maintained.