


G. CHARGING BATTERY OUTSIDE OF VEHICLE
Follow these steps when battery is outside of vehicle:
1. Check polarity of battery posts. Positive battery post is usually
a larger diameter than the Negative post.
2. To keep a safe distance from the battery, attach at least a
24-inch long, 18-gauge or heavier insulted jumper cable to
the Negative battery post.
3. Connect Positive (Red) charger clamp to Positive post of the
battery.
4. Position yourself and free end of the cable as far away from
the battery as possible, then connect the Negative clamp to
the free end of the cable. Do not face battery when making
this final connection.
5. When disconnecting charger, always do so in reverse
sequence of connecting procedure and disconnect the first
connection while as far away from the battery as possible.
6. A marine (boat) battery must be removed and charged on
shore. To charge it on board requires equipment specially
designed for marine use.
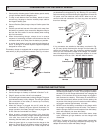
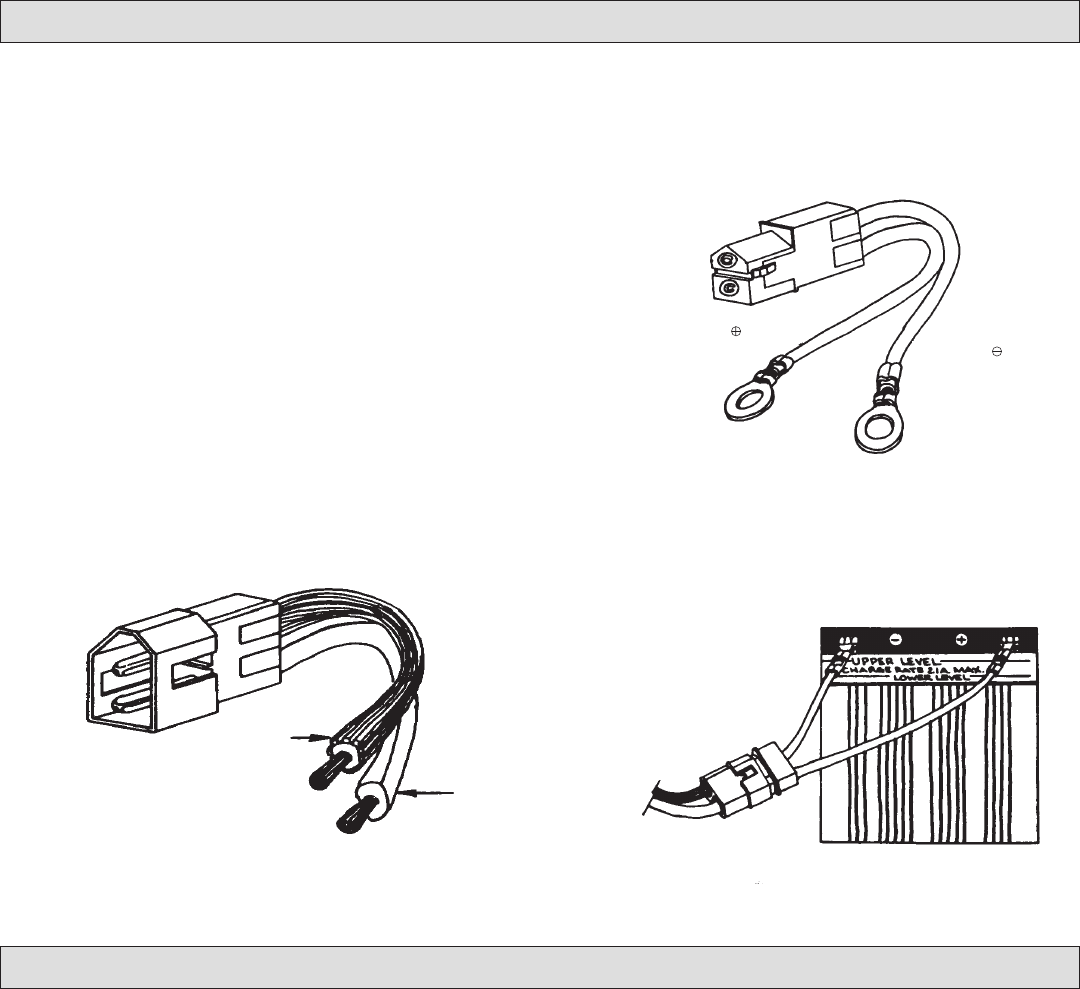
This battery charger is equipped with an output cord that termi-
nates with a (2) two pin polarized connector. See Fig. #1 below.
H. OPERATING INSTRUCTIONS
1. For use with 12 volt batteries only.
2. Connect charger to a battery as outlined in Section F or G.
3. Plug AC power cord into 120 AC volt receptacle.
4. The amber light indicates battery is being charged. The green
light indicates battery is fully charged. The red light signifies
that connection to the battery is hooked up incorrectly.
Reverse clips or rings.
5. When the charger is plugged into an AC outlet but not
connected to a battery the green light will illuminate. For
proper operation, the battery charger must be plugged into
an AC outlet and connected to a battery.
6. When properly connected the amber light should be
illuminated until the battery voltage reaches approximately
14.4 volts, then turns off and the green light turns on,
indicating that the battery has reached full charge.
7. When the green light is on, output from the charger to the
battery is turned off and the battery voltage will began to
drop. When the battery drops to 13.2 volts, output to the
battery is turned on again until the battery voltage once again
reaches approximately 14.4 volts. This cycling will maintain
the battery at its full charge state without over charging the
battery. It will continue as long as the charger is plugged in
and connected to a battery. If the battery is connected to a
circuit that occasionally draws current from the battery, the
on portion of the charge cycle will remain on until the battery
once again reaches approximately 14.4 volts.
8. NEVER leave the battery connected to the charger while
the charger is unplugged from the AC outlet. The reason is
that the charger draws a few milli amperes from the battery,
which will eventually run down the battery.
9. Battery types: Most automotive and marine starter, deep
cycle, AGM and gel type batteries can be charged and
maintained.
CAUTION - To reduce risk of fire or electric shock, connect bat-
tery charger directly to grounding receptacle (three-prong). An
adapter should not be used with battery charger.
Positive
Negative
(Ribbed Lead)
FIG. 1
When making connections to the battery, use the polarized out-
put attachment cord supplied (Fig. #2). Warning: For your safety,
before connecting and disconnecting this attachment, remove the
AC power cord from electrical outlet. NOTE: When not in use,
store all cords and connectors in a clean, dry place and protect
them from damage.
If ring connectors are attached to the battery, as shown in Fig.
#3, you may quickly disconnect the charger from the battery by
pulling the connectors apart. By purchasing additional output
cords, you can increase the usage of the charger, for instance,
have one attachment cord for a motorcycle another for a lawn
tractor battery or ATV etc. Call 1-800-621-5485 for details.
Negative
Positive
Positive
Red
Negative
Black
FIG. 2
FIG. 3
Ring
Connectors
Quick-Disconnect
Harness