


6
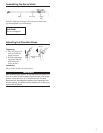
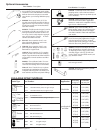
Pump the lever with
the trigger valve open
until the discharge
runs clear
WARNING!
Remove all chemicals and wash before storing the sprayer.
Chemical products have different reactions and can cause
damage to the sprayer components and the environment.
Unidentied chemicals left in the sprayer tank can pose
a serious health threat to anyone servicing the unit and
unaware of its presence!
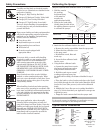
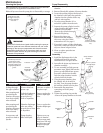
Periodically clean and
lubricate the pump
chamber, piston cup and
actuating linkage with
a high quality lithium
grease.
Lubricate
(disassembly
required)
Cleaning the Sprayer
After finishing the spray application, empty the sprayer and wash
all equipment in an approved decontamination area.
Relieve all pressure from the pump prior to disassembly or storage.
Maintenance
Troubleshooting: Lack of Pressure
Pump Disassembly
CAUSE
REMEDY
Leakage through
the upper cylinder.
After pumping and
pressurizing the
chamber, the pump
lever drops rapidly
when released.
After pumping and
pressurizing the
chamber, the pump
lever rises slowly
when released.
Low pressure and
pump lever hard to
operate.
Worn or dried out
piston cups.
Cylinder diaphragm
valve not sealing
properly due to
wear or impurities.
Chamber diaphragm
valve not sealing
properly due to wear
or impurities.
Pump chamber
filled with liquid.
Lubricate or replace
the piston cups.
Clean or replace the
cylinder diaphragm
valve.
Clean or replace the
chamber diaphragm
valve.
Tighten screw cap
at top of chamber.
With an empty tank,
pump lever with trig-
ger valve open until
all liquid is purged
from pump.
SYMPTOM
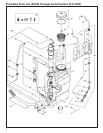
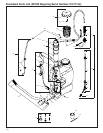
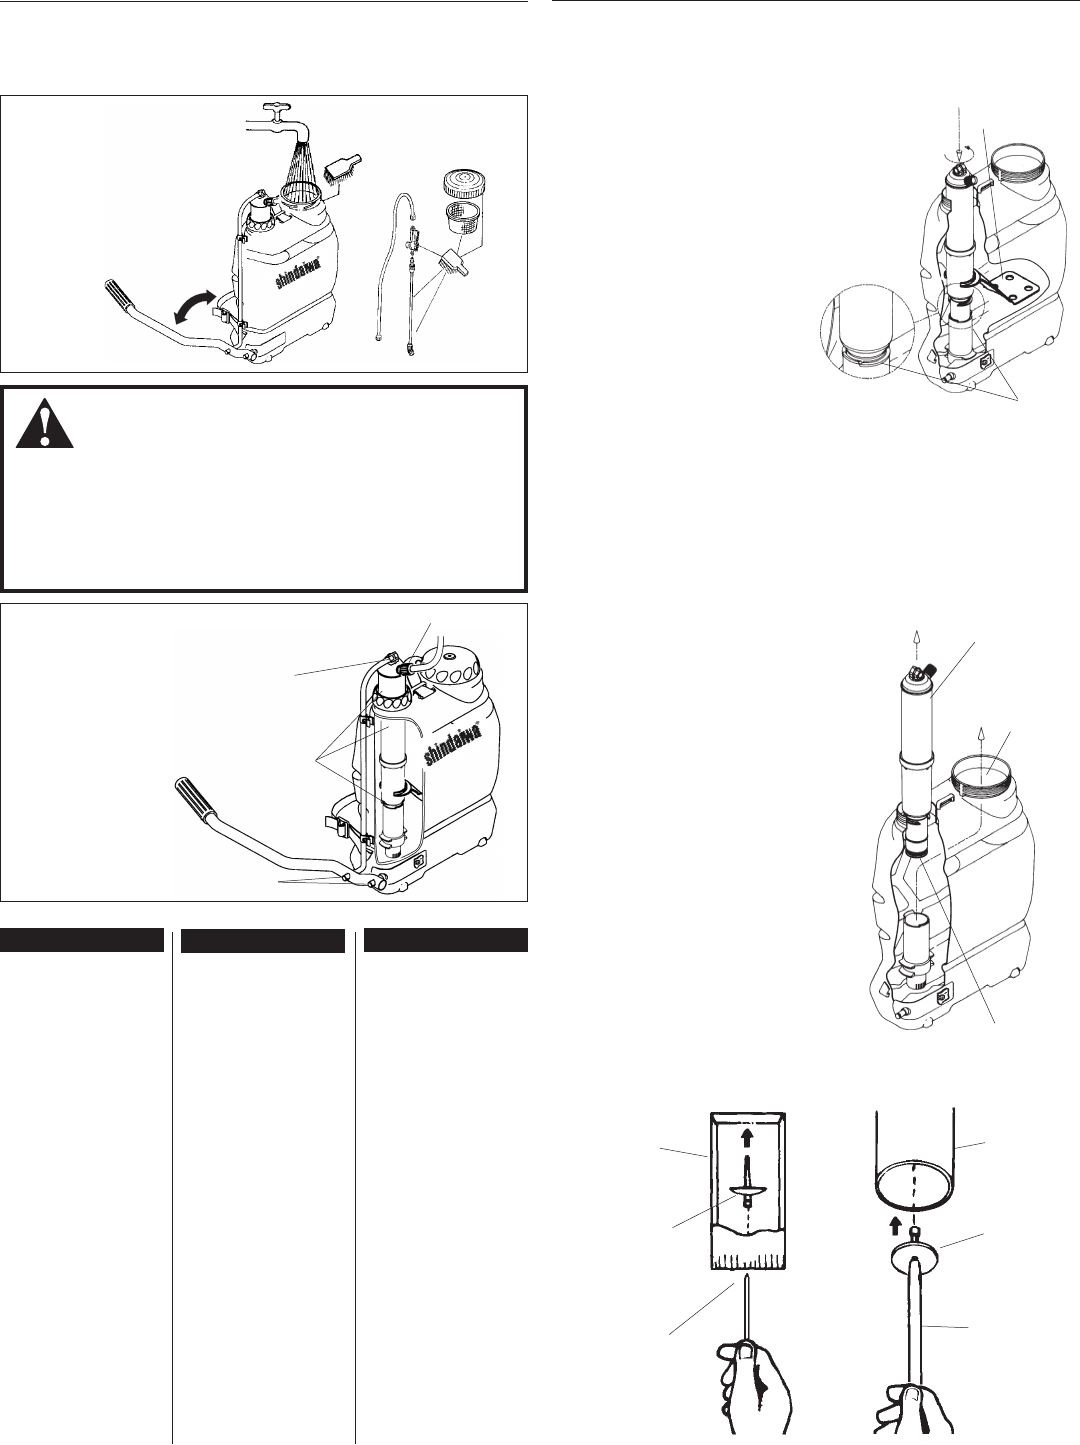
1. Remove the pump-lever connecting rod from the pump
chamber.
2. Remove lid and slide agitator off pump chamber.
3. Loosen the packing ring nut that secures
the chamber to the tank, then push the
chamber into the cylinder all the way
and lock tabs together.
4. Turn the pump chamber 90° to
unlock the cylinder from the tank.
5. Separate the pump cylinder from the
pump chamber and pull the pump
chamber out of the tank.
Remove the cylinder through
the tank fill opening.
6. Remove the piston cup
fastener from the chamber
valve assy. using the 452284
maintenance tool. See page 6.
7. If required, remove cylinder diaphragm
valve with a small screw driver or similar
object as shown in figure below.
8. Clean or replace parts that are
excessively worn.
Assembly
1. Install the diaphragm valve in the
cylinder and secure it using the
installation tool. See figure below.
2. Assemble the piston cup fastener to
chamber assembly.
3. To ease assembly and help prevent
premature wear, lightly lubricate the
piston cup with lithium-base grease.
Insert the cylinder into the tank.
Push the pump chamber into the
cylinder and lock the tabs.
4. Using the pump chamber, place
the cylinder into its location in
the tank. Turn the pump chamber
90°until the cylinder locks in place.
5. Reassemble the pump-lever
connecting rod to the pump
chamber.
6. Tighten the packing ring nut that
secures the pump chamber to the tank.
Push the chamber
into the tank all the
way
Pump Chamber
Assembly
Remove cylinder
through the fill
opening
Grease here
during assembly
Lubricate
Lubricate
Diaphragm
Valve
Cylinder
Installation
Tool
Removal
Diaphragm
Valve
Cylinder
Agitator
Screw Cap