


-10-
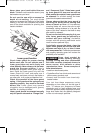
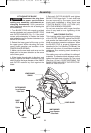
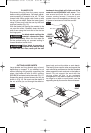
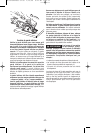
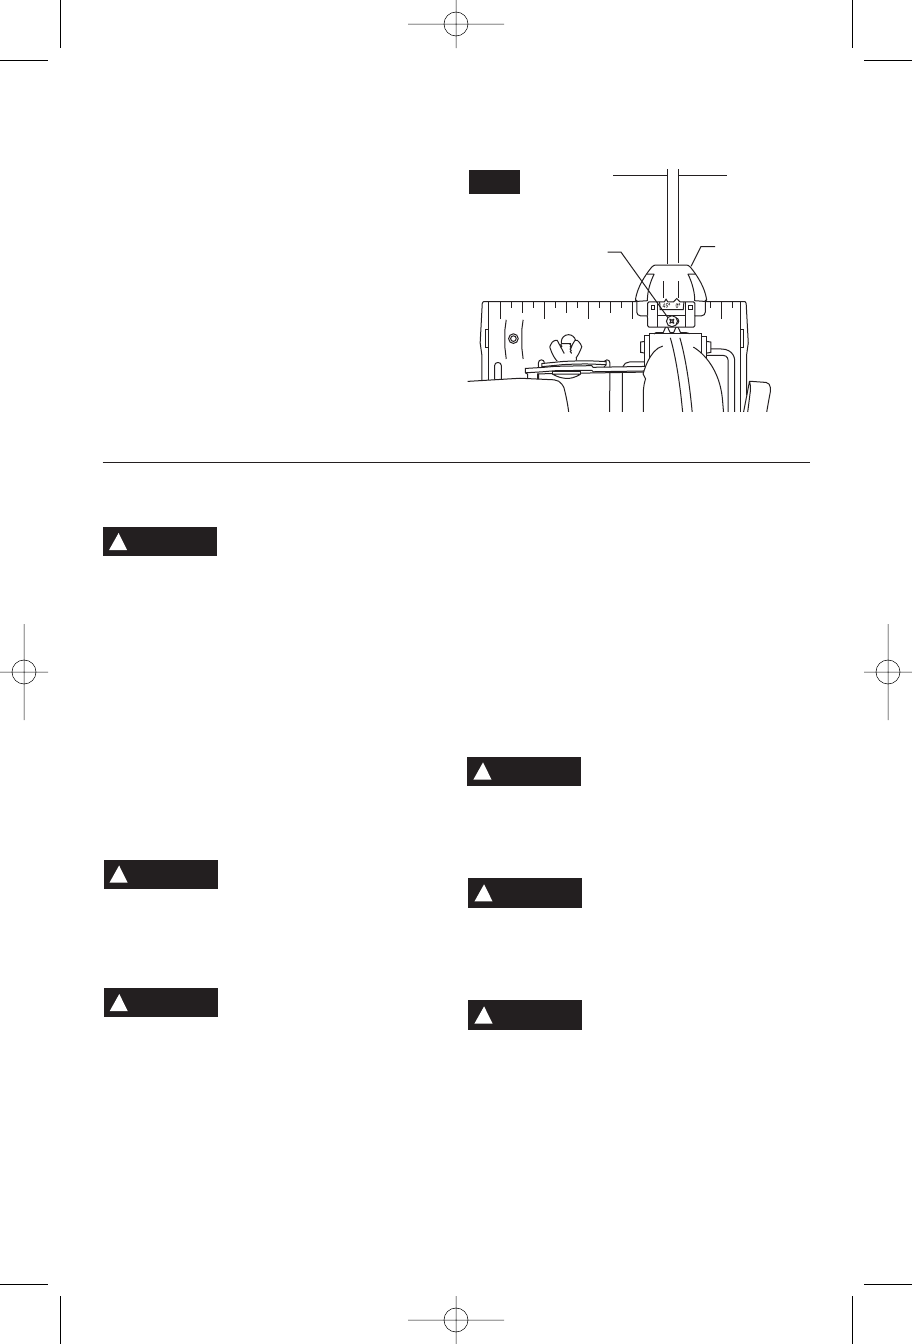
LINE GUIDE
For a straight 90° cut, use right side of notch
or line in the guide. For 45° bevel cuts, use the
left side (Fig. 9). The guide can be adjusted to
allow for variation in blade thicknesses for
whichever side of the blade the user would
p
refer to cut the line on.
TO ATTACH: Disconnect plug from power
source. Align hole in adjustable line guide with
hole in foot and secure with screw provided.
TO ADJUST: Loosen but don’t remove, the
adjustment screw enough so the guide can
move freely. Set a straightedge flat on the
preferred side of the blade, lining up both the
edge of the straightedge and the edge of the
guide where the 0° mark is located.
To ensure minimum splintering on the good
side of the material to be cut, face the good
side down.
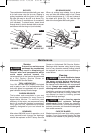
SWITCH
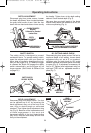
When starting the tool,
hold it with both hands.
The torque from the motor can cause the tool
to twist.
To turn tool “ON”, squeeze the trigger switch.
To turn the tool “OFF”, release the trigger
switch, which is spring loaded and will return
to the off position automatically.
Your saw should be running at full speed
BEFORE starting the cut, and turned off only
AFTER completing the cut. To increase switch
life, do not turn switch on and off while cutting.
GENERAL CUTS
Always hold the saw handle with one hand
and the auxiliary handle or housing with the
other.
Always be sure either hand
does not interfere with the
free movement of the lower guard.
Maintain a firm grip and operate the switch
with a decisive action. Never force the saw.
Use light and continuous pressure.
After completing a cut and
the trigger has been
released, be aware of the necessary time it
takes for the blade to come to a complete
stop during coast down. Do not allow the
saw to brush against your leg or side,
since the lower guard is retractable, it
could catch on your clothing and expose
the blade. Be aware of the necessary blade
exposures that exist in both the upper and
lower guard areas.
When cutting is interrupted, to resume cutting:
squeeze the trigger and allow the blade to
reach full speed, re-enter the cut slowly and
resume cutting.
When cutting across the grain, the fibers of
the wood have a tendency to tear and lift.
Advancing the saw slowly minimizes this
effect. For a finished cut, a cross cut blade or
miter blade is recommended.
CUTTING MASONRY/METAL
This tool is not recommended for usage with
metal or masonry cut-off wheels.
Do not cut metal or
masonry with this circular
saw.
The dust from metal or masonry cutting
will cause the lower guard to become sluggish
and may not close fully and quickly after
cutting these materials.
Do not cut with abrasive
wheels around flammable
materials or environments.
Abrasive cutting
may produce sparks that could ignite
flammable materials and cause explosion
hazards.
Do not use Wet Diamond
cutting off wheel or water
feed devices with this circular saw.
Masonry cutting waste will enter the lower
guard system, harden and cause the guard to
become inoperable. Use of water in masonry
cutting applications with an electric circular
saw will cause electric shock hazards.
0
45
123 1
FIG. 9
45°
BEVEL CUTS
90°
VERTICAL CUTS
!
WARNING
GUIDE
ADJUSTMENT
SCREW
ADJUSTABLE
LINE GUIDE
!
WARNING
!
WARNING
!
WARNING
!
WARNING
!
WARNING
SM 1619X02966 01-08 1/15/08 8:12 AM Page 10