


-
10
-
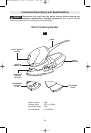
This tool is particularly suitable for one handed
operation, and access to corners and edges
that are otherwise difficult to reach and require
hand sanding. Profiles and grooves may be fin-
ished using the tip or edge of the selected
attachment, which should occasionally be
rotated during use to distribute the wear on the
attachment and backing pad surface.
Always be certain that smaller workpieces are
securely fastened to a bench or other support.
Larger panels may be held in place by hand on
a bench or sawhorses.
SANDING: Open-coat aluminum oxide sanding
sheets are recommended for most wood or
metal sanding applications, as this synthetic
material cuts quickly and wears well. Some
applications, such as metal finishing or
cleaning, require special abrasive pads which
are available from your dealer. For best results,
use sanding and polishing accessories which
are of superior quality and are carefully
selected to produce professional quality results
with your sander.
The following suggestions may be used as a
general guide for abrasive selection, but the
best results will be obtained by sanding a test
sample of the workpiece first.
Grit
Application
Coarse For rough wood or metal sanding,
and rust or old finish removal.
Medium For general wood or metal sanding
Fine For final finishing of wood, metal,
plaster and other surfaces.
Extra fine For final sanding of bare wood,
smoothing old paint, or preparing a
finished surface for recoating.
With the workpiece firmly secured, turn tool on
as described above. Contact the work with the
tool after the sander has reached its full speed,
and remove it from the work before switching
the tool off. Operating your sander in this
manner will prolong switch and motor life, and
greatly increase the quality of your work.
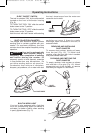
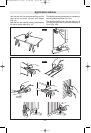
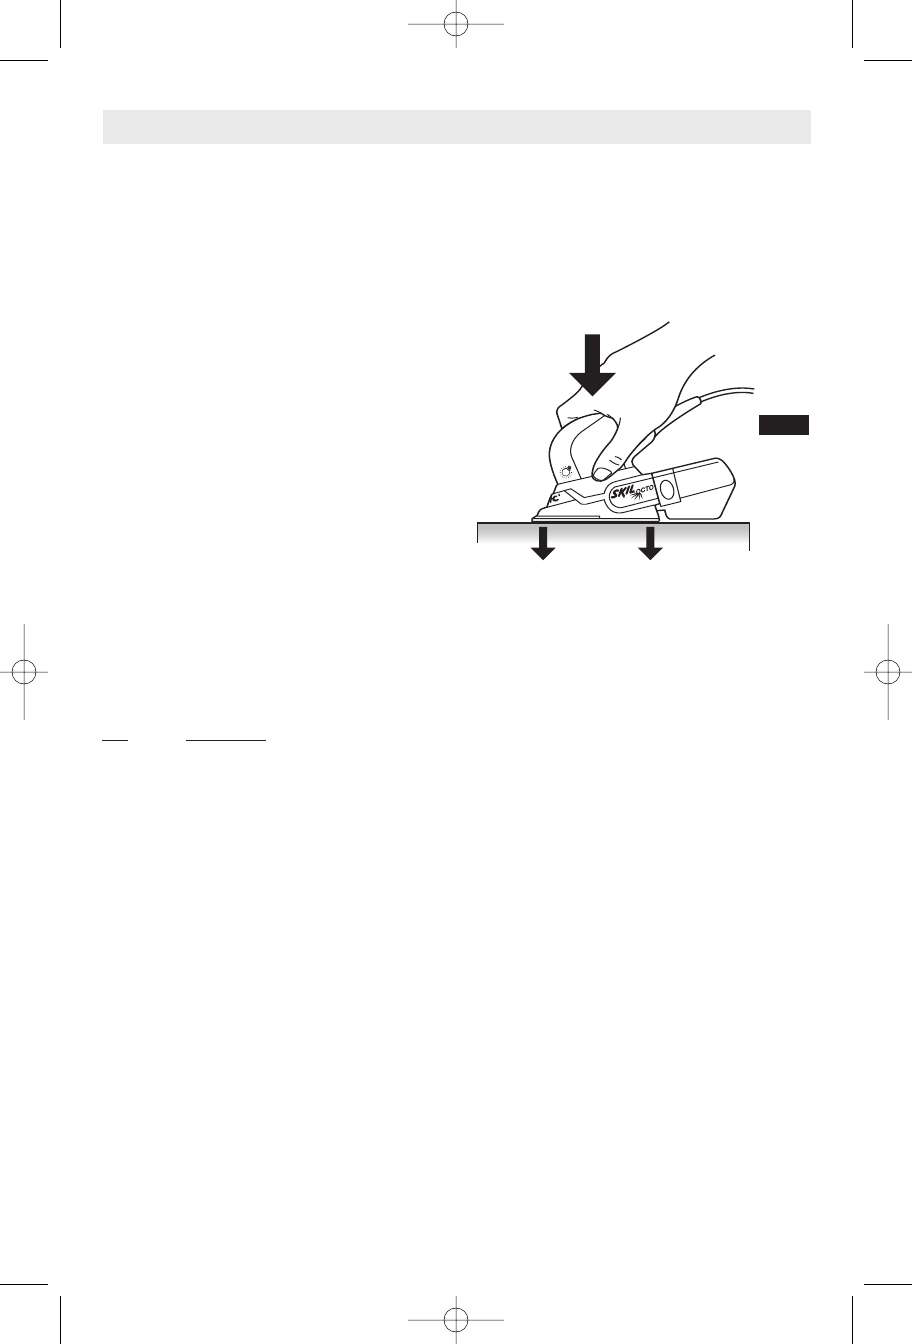
Move the sander in long steady strokes parallel
to the grain using some lateral motion to
overlap the strokes by as much as 75%. DO
NOT apply excessive pressure — let the tool
do the work. Excessive pressure will result in
poor handling, vibration, and unwanted sanding
marks (Fig. 12).
If the surface is rough, begin with coarser grits
and then complete the surfacing with medium
and fine abrasives. To avoid uneven results, do
not skip more than one grit size when going
from coarser to finer, and do not sand in one
area for too long. When the job is completed,
gently lift the tool from the work surface and
slide switch to the "OFF" position.
POLISHING: Your Multi-finishing sander may
be fitted with optional abrasive mesh or
polishing pads to polish or remove scratches or
corrosion from metal, painted, or other
surfaces. The tool is operated in much the
same way as when sanding, but the following
points should be observed;
Use light pressure and a circular or overlapping
motion to remove scratches and corrosion or
polish a surface. If using a compound, use only
as much as necessary and do not use the dust
extraction feature.
When working in very confined areas or
louvered panels, the pad extension plate
should be used.
Clean the buffing or mesh pads with mild deter
-
gents and warm water. DO NOT use solvents.
Tool Tips
FIG. 12
SM 2610938371 01-06 1/12/06 8:10 AM Page 10