


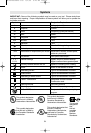

-7-
REMOVING AND INSTALLING
SANDING BELTS
To prevent personal injury,
always disconnect the plug
from the power source before removing or
installing the belt.
Keep your fingers and clothing away from
the belt.
They could get cut or wedged
between the pulley, belt and motor housing.
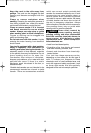
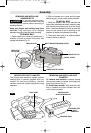
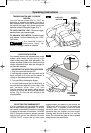
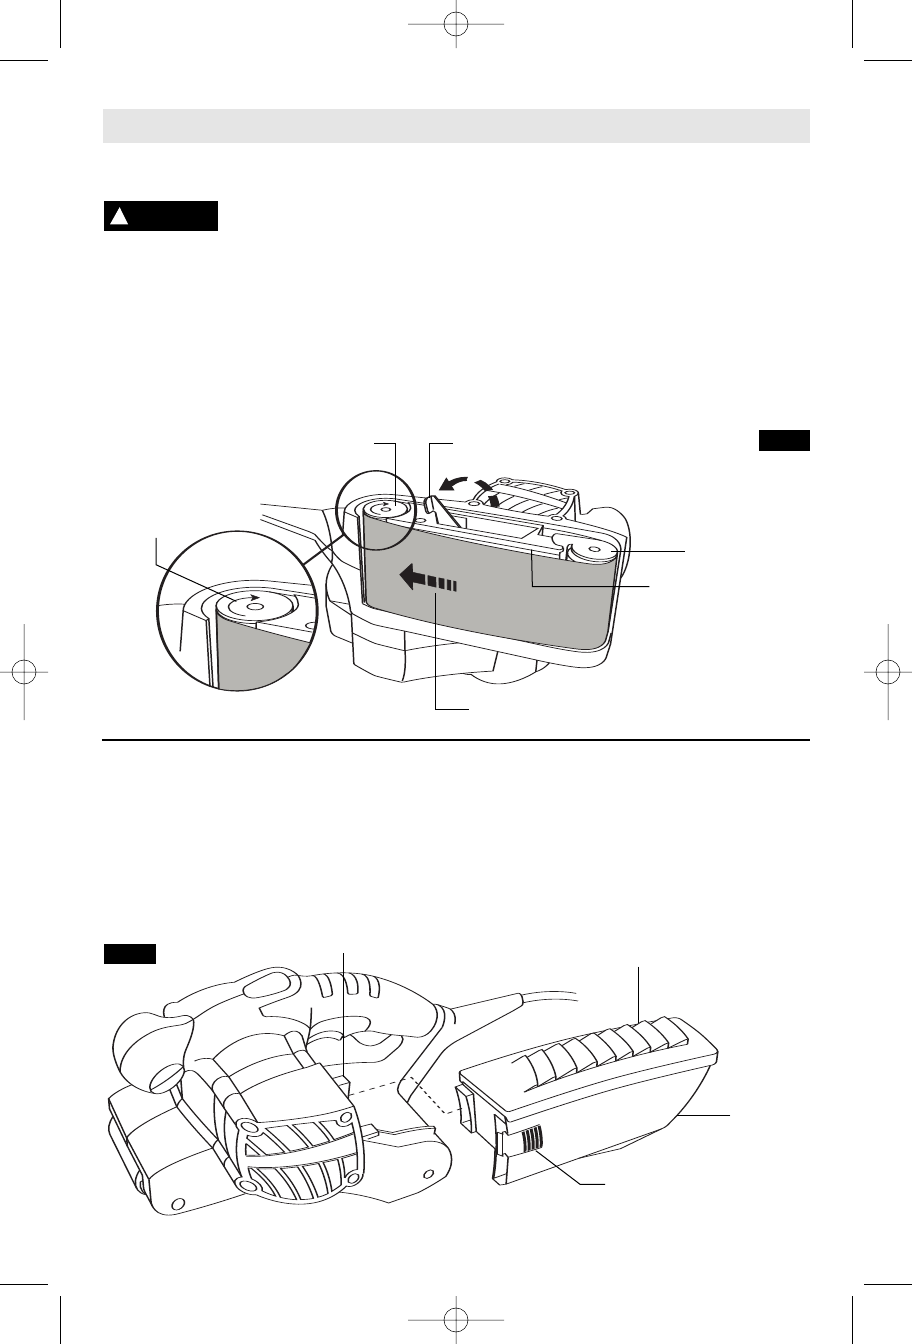
TO REMOVE BELT
1. Place sander on it’s side and move lever in
direction of arrow to retract front pulley and
release belt tension (Fig. 2).
2. With the sander on it’s side and the open
side facing you, you can easily remove the belt.
TO INSTALL BELT
1. While the sander is still on it’s side with the
front pulley retracted and locked, insert the new
belt around both pulleys and over the metal
plate. If belt has directional marks, be sure the
arrow on the inside of belt is pointing in the
direction of rotation as indicated on housing.
2. Then push lever back to its original position
to return tension to the belt.
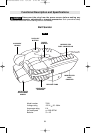
Assembly
!
WARNING
FRONT PULLEY
REAR PULLEY
BELT TENSION RELEASE LEVER
DIRECTION
OF TRAVEL
METAL PLATE
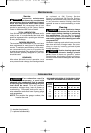
MICROFILTER DUST CANISTER
The integral dust extraction system collects
sanding dust in canister supplied with your
sander. For maximum efficiency, the dust
canister should be emptied frequently during
operation.
REMOVING AND INSTALLING DUST
CANISTER
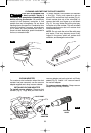
To remove dust canister:
squeeze release
tabs on both sides of canister and simply pull
away from the tool (Fig. 3).
To install dust canister: align dust port with
hole in canister and push canister onto tool
until it locks into place.
RELEASE TABS
MICROFILTER
DUST CANISTER LID
MICROFILTER
DUST
CANISTER
FIG. 2
FIG. 3
DUST PORT
DIRECTION OF TRAVEL
SM 2610930928 6-05 6/1/05 9:10 AM Page 7