1
SET-UP INSTRUCTIONS & PRE-OPERATION CHECKLIST for
SNAPPER SCRAMBLERS
The following instructions cover the set-up of SNAPPER SCRAMBLERs. Complete each of the following steps
carefully. Review and complete each item as instructed on the Pre-Operation checklist. The Snapper Product
Registration card must be filled out and sent to Customer Service department at Snapper when completed.
WARNING
Wear heavy leather gloves when handling or
working around cutting blades. Blades are extremely
sharp and can cause severe injury.
MOWING DECK
1. Cutting Blade
A. Check torque of blade mounting bolts. Torque
to:
33” Deck - 30 to 40 ft. lbs.
38” Deck - 80 to 90 ft. lbs.
42” Deck - 30 to 40 ft. lbs.
48” Deck - 60 to 70 ft. lbs.
B. Check blade straightness per operator’s
manual supplied with machine.
C. After completing blade check, carefully lower
SCRAMBLER to floor to continue set-up.
BATTERY
Electrolyte required for dry batteries must be purchased
locally. Pay close attention to the precautionary
statements on the battery and in these instructions. All
batteries require a slow charge before being placed into
service.
WARNING
DO NOT attempt to charge battery while installed on
the Zero Turning Radius machine. DO NOT use
“BOOST” chargers on the battery.
1. BATTERY REMOVAL
A. Tilt seat up to gain access to battery.
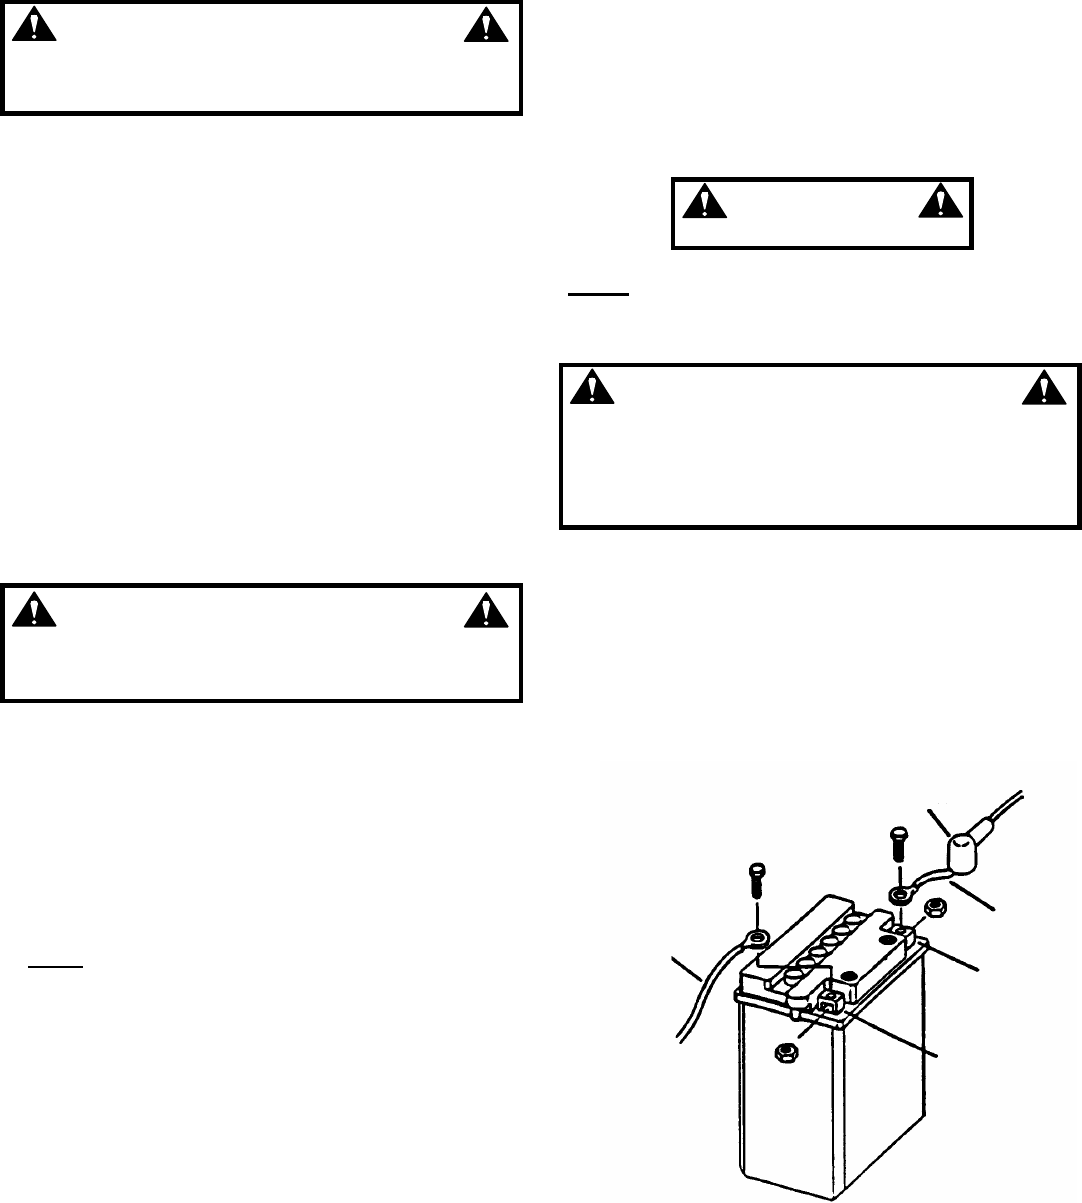
B. Observe and note cable positions on battery.
See Figure 1.
C. Disconnect cables from battery terminals,
disconnecting BLACK (Negative) cable first.
Retain mounting bolts and nuts.
D. Slide battery from battery cradle.
2. BATTERY ACTIVATION
NOTE
: The electrolyte (acid) for the battery is not
supplied with the mower and must be purchased
separately.
A. Place battery in a well ventilated area on a
level surface.
B. Remove battery cell caps. Fill cells as required
with electrolyte to between minimum and maximum
fill line as viewed from outside battery case. Filling
battery with electrolyte will bring the battery to 80%
charged state.
INSTRUCTION No. 5-0410 (I.R. 9/29/03)
C. With all cell caps removed, connect an
automotive type battery charger to battery terminals;
RED to positive (+) and BLACK to negative (-)
terminal.
D. Slow charge at 1 to 2 amps for 2 hours.
E. After charging, check level of electrolyte, add
electrolyte if necessary, and tighten cell caps.
WARNING
DO NOT OVERFILL!
NOTE:
3/16” above cell plates is the recommended level.
Never place anything in battery other than specified
electrolyte.
WARNING
Shield the positive terminal with terminal cover
located on battery harness. This prevents metal from
touching the positive terminal, which could cause
sparks. Cables must be connected to battery
terminals in the proper position.
3. BATTERY INSTALLATION
A. Tilt seat up to gain access to battery cradle.
B. Slide battery into battery cradle.
C. Connect cables to battery terminals. Connect
RED (Positive) cable first. Connect BLACK
(Negative) cable.
D. Place the positive (+) terminal insulator over
positive terminal and cable. See Figure 1.
FIGURE 1
TERMINAL INSULATOR
NEGATIVE
CABLE
POSITIVE
CABLE
POSITIVE
TERMINAL
NEGATIVE
TERMINAL
(Installation Continued
on Next Page)


