


-3-
Care & Maintenance
For optimum performance from your chuck,
follow the maintenance schedule below, and
never hammer on the chuck, jaws, or a workpiece
clamped in the chuck. Never subject the chuck to
abrasives, flame, or water.
Daily:
• Check/correctloosemountingbolts.
• Use a vacuum, rag, or brush to clean the
chuck after use. Never use air pressure to
clean chips away from a chuck.
• Wipe the chuck down with a thin coat of way
oil to prevent surface rust.
• Greasethechuckttingwithonetotwo
pumps of NLGI #2 grease.
If the chuck ever becomes stiff to operate, it may
have been contaminated with metal chips or
abrasives from neglect or poor service practices.
The chuck must be dissembled, cleaned, and re-
lubricated.
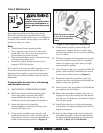
To disassemble the chuck for a full cleaning
and lubrication service:
1. DISCONNECT LATHE FROM POWER!
2. Mark the chuck and the mounting plate
where they mate to ensure that when
reassembled both halves line up. Next,
unbolt the chuck and separate both halves.
3. Insert and rotate the chuck key
counterclockwise until the scroll-gear has
released all three jaws.
4. Using a 4mm and 6mm hex wrench, a #1
standard screwdriver, and a ratchet with a
7mm socket, start at #1 and disassemble the
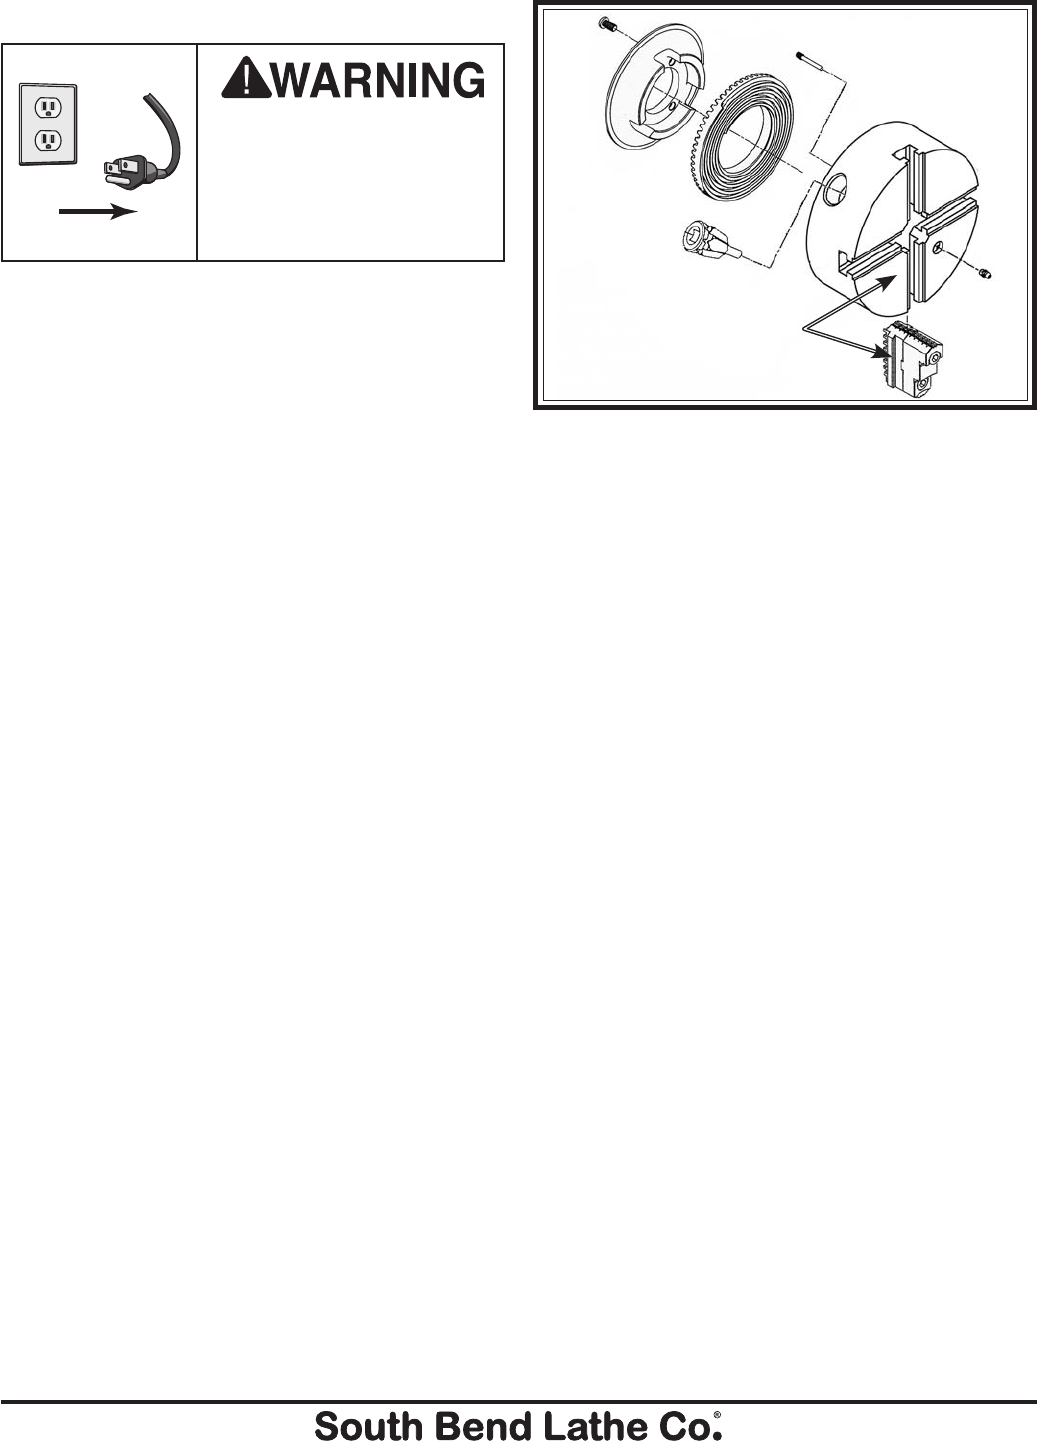
chuck in the sequence shown in Figure 2.
Always disconnect
machine from power before
performing maintenance or
serious personal injury may
result.
!
5. Using mineral spirits, clean and dry all
components. Inspect all bores, teeth, pins,
and mating surfaces for wear, burrs, galling,
rust, or cracks.
6. Without changing the dimension of any part,
use a wire brush, emery cloth, or dressing
stones, to remove any rust, burrs, or high
spots caused by galling.
7. Coat all parts with any automotive NLGI #2
grease, and carefully reassemble the chuck
in the reverse order shown in Figure 2.
8. Rotate the chuck key clockwise until you
see the tip of the scroll-gear lead thread just
begin to enter jaw guide #1.
9. Insert jaw #1 into jaw guide #1, and hold the
jaw against the scroll-gear.
10. Rotate the chuck key clockwise one turn to
engage the tip of the scroll-gear lead thread
into the jaw. Pull the jaw; it should be locked
into the jaw guide.
11. Install the other jaws in the same manner,
and install a new grease fitting if the ball or
nipple leak grease.
12. Line up the timing mark on the chuck and
the mounting plate, and fasten both halves
by tightening and torquing the fasteners as
outlined in Step 13 in Installation.
2
3
6
4
5
1
Figure 2. Chuck sequence of disassembly.
7
Note: Each jaw is marked
1, 2, 3, or 4 to correspond
to its marked slot in the
chuck