•
– 2 –
– 3 – – 4 –
– 7 –
– 8 –
– 9 –
– 10 – – 11 – – 12 –
www.trimble.com/spectra
QM55 Quick Measure
Distance Meter
User Guide
Introduction
Thank you for choosing the Spectra Precision QM55 from the Trimble
family of precision products. This easy-to-use distance measuring tool
will allow you to measure distances quickly, accurately and reliably.
Before using the Quick Measure, read this operator’s manual carefully.
Included is information about operation, safety and maintenance.
Ensure that the operating instructions are with the laser distance meter
when it is given to other persons.
Your comments and suggestions are welcome; please contact us at:
Trimble Spectra Precision Division
8261 State Route 235
Dayton, Ohio 45424 USA
Phone: +1 (937) 203-4419
+1 (800) 527-3771
Fax: +1 (937) 482-0030
Internet: www.trimble.com/spectra
General Operation
Single distance measurement
1) Switch on the device by pressing the ON button.
2) Press the ON button again to activate the laser.
3) Aim the laser do to the surface to be measured, and press the On
button again. The measurement will be shown in the display
4) Press and hold the OFF Button to switch off.
Continuous measurement
1) With the device on, press and hold the ON Button for 2 seconds
until the continuous measure icon appears to activate continuous
measuring mode. The tool beeps during continuous measure mode if
beeper is turned on.
2) Press the Measure Button again to stop continuous measure.
When continuous measure is stopped, the display will show:
• Maximumdistance
• Minimumdistance
• Lastdistance
Continuous measure can be useful to find the shortest distance to a
wall or longest distance to a corner as shown.
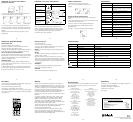
Features
Protective
overmolding
LiquidCrystalDisplay
(LCD)
Power ON / Measure
Subtract next measure
Units of measure /
backlight
Clear previous reading /
OFF
Add next measure
Functions
(area, volume, height)
Measure reference
Included with the QM55: Pouch, unit, battery, user guide,
battery key/extension
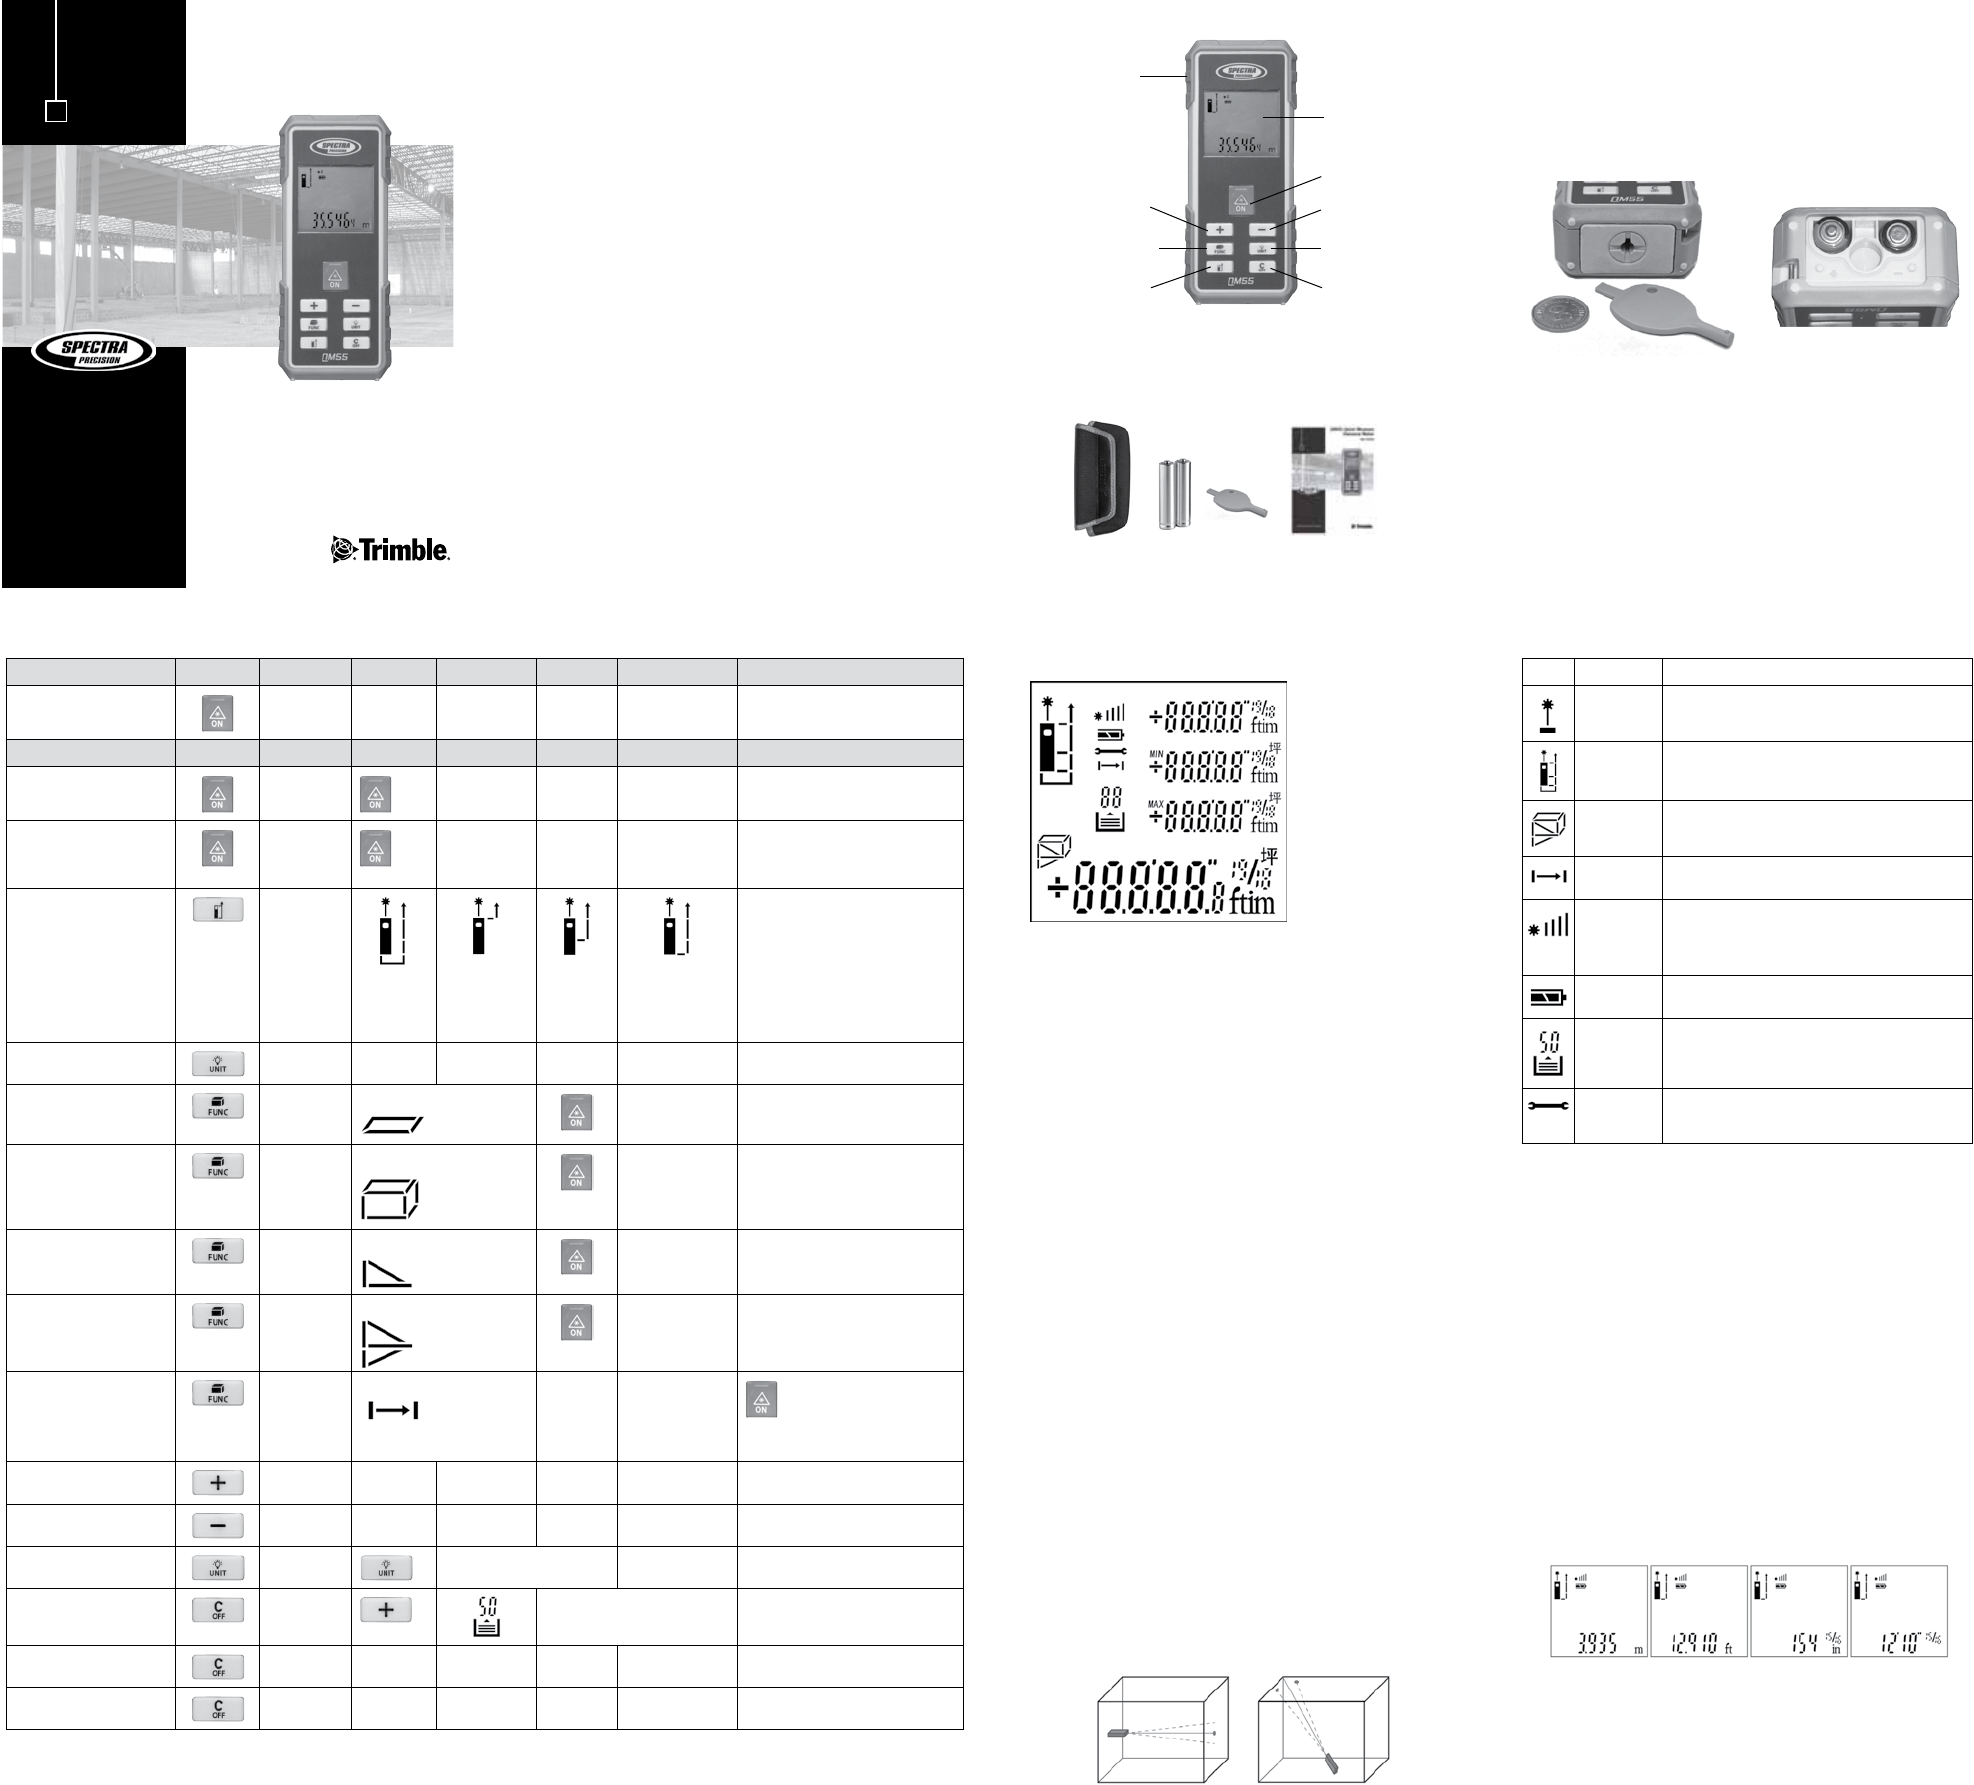
Features - LCD Detail
Batteries - Installation
1. Open the battery compartment using the supplied battery key or a coin.
2. Remove the batteries from the packaging and insert them in the tool.
NOTE
When installing batteries note the positive (+) and
negative (-) markings on the housings
3. Close the battery compartment cover.
Battery disposal - Some areas have regulations regarding the disposal
of batteries. Be sure to dispose of discharged batteries properly.
CAUTION: The batteries should be removed when storing the laser
more than 30 days.
Icon Name Description
Laseron Shows that laser is activated
Measure
reference
Indicates measure reference from front, center,
back, and back with extended key
Functions Indicates functions: area, volume, indirect measure
Continuous
Measure
Symbol flashes when in continuous measure mode
Signal
strength
indicator
More bars indicate strong signal, faster and more
accurate measure.
No bars indicate weak signal - best to adjust
conditions
Battery
indicator
More bars indicate more battery power remaining
Flashing indicates it is time to change batteries
Data storage Indicates historical reading being displayed. 50 is
most recent. 1 is the oldest
Hardware
error
Switch unit on/off several time. If this symbol
remains, contact your dealer
Clear button
Press the C/OFF button to clear the last reading or command. During
area and volume measures, the C/OFF button clears the most recent
measure, but preserves previous measures.
Change reference
Default measure reference is the back of the unit. Press the MEASURE
REFERENCE button to change to front, center or extended back with
tail as shown on the icon.
Display backlight
PresstheUNIT/LIGHTbuttontoturnthebacklightonoroff.
Setting unit of measure
PressandholdUNIT/LIGHTbuttonuntiltheunitsofmeasure
changes. Press again to change to next unit of measure. Unit of
measure options are: m, ft, in, ft-in.
3rd prior measure
2nd prior measure
Previous measure
Current measure
Unit OFF Press Press Time Press 2 Press Time Press 3 Press Time Comment
Power ON
Long
Unit ON
Single measure
Short Short 1 turn on laser
2 measure
Continuous measure
Long Short to stop Lastscreenshows Maximum distance
Minimum distance
Lastdistance
Change measure reference
Short
Measure
from back
with
extension
Measure from
front
Measure
from
center
Measure from
back
Measure from back is the default
setting when turned on.
Turn on/off backlight
Short
Area Short Cycle function to: Measure as shown Result shows 2 measures and area
Volume
Short Cycle function to: Measure as shown Result shows 3 measures and volume
Indirect single height Short Cycle function to: Measure as shown Result shows 2 measures and distance
Indirect double height Short Cycle function to: Measure as shown Result shows 3 measures and distance
Stake Out Short Cycle function to: Use + to select
digit. Use - to
change digits
Continuous measure;
Beeps faster when near set value.
Addition Short Adds next measure
Subtraction
Short Subtracts next measure
Units of measure change
Long m, ft, in, ft-in Cycle through units with long presses
Memory Short First clear screen measures Press + or- to cycle through measures.
Clear previous action
Short Erase previous action
Power off Long
Quick Start Guide
Features - LCD Detail